
 A screened bottom board is a great addition to any beehive. It not only provides great ventilation for the hive, but can also be used in your IPM (Integrated Pest Management) practices to help determine the number of Varroa mites that are in your colony. The premise of this theory works like this: Count the number of mites that have fallen off the hive and have adhered to the “sticky board” over a 24 hour period. Compare this number to the “threshold numbers” that are recommended by your local beekeeping agency. For example: where I live, the governing agency recommends that a treatment be considered when 9 mites are found on the sticky board in a 24 hour “drop” during the month of May.
Initially, I thought that this would be a great way to determine if I would have a future mite problem (levels above a particular threshold). But then I came across a different theory which argued that the number of mites found on the sticky board may not be an accurate way to determine if your hive is infested with mites. The rational for this was that hygienic bees may be better at removing mites from each other and, therefore, you may not have an infestation, but rather, bees that are very good at removing these beasties from the hive. GGGGGGGRRRRRRRRRRRRR! Beekeeping………….Nobody ever seems to be on the same page!
Anyways, the screened bottom board is still a great addition to the hive because:
A) The mites that do drop off will fall through the mesh and (from what I’ve read) not be able to crawl back up into the hive.
B) The sticky board will allow you to monitor how many mites will drop in a 24 hour period.
C) The screened bottom board ( without the sticky board is place) provides great ventilation for the hive. This will be extremely useful through the entire year to help rid the hive of excess moisture. This is just as important in the Winter as the Summer.
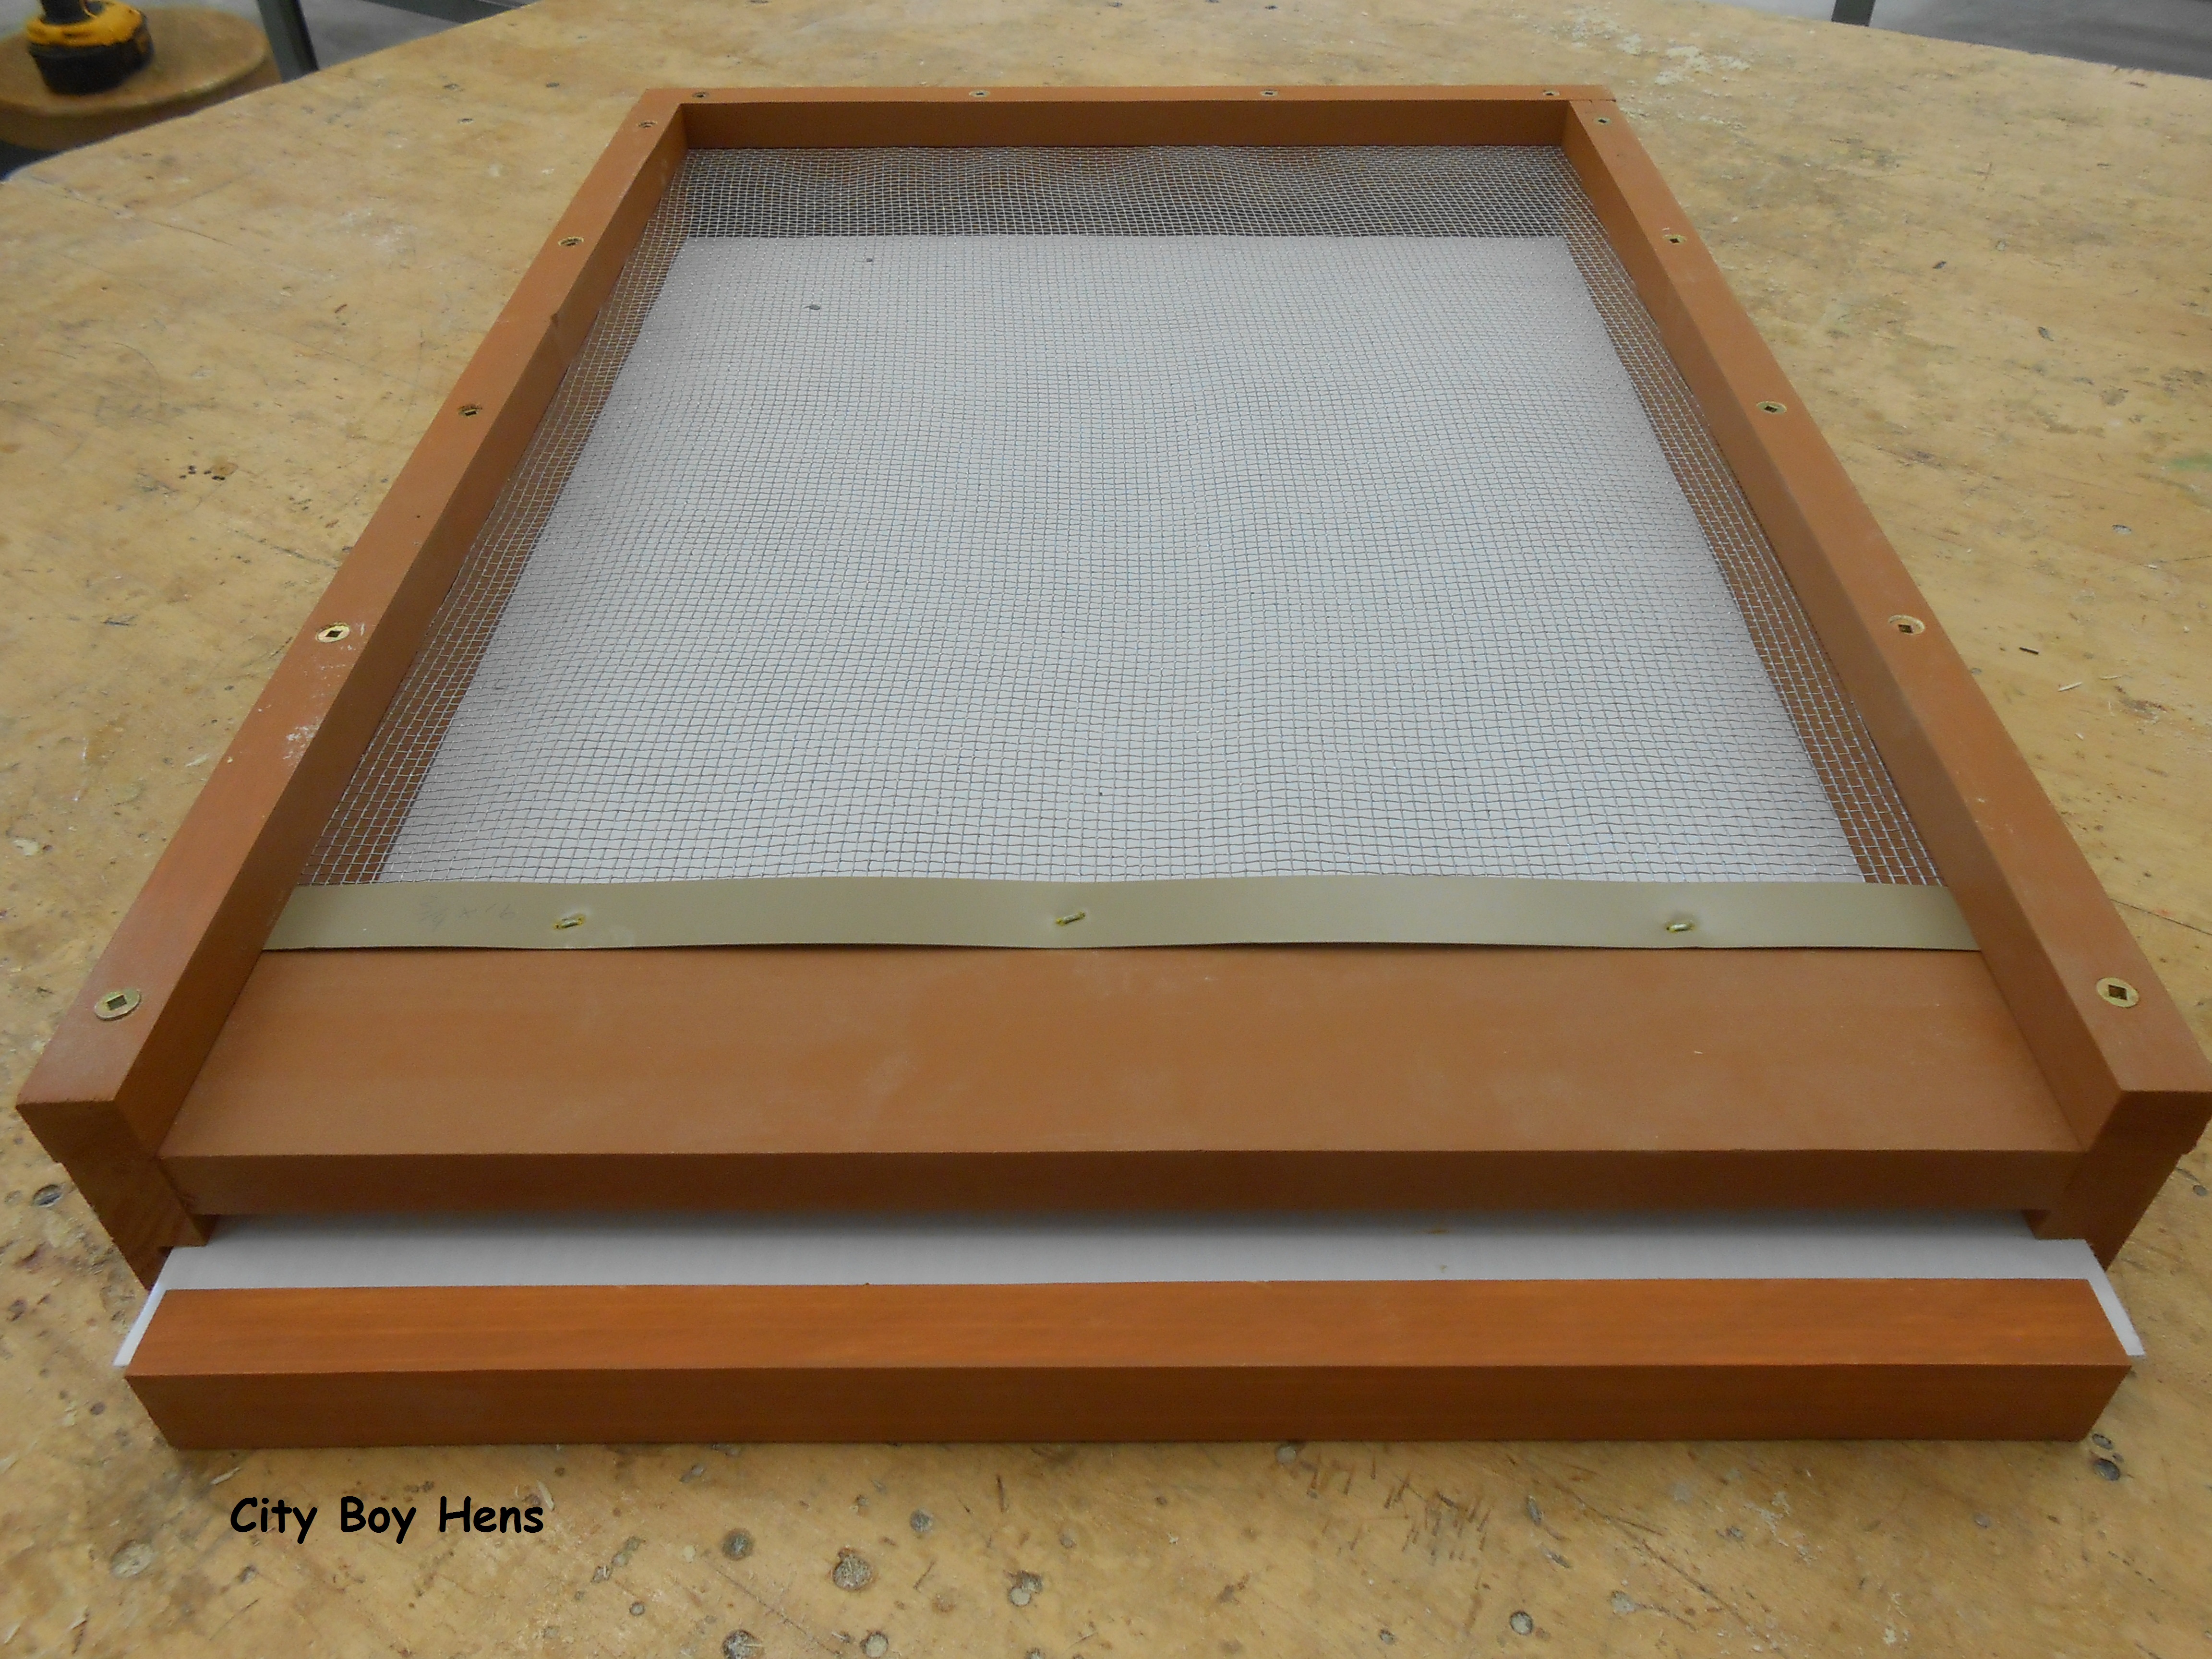
So…I decided to make a screened bottom board that would have a sticky board that could easily slide within the bottom board. The entire “unit” will be made up of 2 sections that, when combined will become the final bottom board.
Material List
Section #1
Sides: 3/4″ x 1- 3/4″ x 21 -1/4″
Back: 3/4″ x 1 -3/4″ x 16- 1/4″
Front: 3/4″ x 3″ x 14- 3/4″ (This will be the “landing pad”)
Sticky Board Front: 3/4″ x 7/8″ x 14-1/2″

Section #2
Sides: 3/4″ x 3/4″ x 21-1/4″
Back: 3/4″x 3/4″ x 16-1/4″

Directions
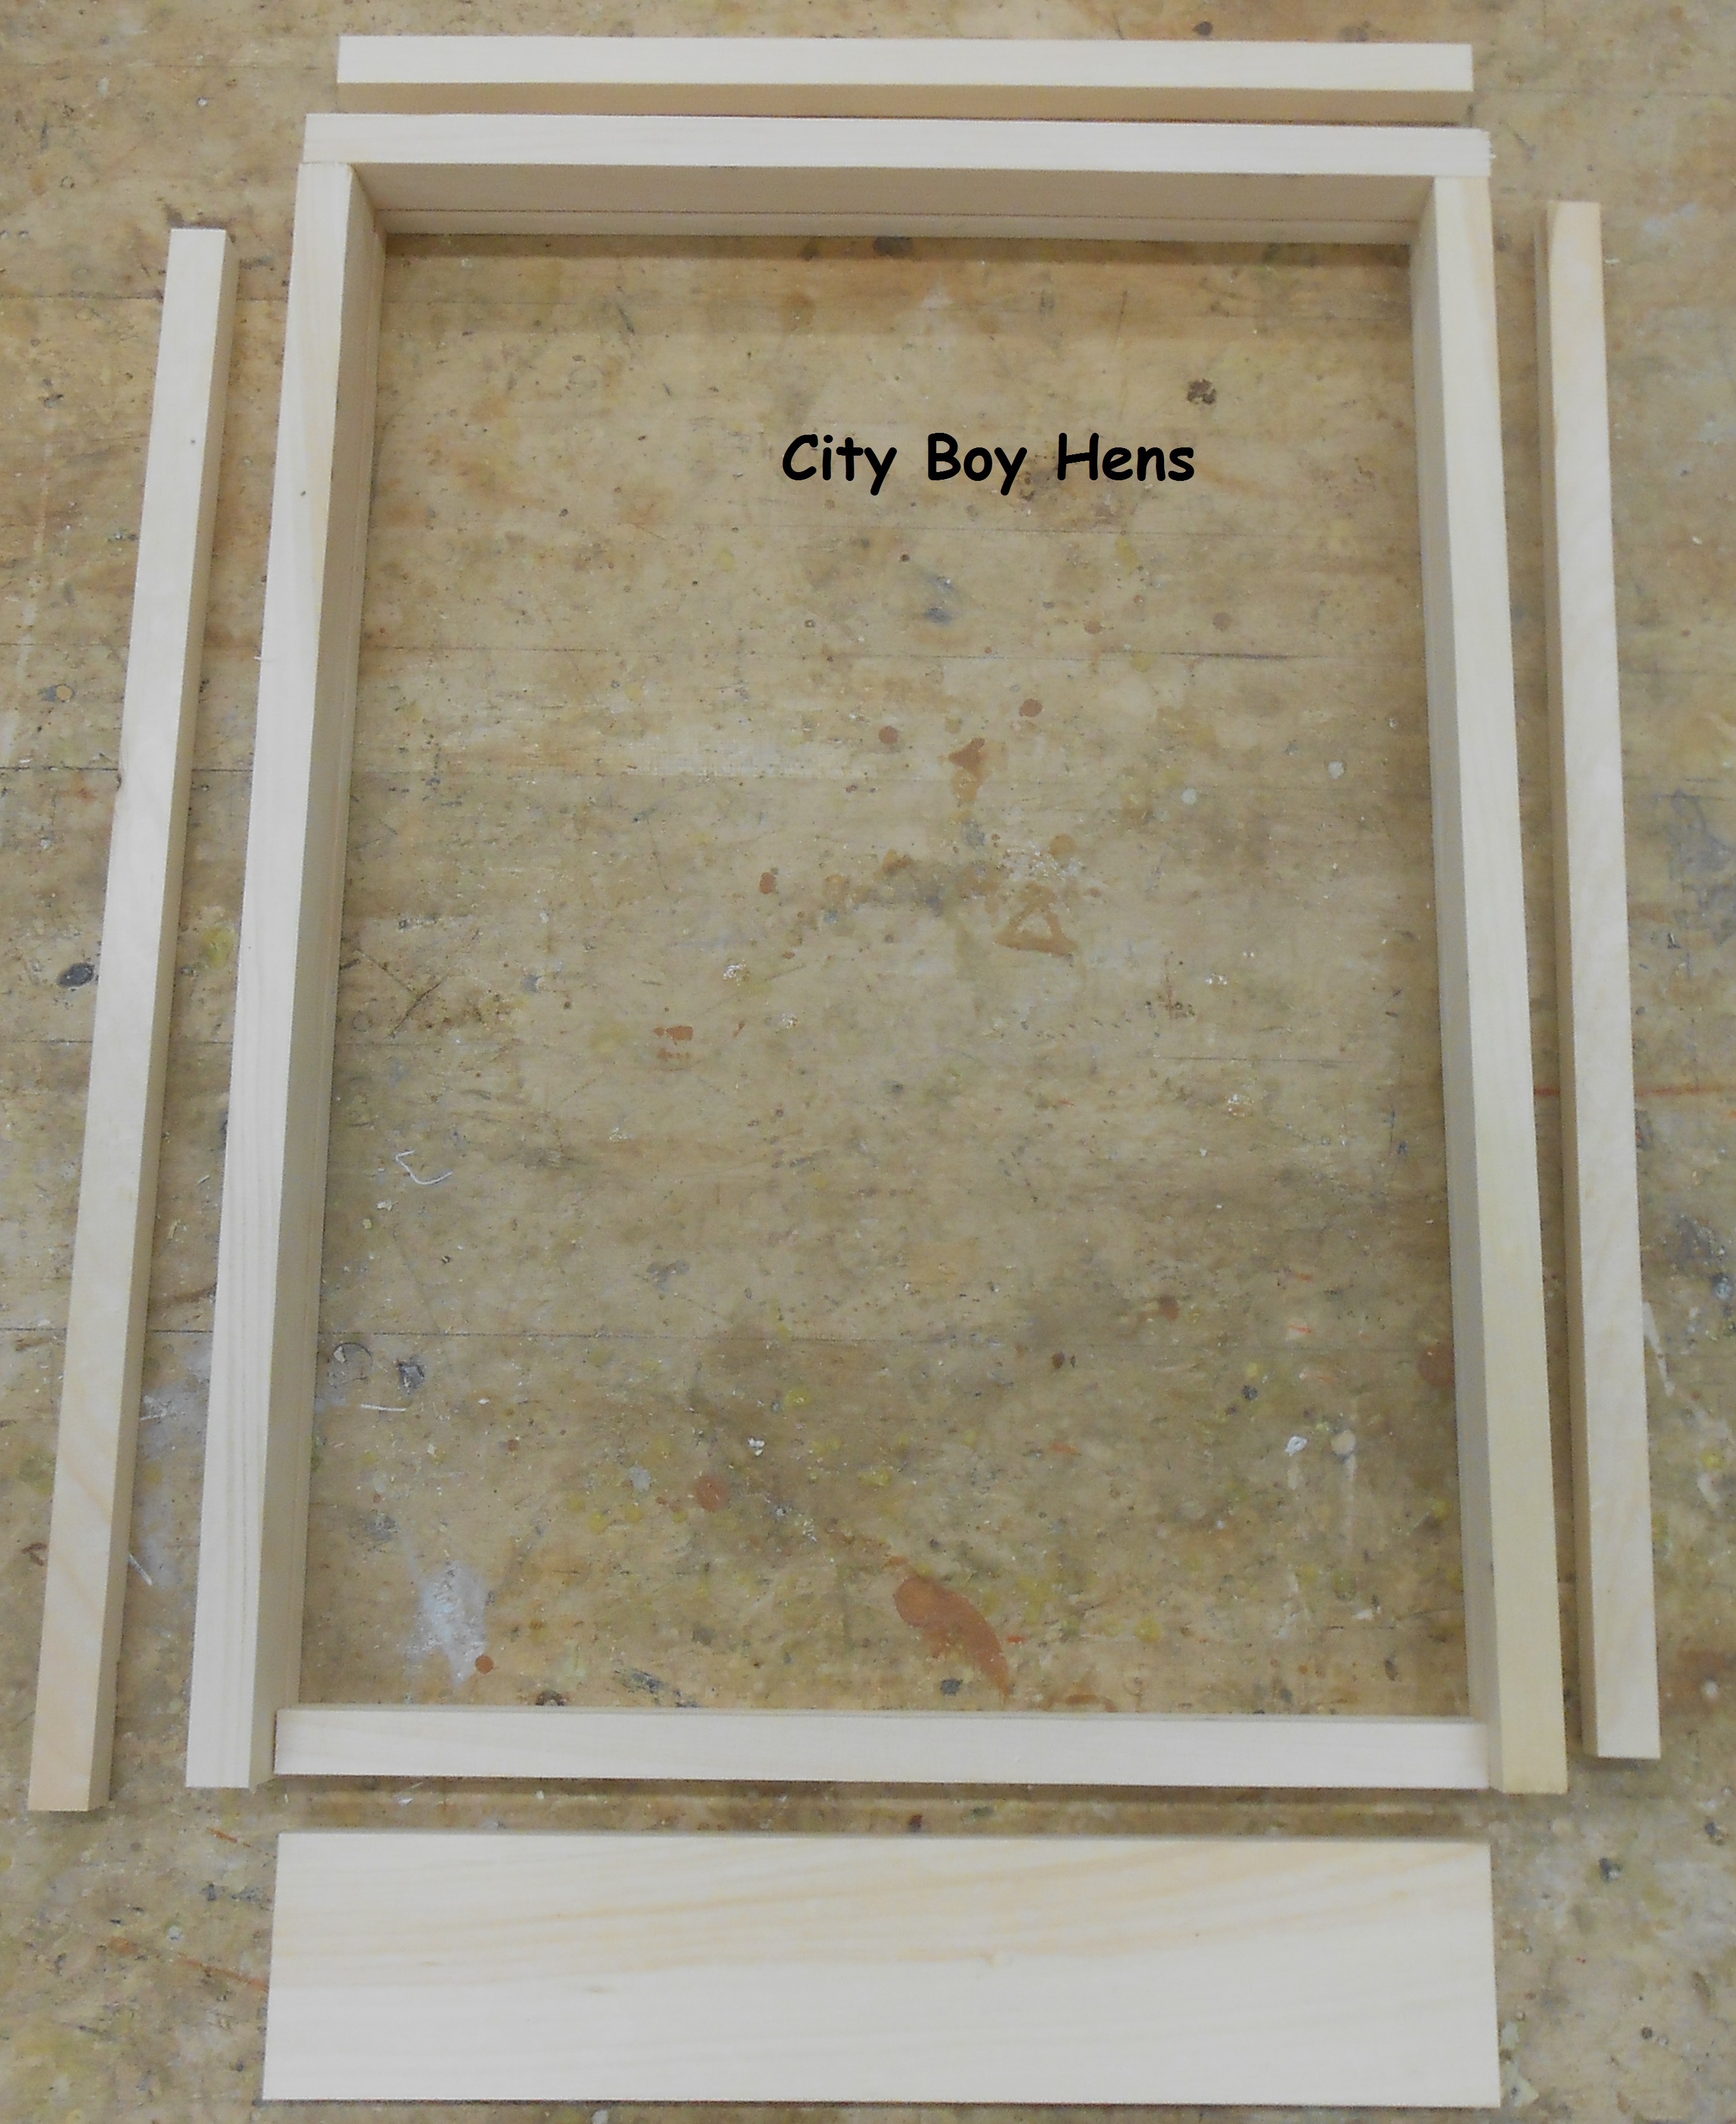
Cut all pieces to the above measurements.
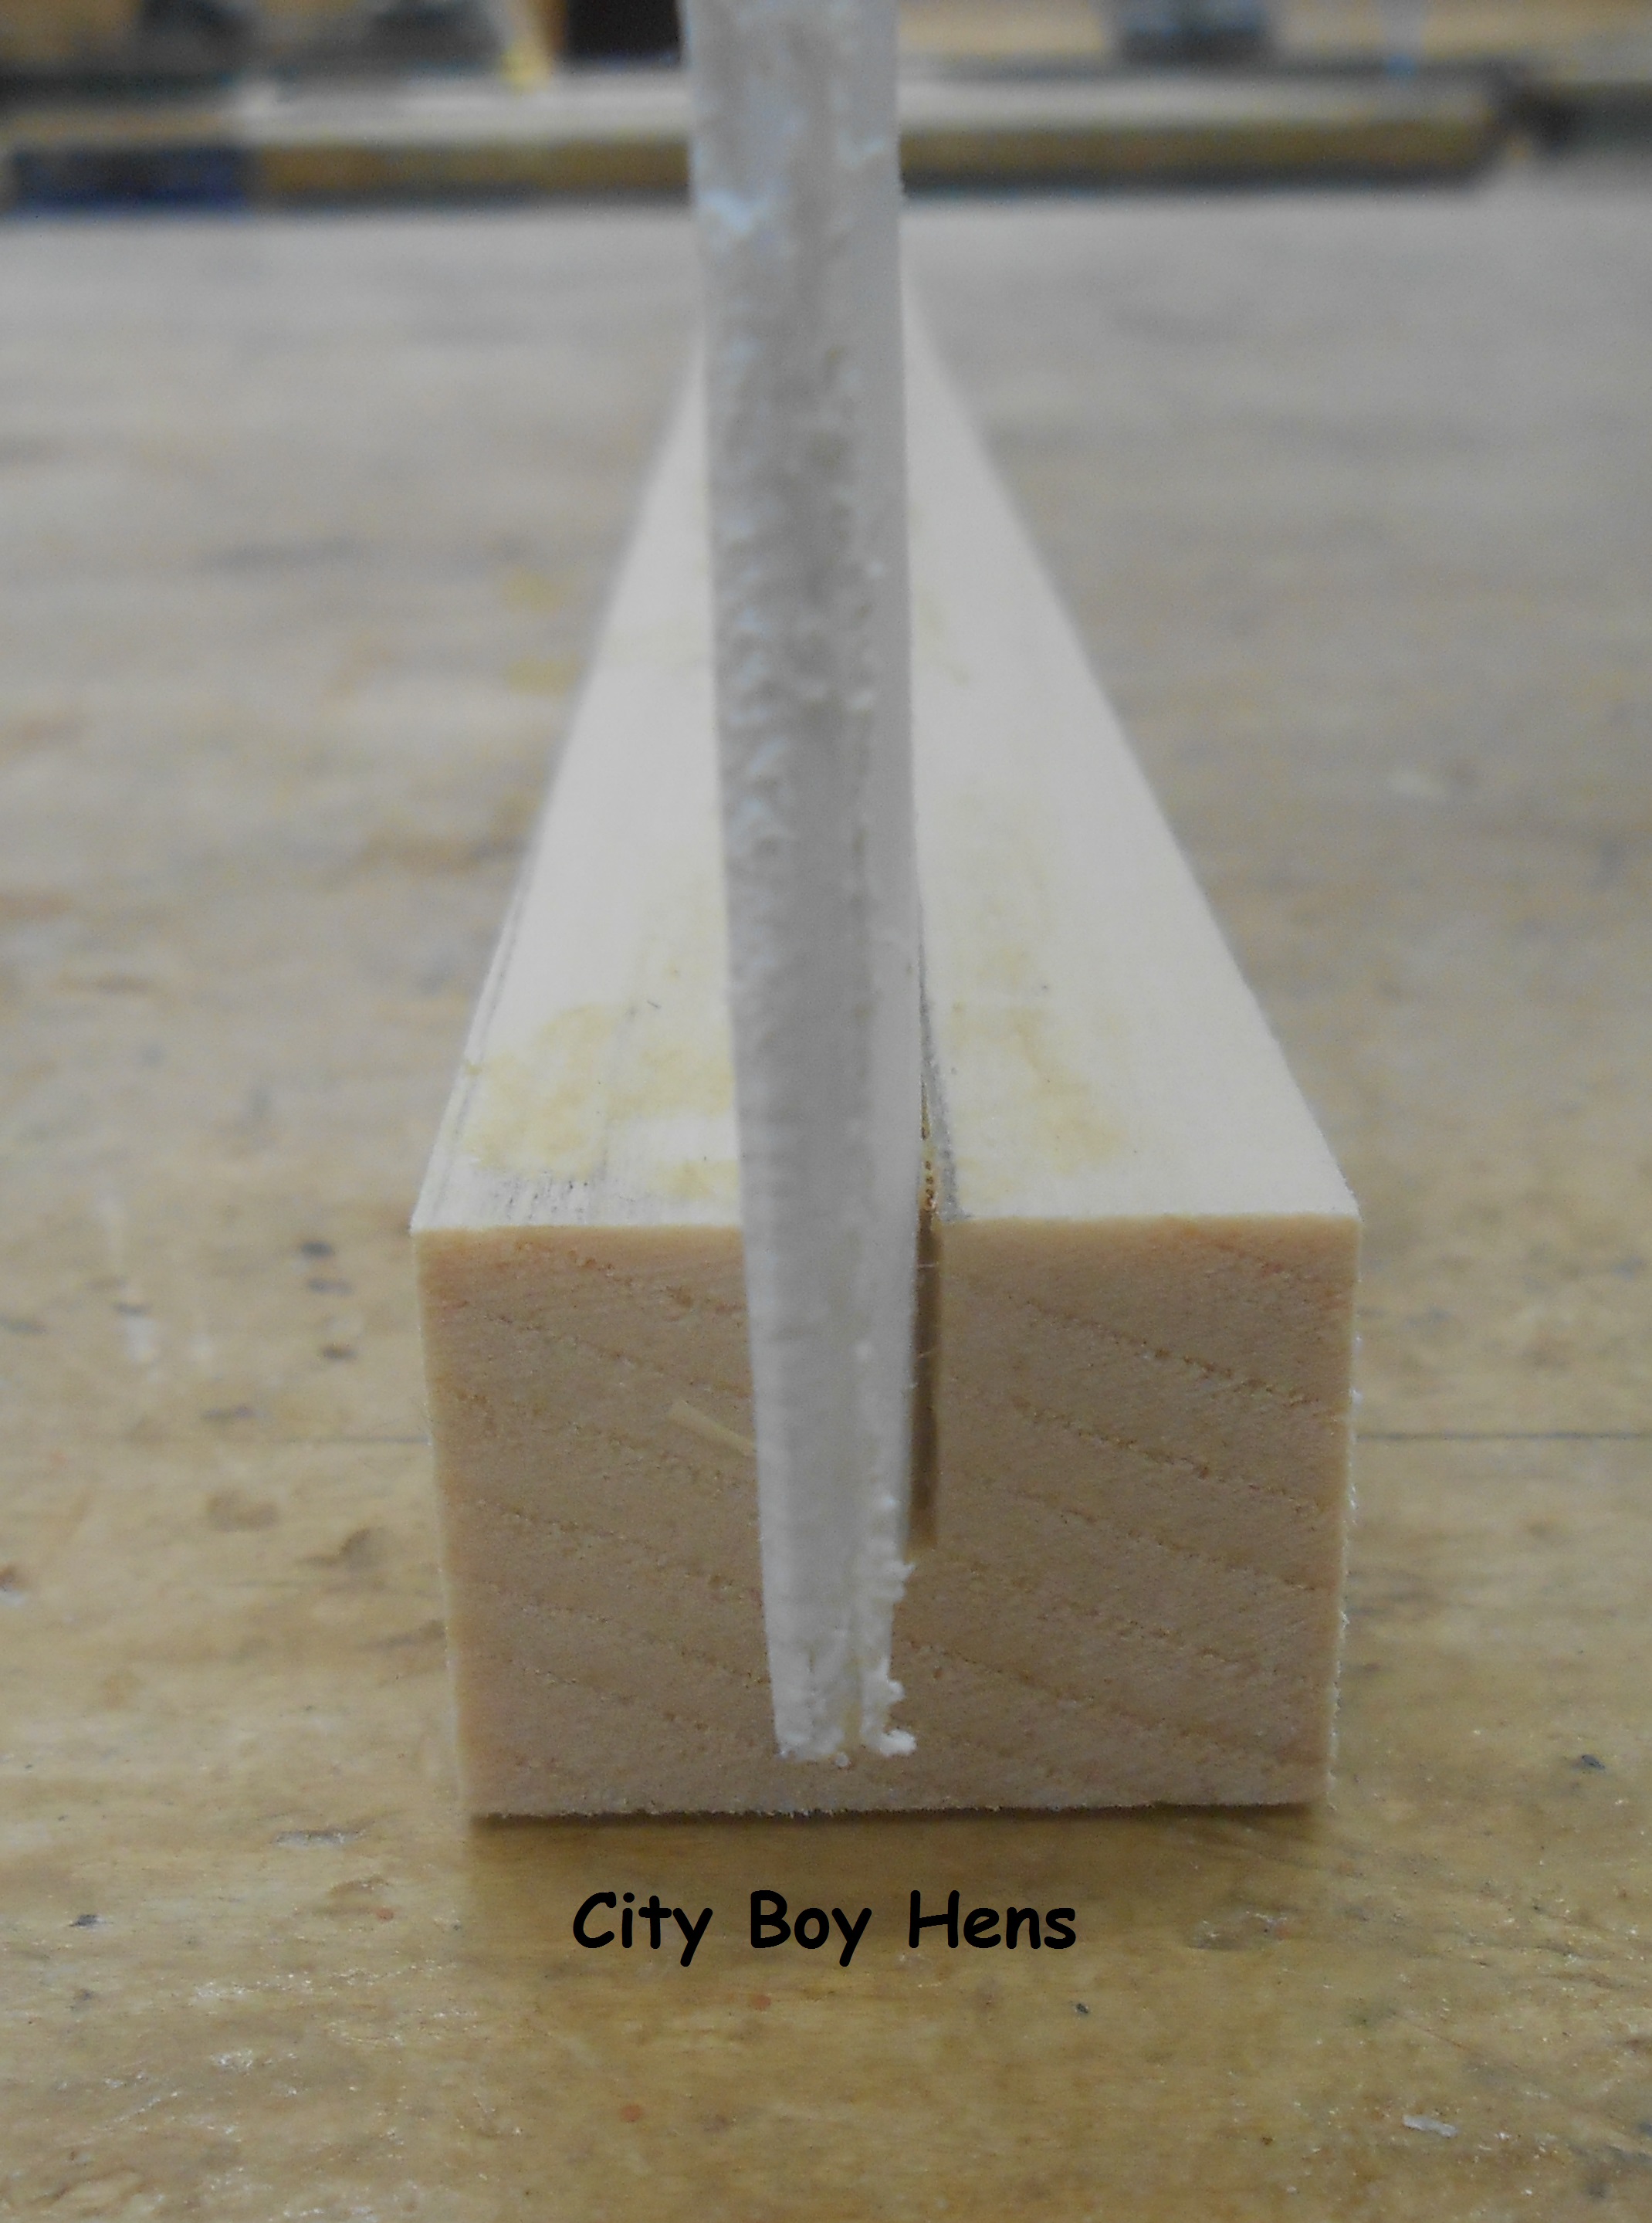
Using a table saw, rip a 3/16″ wide x 1/4″ deep channel through the inside of the sides, back and the sticky board front. This channel will allow for the sticky board to be positioned in the bottom board when in use. I set the table saw fence to 7/16″ and made sure to put the bottom of each board against the fence.


Next, counter sink the screw locations to put this section together. (Note: Set the sticky board front aside for now. It’s not getting assembled with these pieces.) I used 1-1/2″ deck screws for this job.

Now screw these pieces together using a good exterior glue.

I used coroplast for my sticky bottom board. You can get it at a sign shop or, better still, re-purpose an old real estate or election sign if one is available. I cut it to 15- 1/8″ wide x 20-7/8″ long and glued the end (using construction adhesive or silicone) to the sticky bottom board piece that you previously put aside.

Now, fill all screw locations with wooden plugs, flush cut each plug and sand the frame. Now is a good time to paint all the parts of the bottom board.
Cut a piece of #8 hardware cloth for the size of the bottom board. Use must use #8 because it is small enough to prevent your bees from going through these holes. Staple it to your frame.
Next, staple a thin piece of metal or wood to the front of the screen and screw the 3 pieces of wood from section #2 to the frame. I used a counter-sink bit to ensure that I did not split these pieces.

And…there you have it. A home-made screened bottom board. Your bees will be delighted with all the ventilation for your hive. As well, you’ll be able to begin monitoring for mite levels as well.
Please CLICK HERE if you would like to view my other posts on making your own beehive.


When attaching the grooved boards together where are you using two screws to attach them; if so are they both above the groove? Thanks for your help.
Hi Dale,
I assume you are referring to the first section of the frame (below the screen). There are 2 screws locations at either end of the back. They are both above the groove. Let me know if you require further clarification.
Regards,
CB
Dear CB, this is exactly what I was looking for, thanks! One question: How much do you think you have in materials, all said and done? Bottom boards like yours seem to be running around $40.
Hi Cindy,
Nowhere near $40. Since it is mostly scrap wood, just the cost of the hardware cloth, a few screws and the chloroplast.
Regards,
CB