
 The jury still seems to be out on whether a hive stand is necessary for a beehive. Being new to the art of beekeeping, I DO know one thing………… MY CHICKENS LOVE TO EAT BUGS!!!!!!!! There’s not an insect that is safe in my backyard when my 3 hens are free ranging for protein. The last thing that I want is for them to develop a “taste” for my bees so I decided to make elevated hive stands for my 2 hives.
The inspiration for my hive stands came from Beekeeping for Dummies but I made 2 changes to the plans. First, I increased the height of the stand to 18″ because the original height would still make it easy for my hens to “pick off” those tasty treats. Second, I created a design in the front of the stand because I’ll be looking at the hive every day and I want it to look nice.
So…..lets get started. But first, lets talk about safety. Make sure that you read and understand how to SAFELY operate your power equipment. In some of the pictures below, the safety guard has been removed so that you can get a better understanding of the photo. NEVER operate your equipment without a guard in place!
Legs
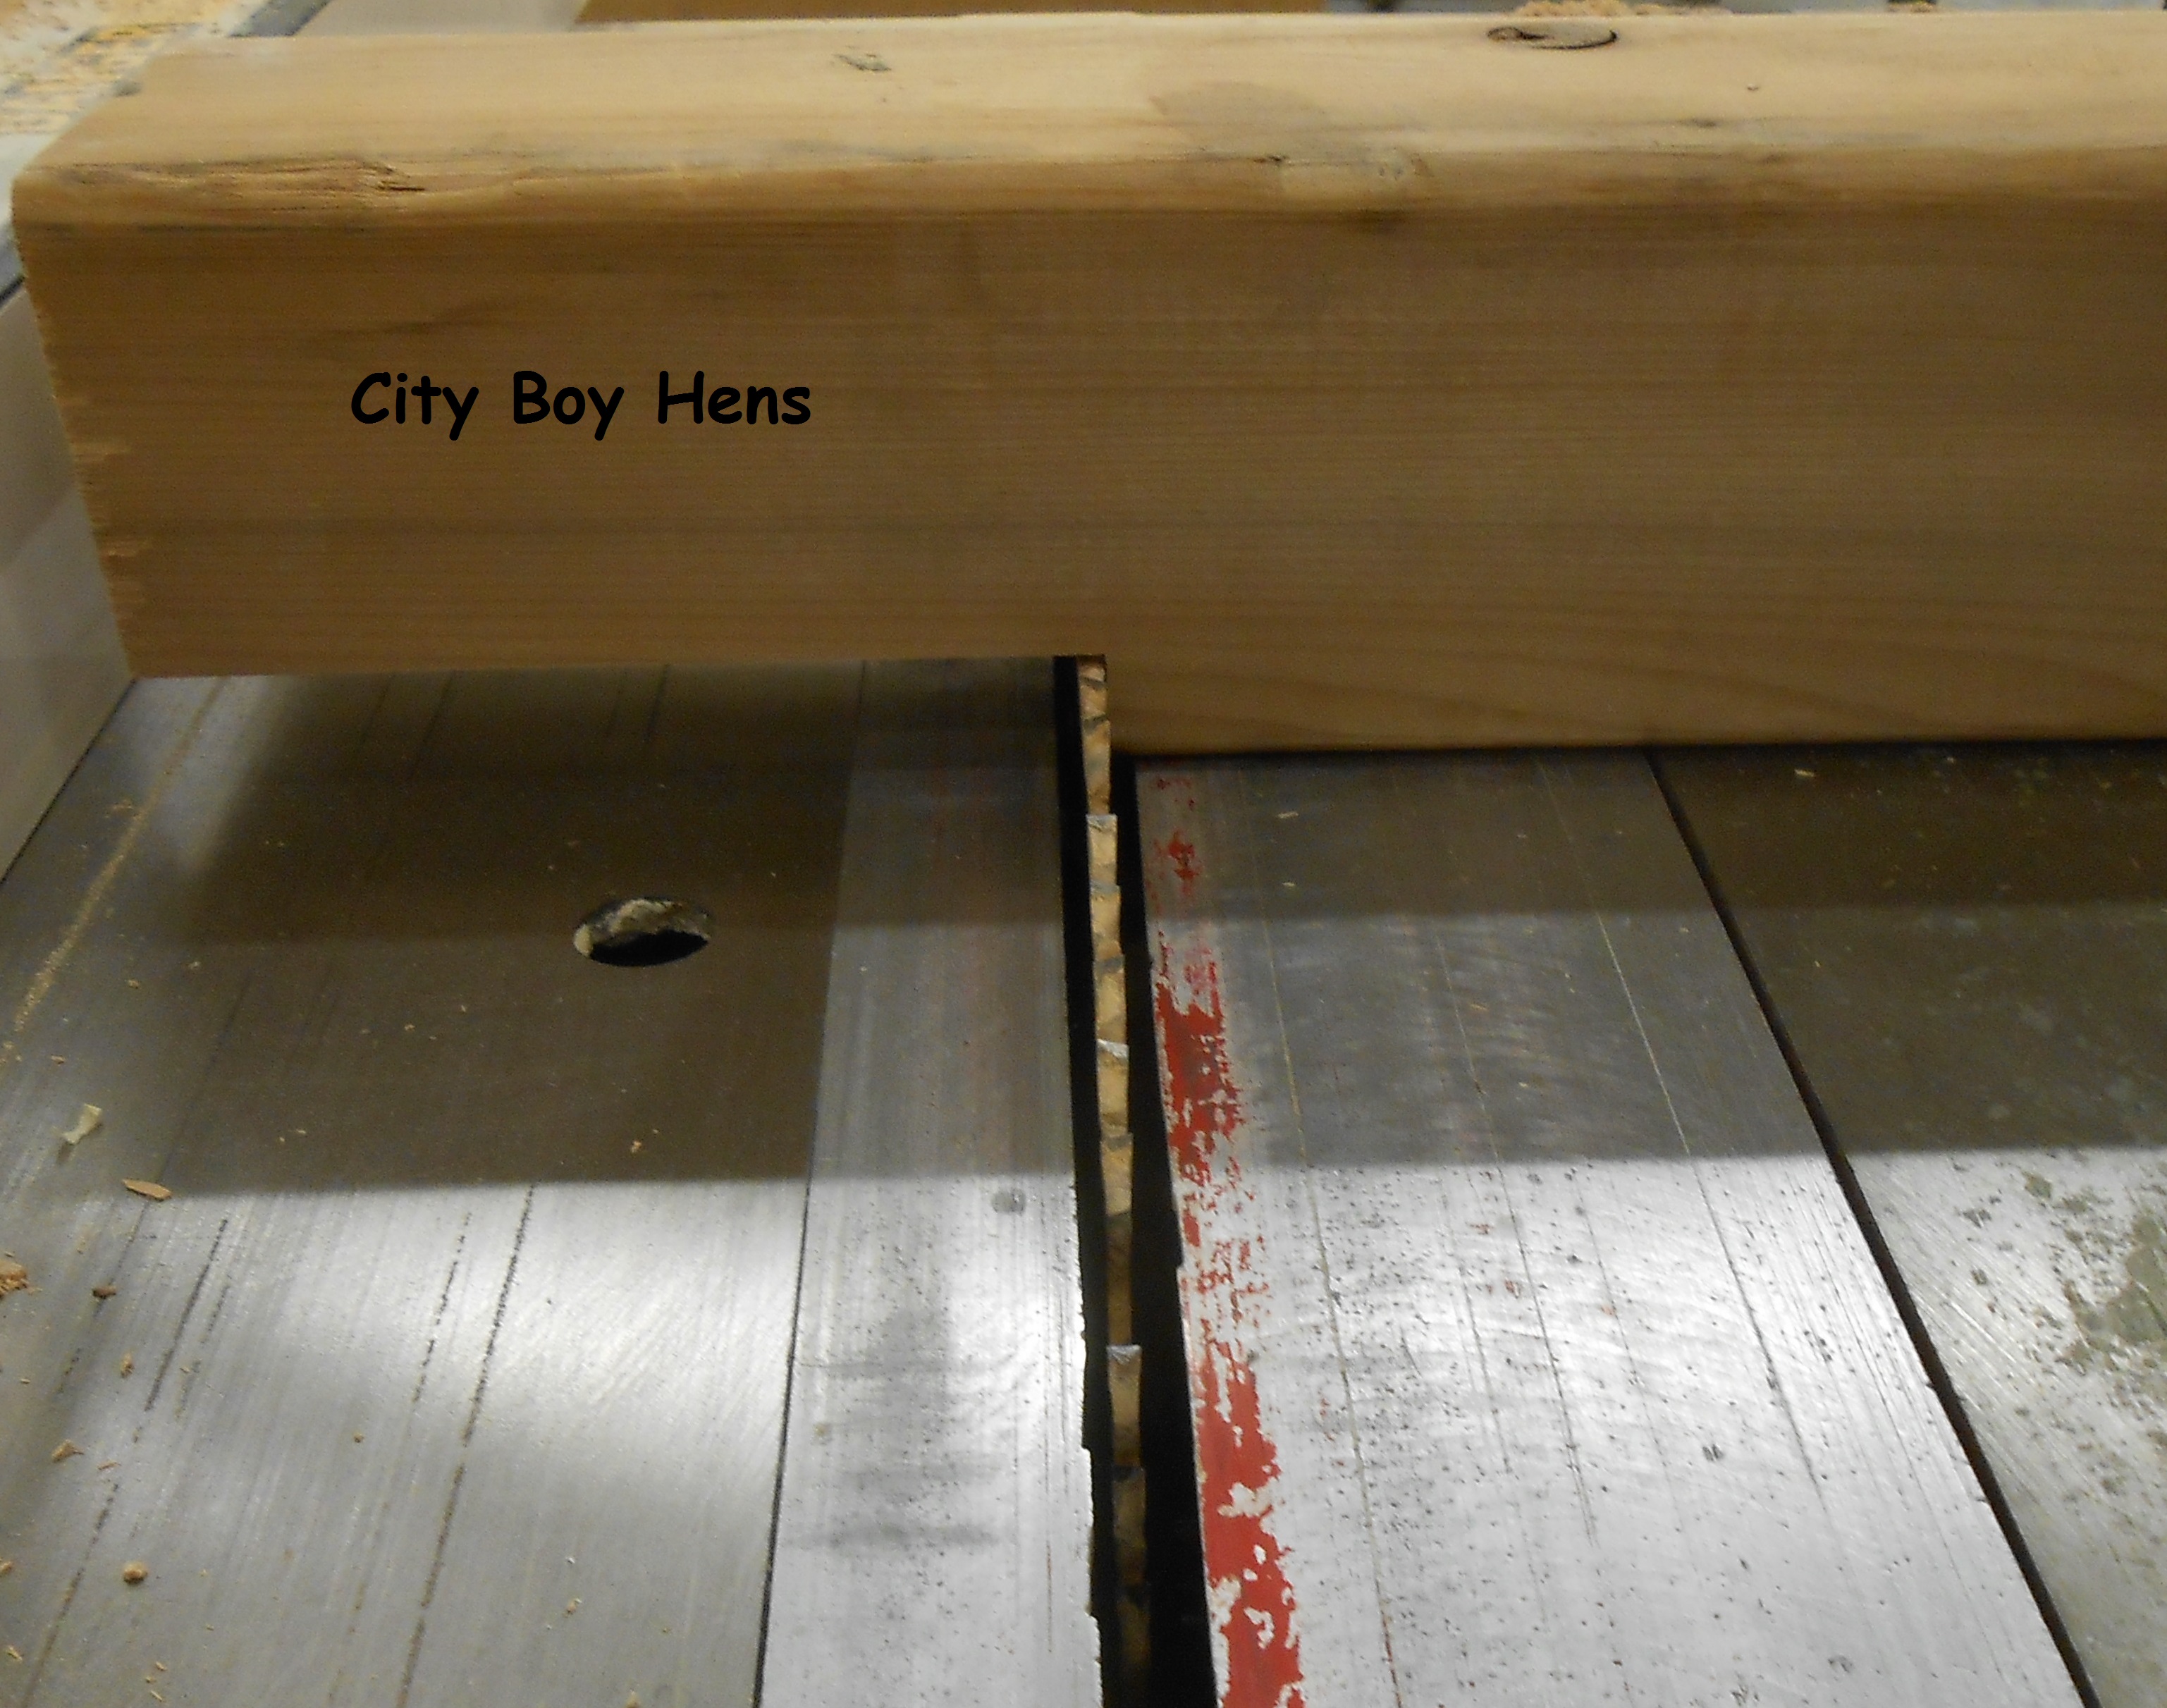
I used 4×4 cedar for the legs. It’s a bit more expensive than pine, but it will last a whole lot longer because it is more resistant to rot. Start by cutting the legs down to 18″ in length. I used my miter saw with a stopper on the fence to ensure that every leg was exact. Next, cut a rabbet 5-1/2″ wide by 3/4″ deep along one end of each post. This rabbet will accommodate the sides of the stand. I found that the safest way to make this joint was to “nibble” the waste away by making many cross-cuts on the table saw with the miter gauge. This way is going to take a lot longer, but it is way safer! * Note: When using the table saw, never butt the lumber up to the rip fence when cross-cutting. Make sure to have an axillary fence or scrap of wood clamped to the fence for this operation. This will definitely prevent the wood from binding between the blade and the fence preventing dangerous kick-back.

 Front/Back & Sides
Using 1″x6″ pine, rip and cross-cut these pieces to size. The front and back are 3/4″ x 5 1/2″ x 24″. The sides are 3/4″ x 5 1/2″ x 22 1/2″. If you want to use my design on the front, you can make a template from the photo below. A scroll saw is essential for these cuts.
Next, pre-drill the screw location holes with a counter-sink drill bit. Each holes will be later filled with a wood plug and trimmed using a flush cutting Japanese saw. If you don’t want to go to this trouble, than just screw your fastener in so that the head is flush with the surface of the wood. If you choose to do the later, I recommend that you still pre-drill the screw locations in order to prevent splitting the ends of your pieces.For the front & back, measure 3/8″ from the end of the boards and intersect this line at 1″ from the top of the board, half way across the width and 1″ from bottom of these boards. These locations will anchor these pieces to the sides. Next, pre-drill 2 holes on each side to anchor these pieces to the legs. 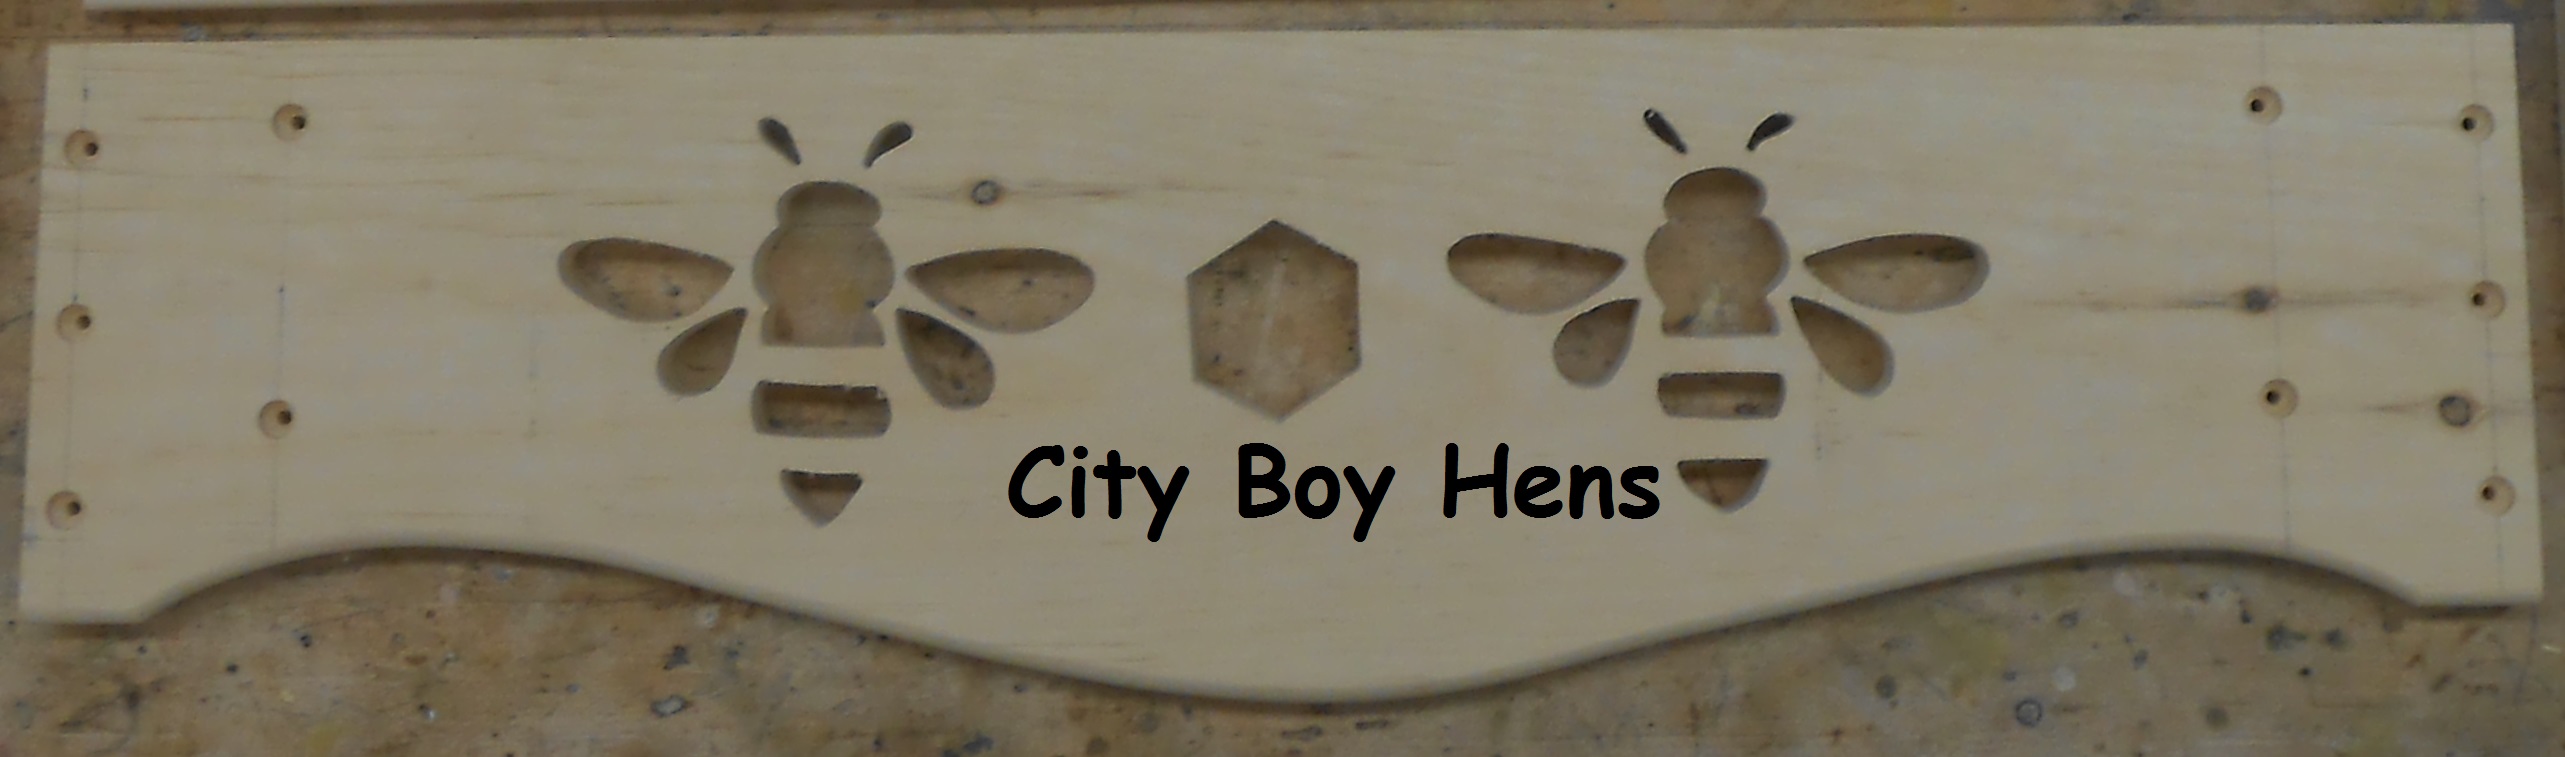 Now drill a few screw locations for the side pieces that will anchor to the side of the legs.
Top
The top of the stand is made up of 2 wider pieces ( 3/4″ x 5 1/2″ x 24″). These 2 pieces will be attached to the front and back of the stand. The 2 center pieces (3/4″ x 2″ x 24″) should be spaced out evenly in the middle of the top. All pieces should be ripped to width on the table saw and cross-cut on the miter saw or table saw. Once again, pre-drill screw locations 3/8″ from each end and along one edge of the front and back. These locations will anchor the top to the sides. Next, make a screw locations for the top to be anchored to the leg.
Assembly
First start by gluing (exterior glue) and screwing the sides to the legs with 1 1/2″ deck screws. Make sure that the sides fit into the rabbets. Next, screw the front and back to the sides and legs.
Next, secure the top pieces to the stand.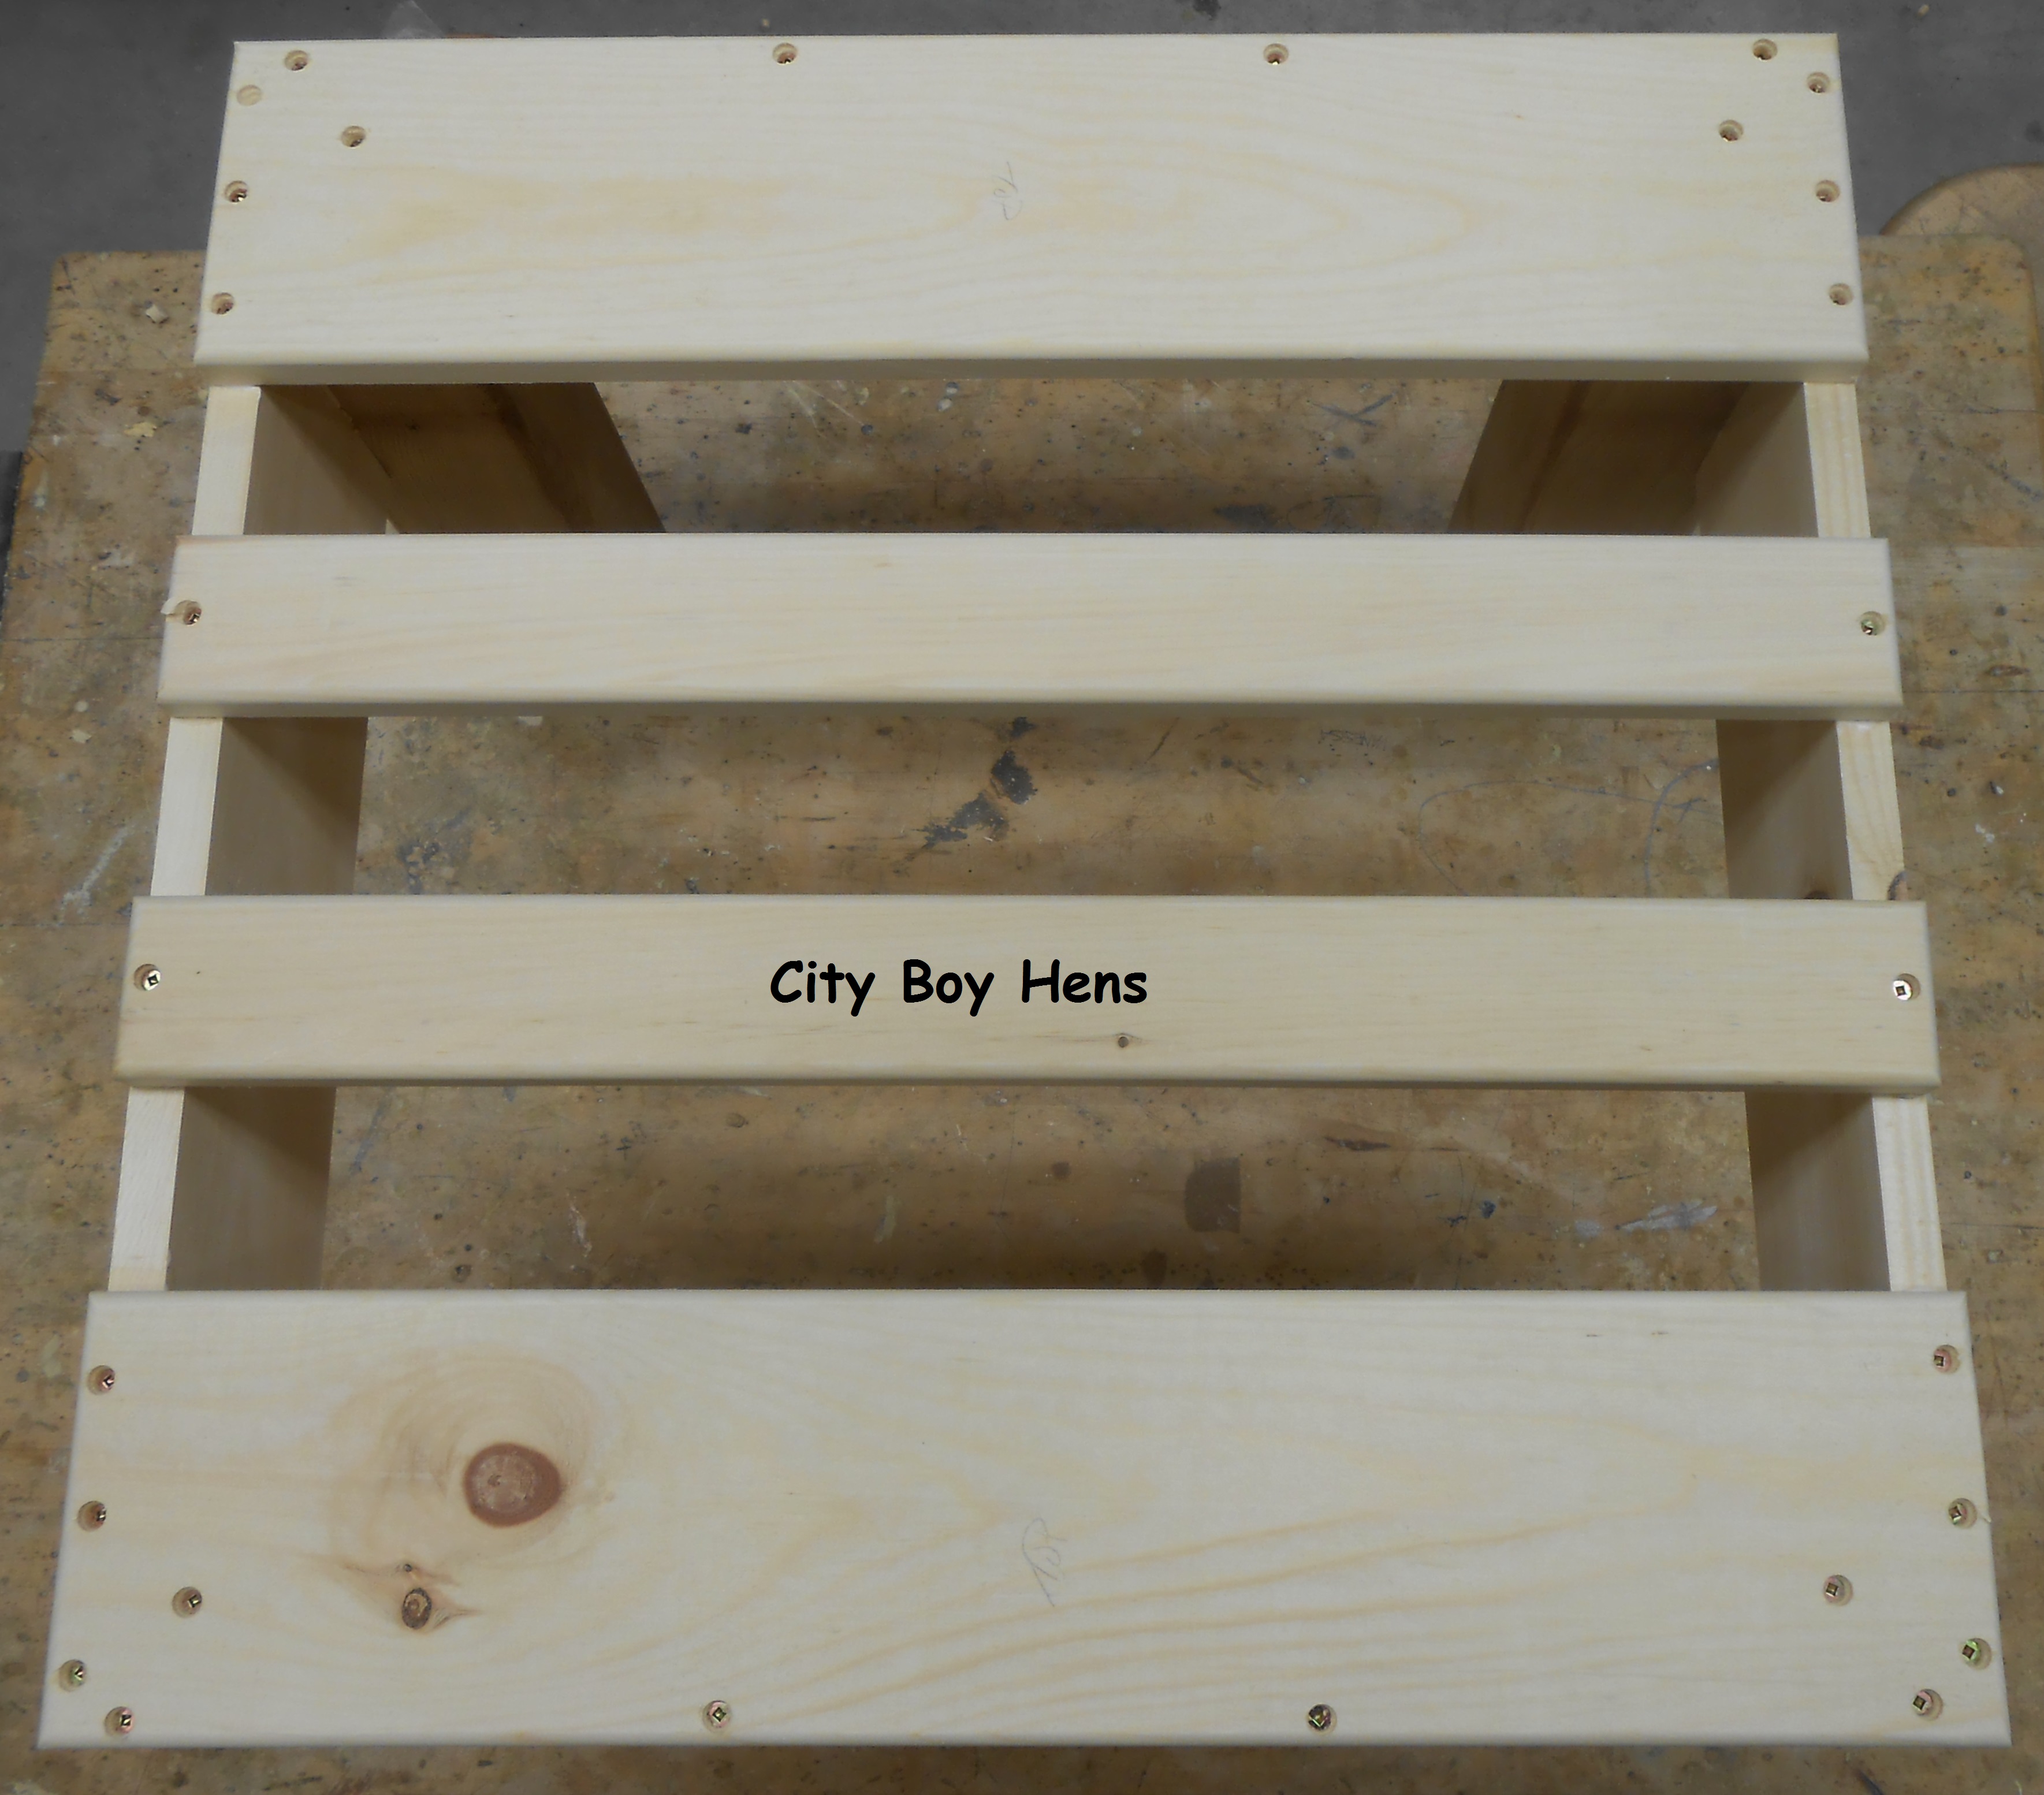
Fill each counter-sink hole with a wooden plug, trim the excess with a flush cutting saw and sand.
Completely seal your hive stand with your favorite exterior paint! If you’d like to see how I built my honeybee boxes, please CLICK HERE. If you’d like to see how I made my ventilated gabled roof , please CLICK HERE.


Neat idea! Like your bee design
Thanks Silky!
Nice work and writeup. Can’t believe you cut that pattern with a scroll saw. Almost looks laser cut at that distance.
Thanks Boom,
Been cutting for over 20 years!
Regards,
CB
I’ve always wondered if hives should be higher off the ground. However, I realize you can’t keep the elements away entirely. Cute design and great construction 🙂
HI Terri,
Thanks for your comments & kind words.
Regards,
CB
I know you built the stand to protect your bees, but let me tell you; it’s darn cute! I love the bee cut outs and it will make a great ornamental piece in your garden. Not only functional, but Purdy! lol! thanks for sharing it with SYC.
Jann
HI Jann,
Thank you very much!
Regards,
CB
Nice job, City Boy! I don’t need a bee hive stand, but I’m gearing up for a lot of woodworking this summer. Looks like fun! (Except for the table saw, which scares me to death!)
Hi CM,
Saw your feeder. Great job!
Just remember….measure twice & cut once!
Looking forward to seeing your woodworking creations.
Warm Regards,
CB
Love the bee detail. A hive stand is definitely nice – want some free advice? Make an extra, to put down supers and deeps when you do a hive inspection. You don’t want to put down the super in the grass…. My hive stand looks much like a bench – with a hive on both sides and workspace in the middle. I like it so far!
Hi Kath,
Thanks for your comments and tip.
Hope you’ll drop by again.
Regards,
CB
That’s so cool! I love the bee cut outs 🙂 Thanks for sharing on The HomeAcre Hop! Hope you can join us again today!
HI G.,
Thanks for the opportunity.
Regards,
CB
We just ordered our hives and nucs and intend on making our bee stands. I LOVE, LOVE, LOVE this. We will be copying this I think…. Thank you for sharing; it is just wonderful!
Hi Debbie,
Can’t wait to see your stand!
Hope you’ll send a pic.
Regards,
“Country Boy” CB
Looks great! Thank you for linking to the In and Out of the Kitchen Link Party. Hope to see you next time.
HI Cynthia,
Thanks for the opportunity.
Regards,
CB
What a gorgeous stand!!
Thanks Gretchen!
Regards,
CB
Great site, Thanks for all your information. I really like that hive Stand.
Thanks Craig!
CB
I love all of your designs. What brand of scroll saw do you use? My husband is making the stand and we have rough cut out the design but his jig saw isn’t allowing for fine enough work so he wants a scroll saw but reviews are all over the map on the products we see on line.
Thanks Sarah,
I use a Dewalt DW 788, but you don’t have to go to that expense unless you plan on really using this saw for a lot of other projects down the road.
Best of success.
Regards,
CB
If you keep putting up cool plans, I will probably keep him busy with it for more and more hives. Too bad I can’t keep hens too.
Thanks Sarah,
There’ll be a few more plans comin’ down the pipe pretty soon.
Regards,
CB
Nice design on the front. I must try that. Do you think you could use a coping saw to make the bee cutout? Thanks for posting.
Hi Peter,
A harder job, but give it a try.
Regards,
CB