Unwanted Hitchhikers In My Hives

Varroa Mites

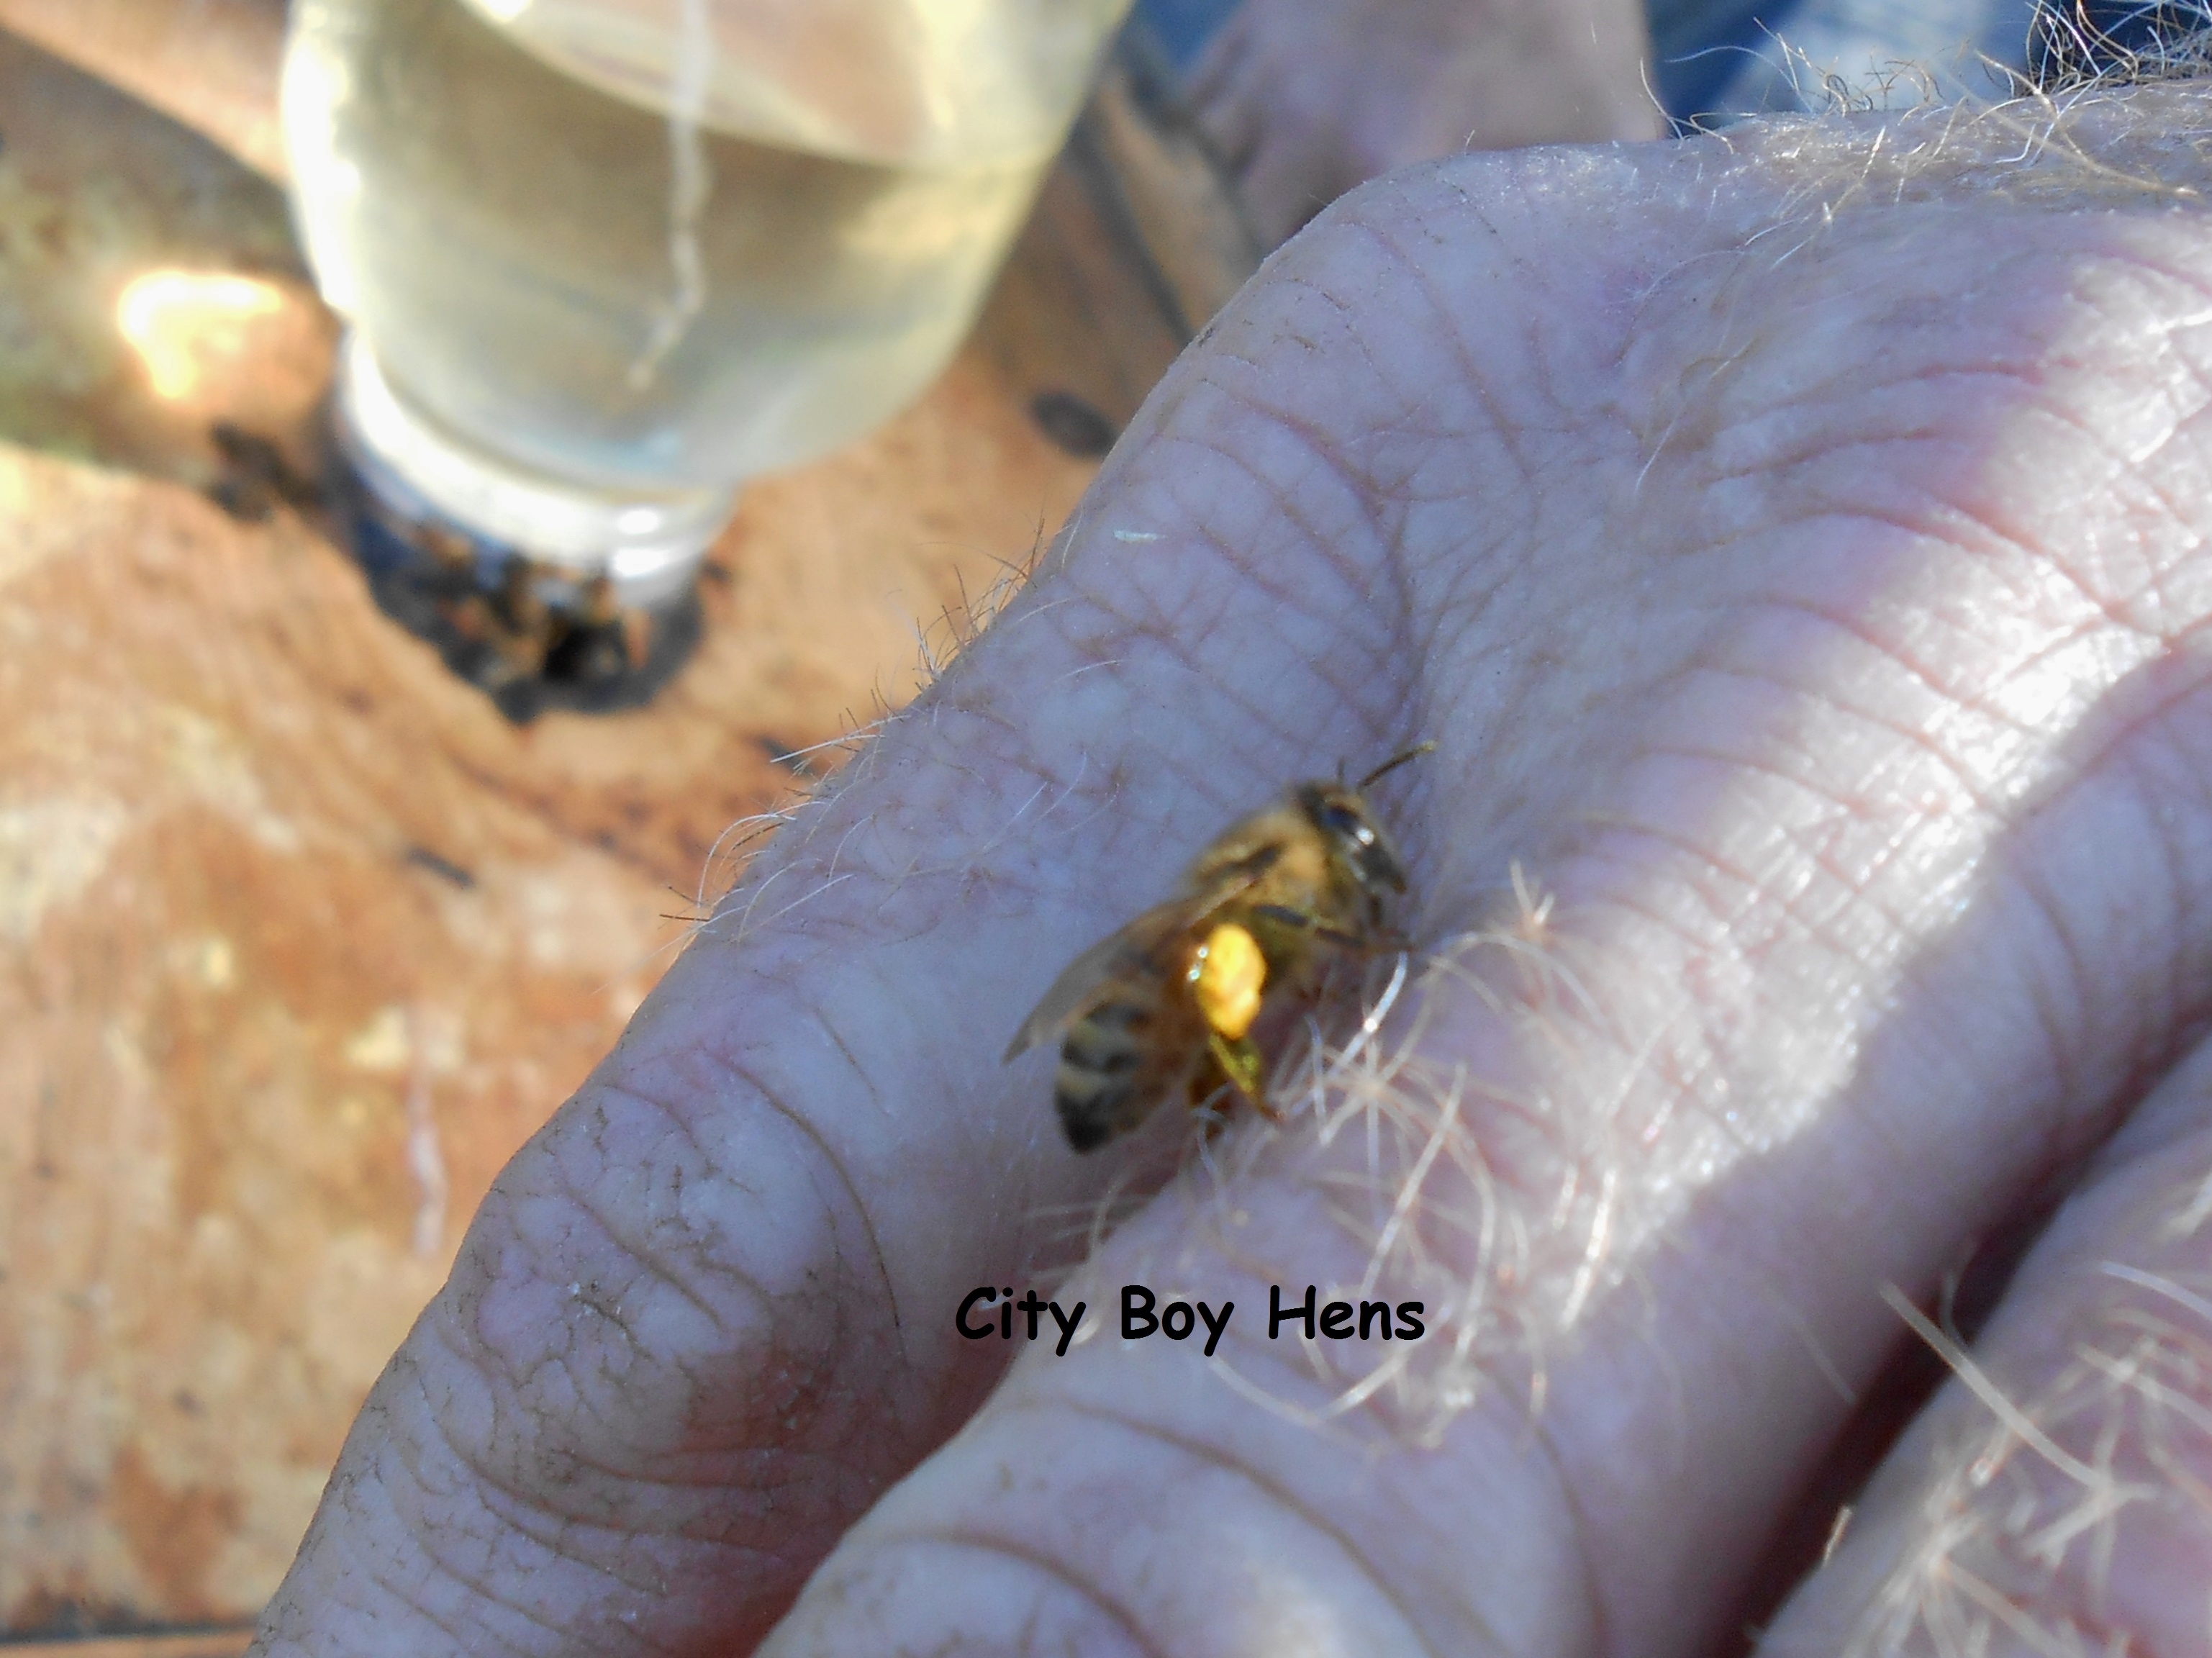
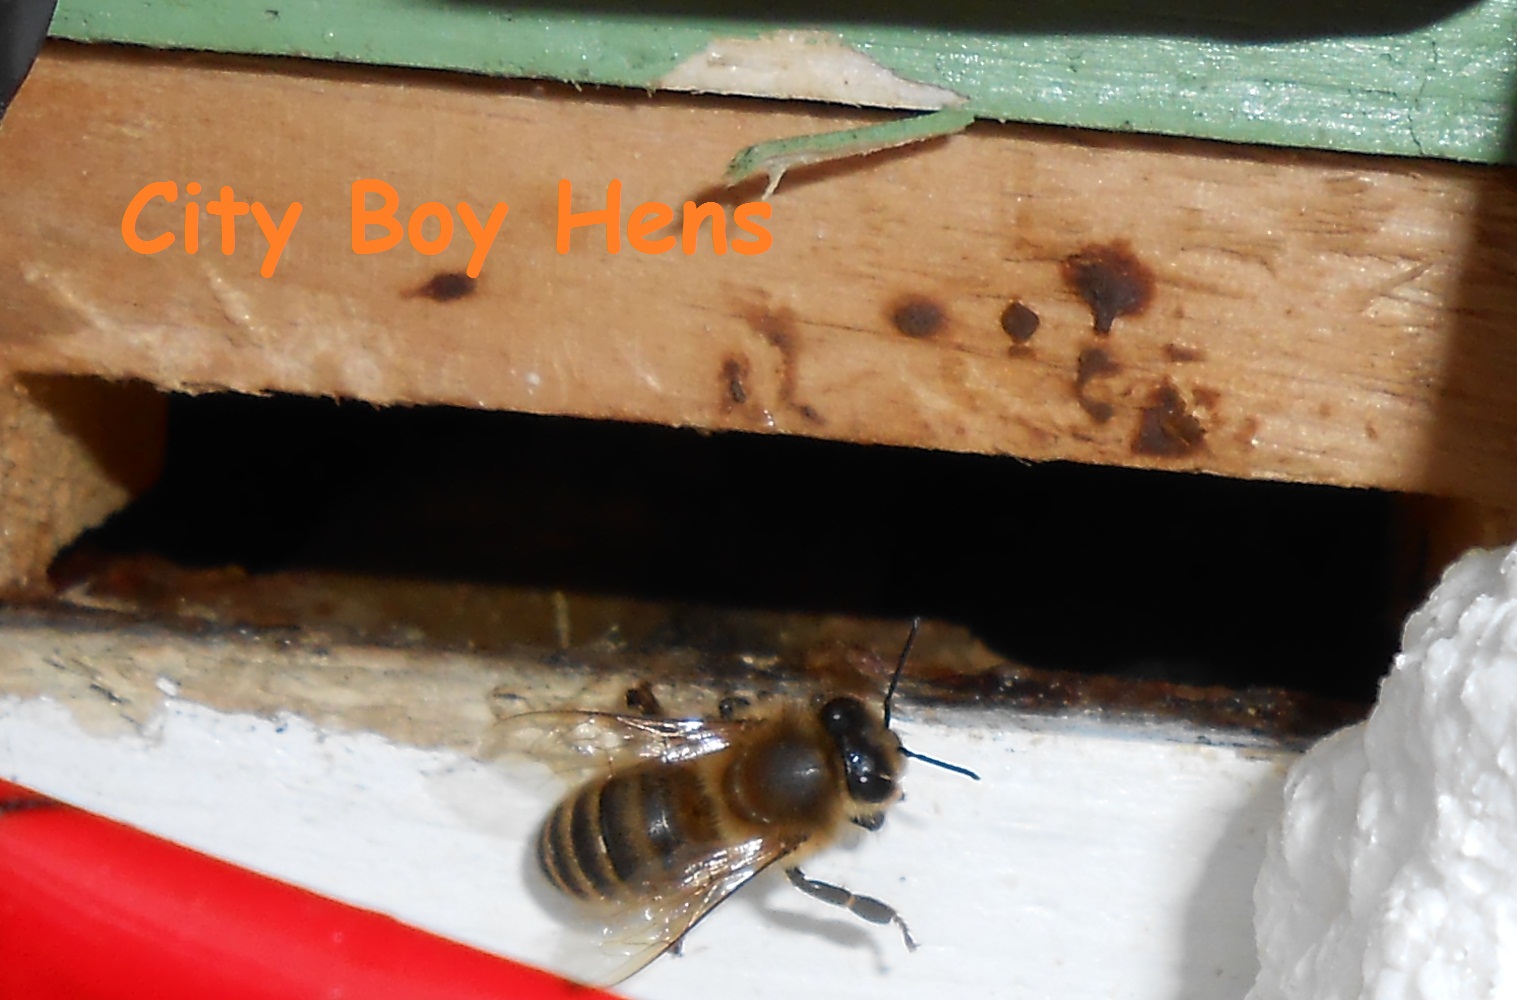
It’s hard to believe, but these tiny bugs  are one of the leading causes to the honey bee’s demise.  They are about the size of a pin head, are named Varroa Destructor and…….I’ve got ’em in my hives.  These little buggers attach themselves to a honey bee, weaken the bee as they suck their blood and pass on various viruses as a parting gift to the bee.  If not controlled, the mites will eventually take down the entire colony.

The varroa mite was nowhere to be found in North America before the 1980s.  Though it was firmly entrenched in Europe and Asia, bee keepers in North America had no issues with this parasite before this time.  According to the old-timers, “pre-varroa” was a great time to be a beekeeper on our continent.  Nobody knew what Colony Collapse Disorder (CCD) was and the honey bee and the beekeeper generally flew under everybody’s radar.

Fast forward 30 years later and we’re in a totally different boat.  Harsh chemicals have failed to be the answer to the demise of varroa as these parasites continue to wreak havoc for most beekeepers.  So……what’s a beekeeper suppose to do?

Option #1: Do nothing and hope that the bees figure out how to over-run these parasites. This hasn’t proven to be too effective for most backyard beekeepers, though certain people in the industry claim that they now have varroa resistant bees.

Option #2: Treat the hives with harsh miticide chemicals to kill the varroa.  This also hasn’t proven to be that effective  since the mite has learned to become resistant to these insecticides.  Not to mention that the residue from a lot of these chemicals is now being found to contaminate the comb that bees use to store honey and raise new bees.

Option #3: Develop an Integrated Pest Management (IPM) system which involves adopting “safer” strategies in order to keep varroa numbers at a level that will not allow them to destroy a colony over time.  Examples of this include:

A) Using screened bottom boards which do not allow a fallen mite to re-enter a colony.

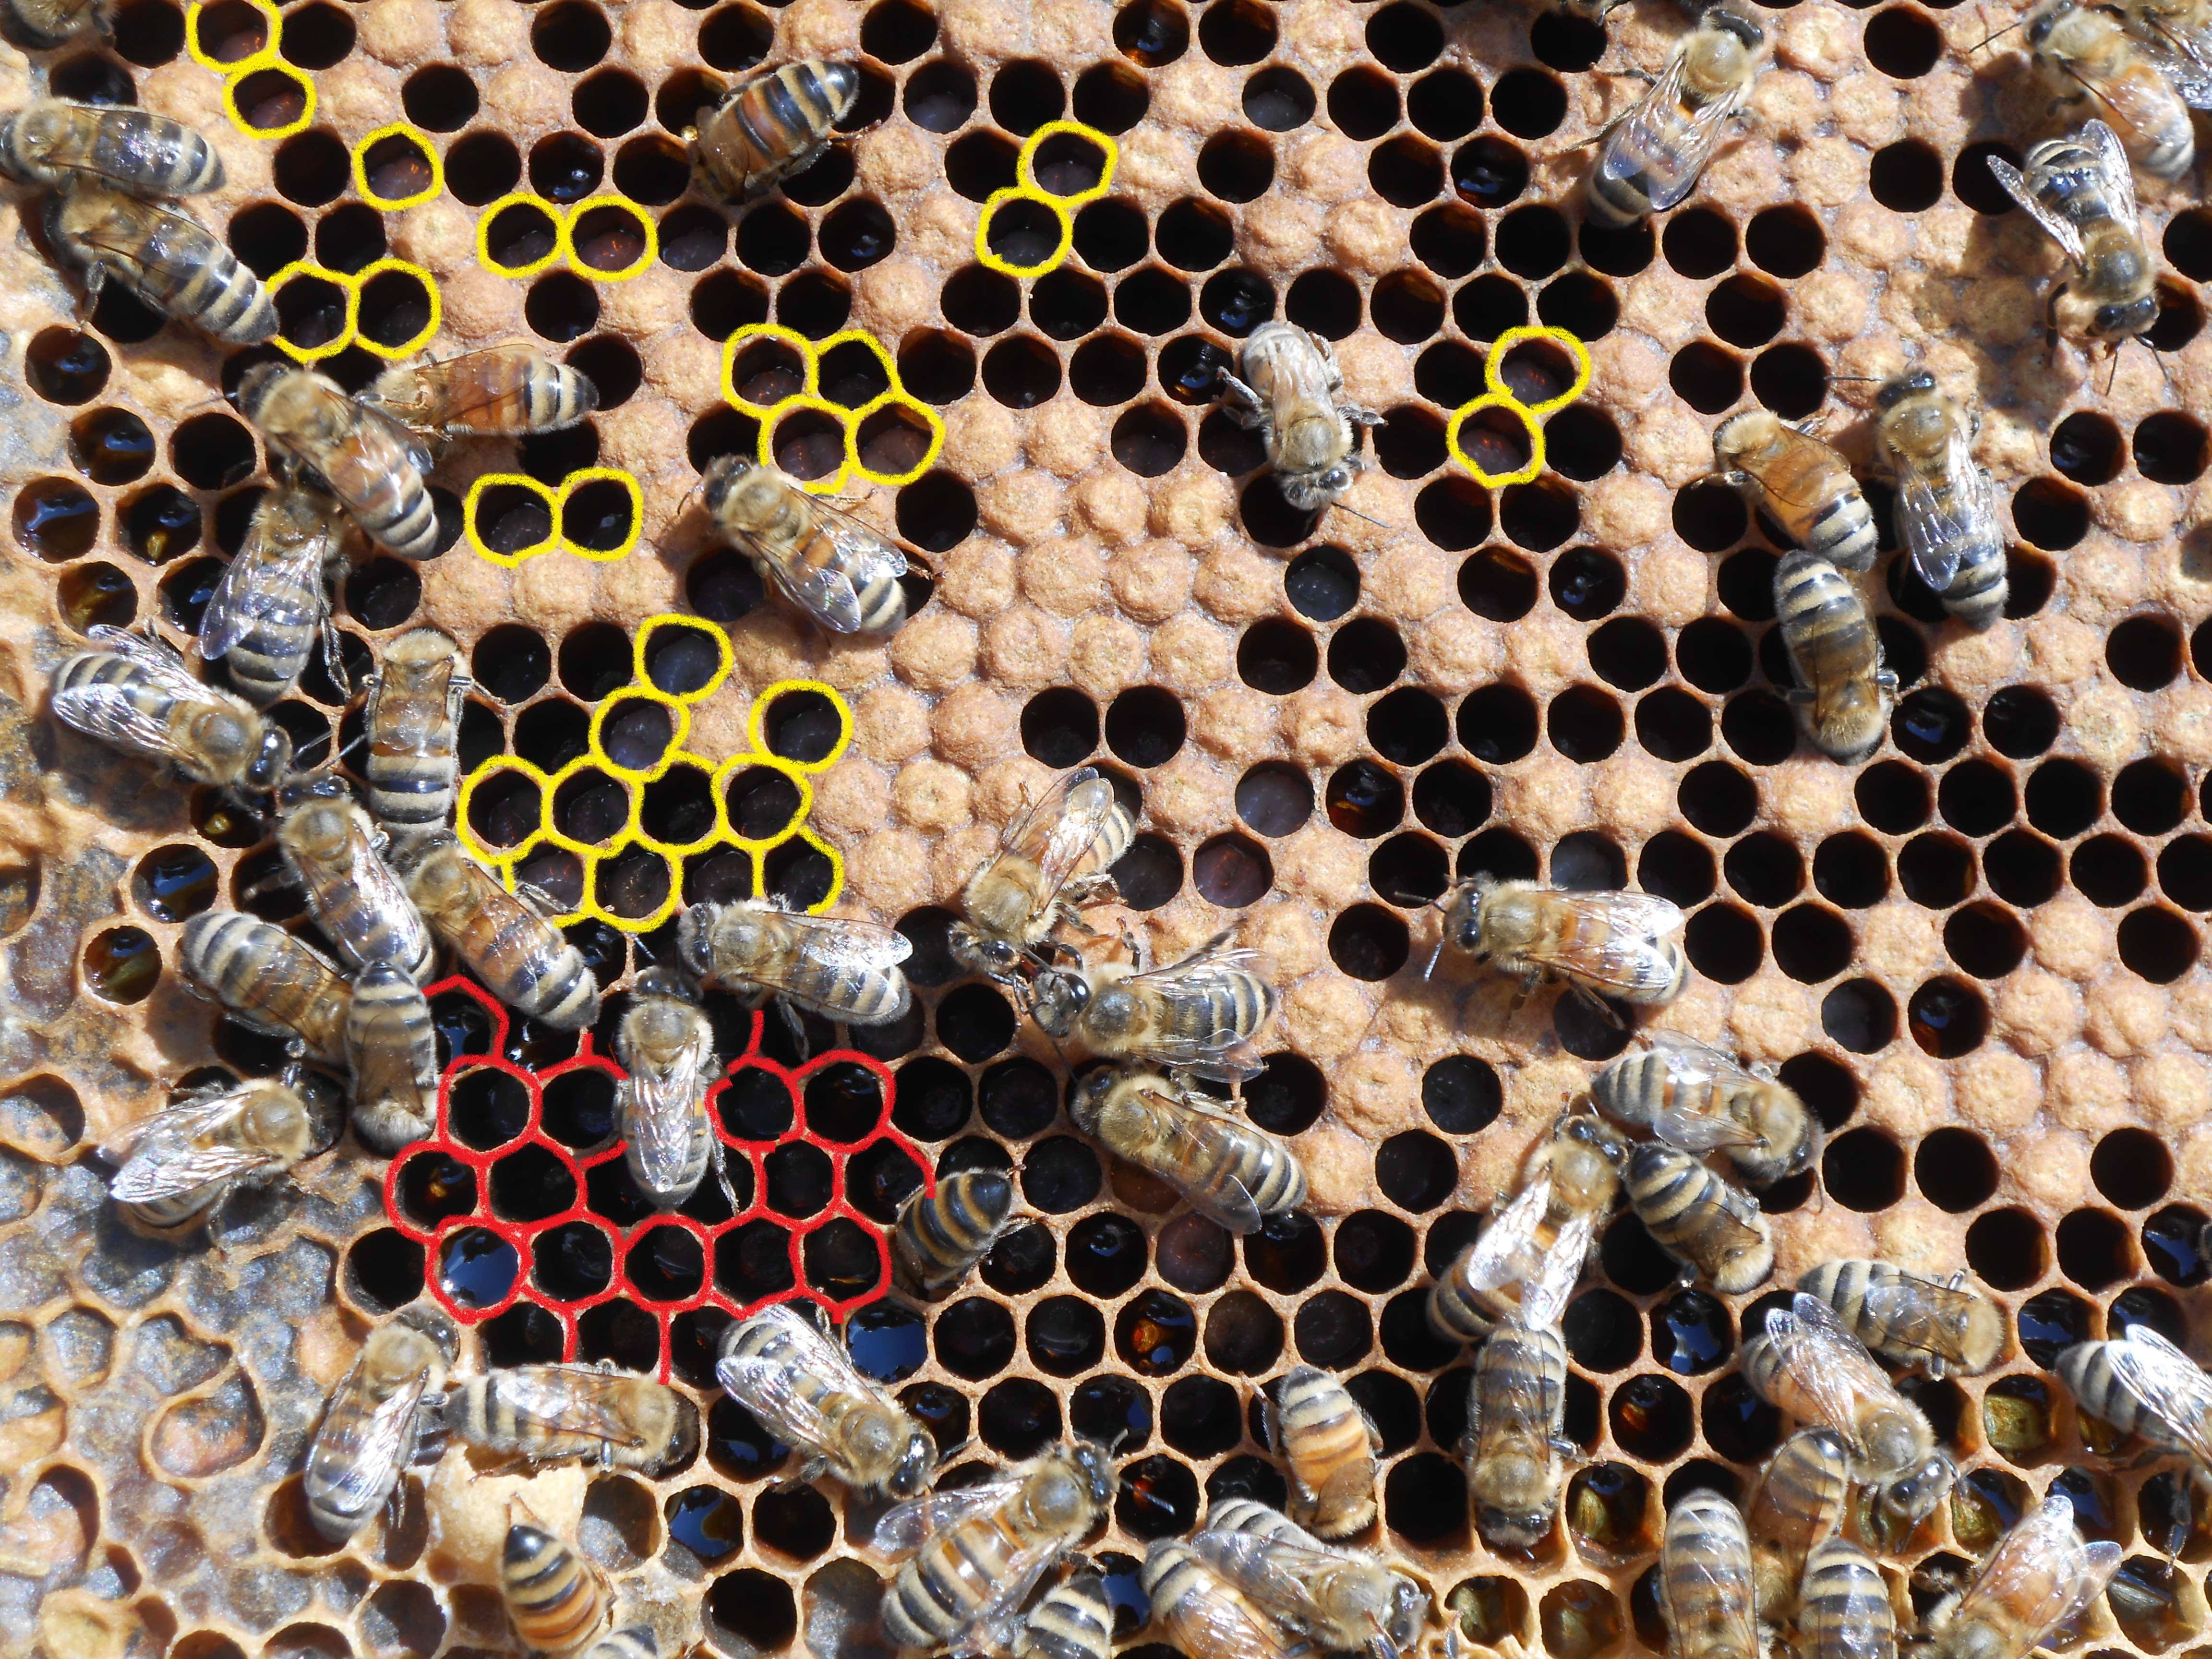
B) Culling drone brood (male bees).  This “intelligent” parasite has figured out that it can breed and suck on the bee’s bodily fluid for an extra 3 days in capped male brood rather than the female brood.  As a result, the female mite favors mating and raising new mites in the comb where male bees develop.  By opening this comb and removing the drone brood, the beekeeper also removes a lot of mites who, in turn, would mate and increase their numbers within the hive.
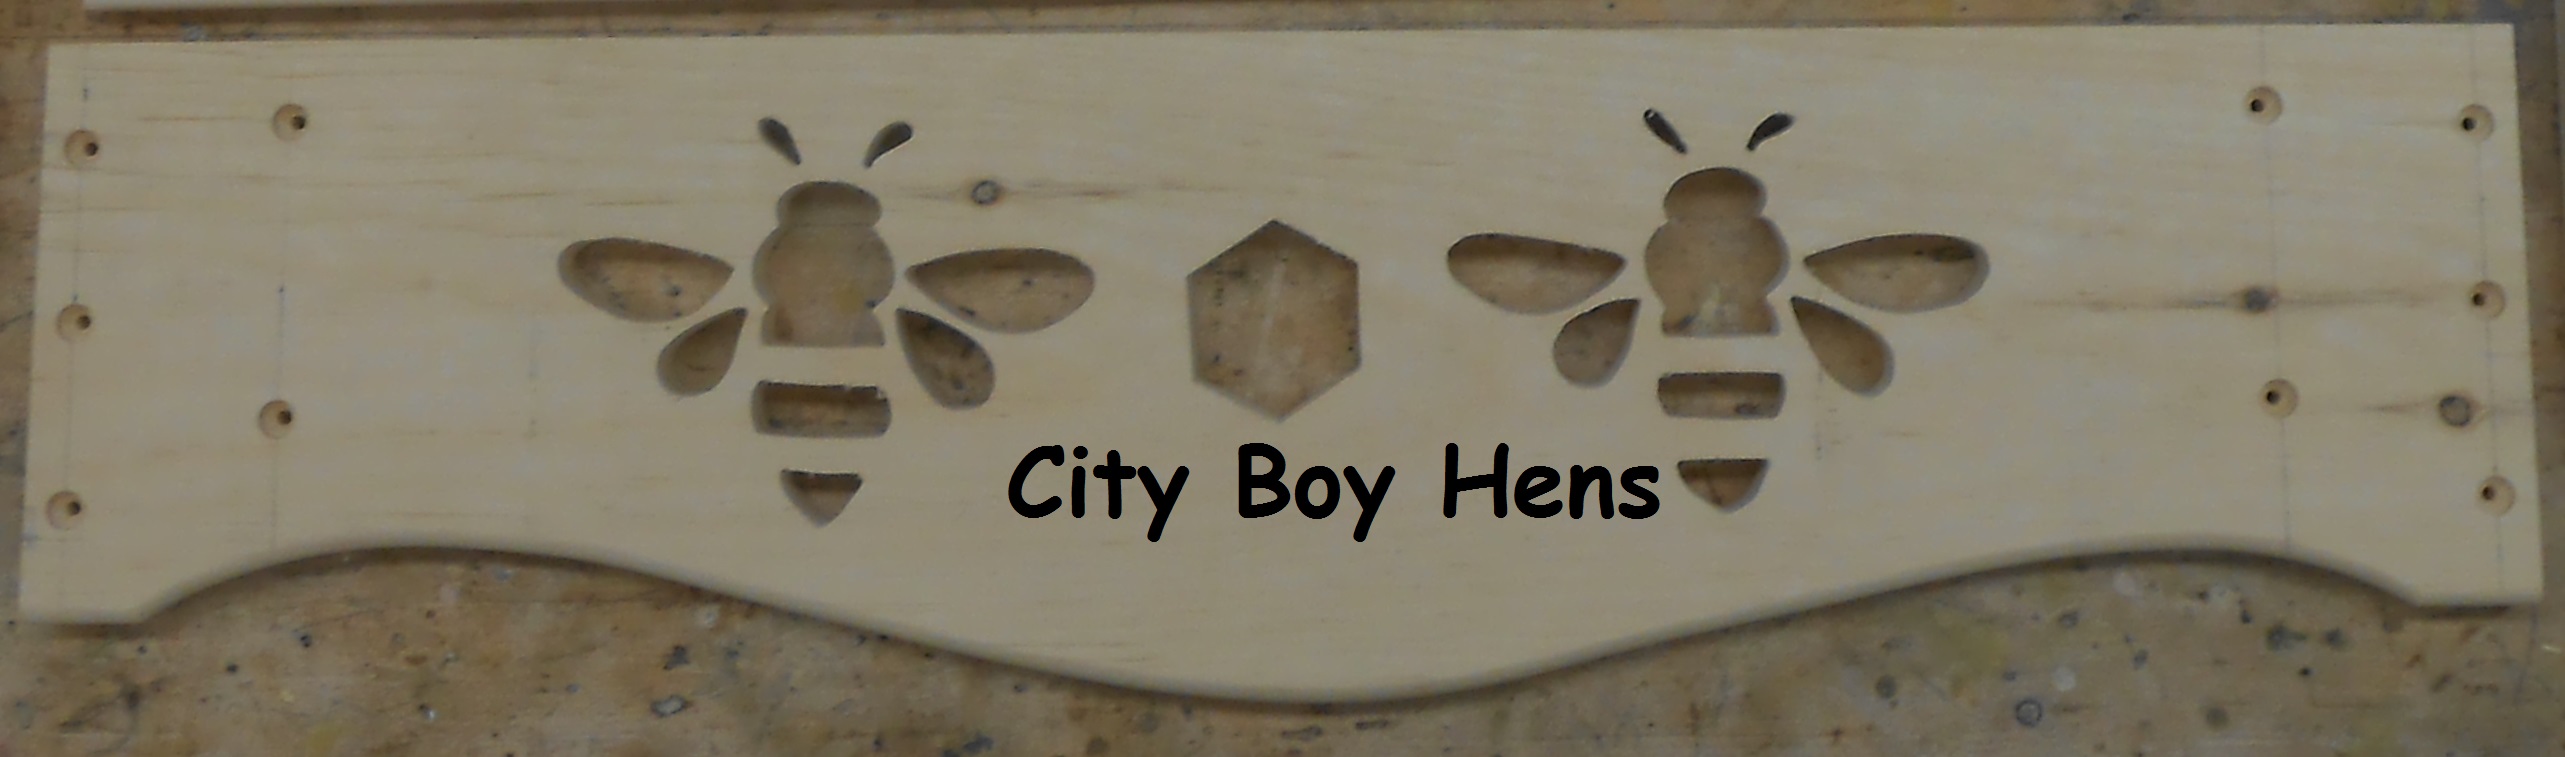
Culling Drone Brood

Culling Drone Brood

C) Using natural treatments like formic and oxalic acids at designated times in the year.  Formic acid is naturally found in many foods including apples, strawberries, raspberries and……….. honey.  Oxalic acid can be found in spinach, Swiss chard, beet tops and parsley.  In high concentrations, they are poisonous to humans.  This is why we do not eat rhubarb leaves.  Fortunately, these acids are also lethal to varroa mites and, when used in the right application, can really knock down the mite numbers in a hive.  Best of all, these acids have been certified as “safe” chemicals that allow the organic beekeeper to continue to consume and sell a safe edible honey.


As Michael Corleone said “Keep your friends close and your enemies closer”.   Varroa mites are not leaving anytime soon.  In fact, they are probably here to stay. Hence, I’ll do what I can to help my bees maintain the upper hand on this incredibly destructive pest.  It’s the least I can do to help this incredible insect!022

How To Make A Ventilated Gabled Beehive Roof

I spent a lot of time deciding on what type of cover I would build for my beehives.  I can’t say that I am too impressed with the look of a standard telescoping cover.  I guess that’s because it is designed to be functional and esthetics do not play a role in the business of professional beekeeping.  After searching for ideas, I came across an informative post at Honey Bee Suite on The Best Ventilated Gabled Roof.  This roof had the right combination of purpose and esthetics.  I liked the idea of incorporating ventilation into the roof and the look of a gabled roof on top of a hive looked great.  Now… I just had to give it a few City Boy extras in order to personalize my hive.

Safety

Make sure that you read and understand how to SAFELY operate your power equipment.  In  some of the pictures below, the safety guard has been removed so that you can get a better understanding of the photo.  NEVER operate your equipment without a guard in place!

End Gables

004 - CopyDress 2 pieces of pine to 3/4″ thick x 7-1/4″ wide x 18 1/8″ long.

Now layout the lines for the end gables by a) making a mark 1-1/2″ up from the sides of each gable and b)   making a mark at the peak of the roof.  Now connect these points and cut the gabled ends with a band saw or jig saw.

Now, draw out the design for your ventilation access.  I made a star because it ties in with the design on my chicken coop door, but you could give it your own personal touch.  A scroll saw makes for accurate work in cutting out the design.

Next, cut the sides of the roof to 3/4″ thick x 2″ wide x 20-1/4″ long.  Now set your table saw or bandsaw to 22-1/2 degrees and rip these 2 pieces to 1-1/2″ in width.( This will allow the plywood roof to rest perfectly on the sides).002 - Copy

Next, cut the 4 structural supports.  These supports will tie both gabled ends together and provide a nailing surface for your plywood top and shingles.  You don’t have to be too fussy about the width of this material because it won’t be seen.  Just make sure that they are at least 1-1/4″ wide and 20-1/4″ long.008 - Copy

Next drill (using a countersink bit) the screw locations into each gable end in order to attach the side pieces and structural supports.  A drill press works great, but a hand-held drill will work as well.  Use exterior glue and 1-1/2″ deck screws for assembly.  Now, fill each screwed hole with a wood plug and trim the plug with a japanese flush cutting saw.  This would be a good time to staple  screening over the inside of the ventilation star.  I saved this step until I made the entire project and it was a bit more challenging later  on.  004 - Copy

Roof

I made the roof from some scrap pieces of 1/2″ plywood.  One side will be 1/2″ x 12-1/2″ x 24″ and the other side will be 1/2″ x 12″ x 24″.  The reason for the difference in the width is for the overlap at the peak of the roof.  Now, rip  the length (edge) of each board at 22-1/2 degrees. 006 - Copy This will make for a tight peak.  Now flip the plywood over if it’s one solid piece and rip the other edge (bottom of the roof) at 22-1/2 degrees. If you are using 2 pieces for each side of the roof (like I did) than just rip the second board at the same degree.  The table saw or band saw works good for this step.  This is a good time to paint the exterior or the entire project.010 - Copy

Shingles

I used cedar shingles because I like the look and the hives will tie in nicely with my shed/chicken coop which is also shingled in cedar.  You can also use asphalt if you prefer.  Either way, just make sure to double your bottom course and not to have the gaps between shingles identical on all courses.  I used a pneumatic stapler to secure the shingles to the roof and marked my location in order to drive the staple into the plywood and structural supports.  * Note:  The shingles overhang the roof sides and bottom by 1″.

First start by stapling the first course and trim the shingles at the top of the peak with a fine tooth saw.002 - Copy

Now secure the next course right on top of the entire first course, making sure to not align this course over the sides of the previous course. This will help keep moisture from penetrating to the plywood.  Next, put your third course of shingles on, making sure to start them further up the roof.  Follow up by trimming the shingles at the roof peak.006 - Copy

009 - Copy

Peak Cap

I cut some repurposed coated metal roofing for a cap.  The measurements were 7-1/2″ wide x 26″ long.  I bent the metal on a sharp edge and attached it with 8 roofing nails.  Make sure to pre-drill each location first with a metal bit that is 1/16″ less than the diameter of the nail.024 - Copy

And there you have it.  I think the gabled roof is a great addition to my hives.  I hope you give it a try!  If you would like to learn how I built my hive boxes CLICK HEREIf you would like to learn how to build the elevated hive stand CLICK HERE.014 - Copy

Making An Elevated Stand For Your Beehive

011 - CopyThe jury still seems to be out on whether a hive stand is necessary for a beehive.  Being  new to the art of beekeeping, I DO know one thing…………  MY CHICKENS LOVE TO EAT BUGS!!!!!!!!    There’s not an insect that is safe in my backyard when my 3 hens are free ranging for protein.  The last thing that I want is for them to develop a “taste” for my bees so I decided to make elevated hive stands for my 2 hives.

The inspiration for my hive stands came from Beekeeping for Dummies but I made 2 changes to the plans.  First, I increased the height of the stand to 18″ because the original height would still make it easy for my hens to “pick off” those tasty treats.  Second, I created a design in the front of the stand because I’ll be looking at the hive every day and I want it to look nice.

So…..lets get started.  But first, lets talk about safety.  Make sure that you read and understand how to SAFELY operate your power equipment.  In  some of the pictures below, the safety guard has been removed so that you can get a better understanding of the photo.  NEVER operate your equipment without a guard in place!

Legs

I used 4×4 cedar for the legs.  It’s a bit more expensive than pine, but it will last a whole lot longer because it is more resistant to rot.  Start by cutting the legs down to 18″ in length. I used my miter saw with a stopper on the fence to ensure that every leg was exact.028 - Copy Next, cut a rabbet 5-1/2″ wide by 3/4″ deep along one end of each post. This rabbet will accommodate the sides of the stand. I found that the safest way to make this joint was to “nibble” the waste away by making many cross-cuts on the table saw with the miter gauge.  This way is going to take a lot longer, but it is way safer!  * Note: When using the table saw, never butt the lumber up to the rip fence when cross-cutting. Make sure to have an axillary fence or scrap of wood clamped to the fence for this operation.  This will definitely prevent the wood from binding between the blade and the fence preventing dangerous kick-back.030 - Copy

031 - Copy

036 - CopyFront/Back & Sides

Using  1″x6″ pine, rip and cross-cut these pieces to size.  The front and back are  3/4″ x 5 1/2″ x 24″.  The sides are  3/4″ x 5 1/2″ x 22 1/2″.  If you want to use my design on the front, you can make a template from the photo below.  A scroll saw is essential for these cuts.031 - Copy

Next, pre-drill the screw location holes with a counter-sink drill bit.  Each holes will be later filled with a wood plug and trimmed using a flush cutting Japanese saw.  If you don’t want to go to this trouble, than just screw your fastener in so that the head is flush with the surface of the wood.  If you choose to do the later, I recommend that you still pre-drill the screw locations in order to prevent splitting the ends of your pieces.For the front & back, measure 3/8″ from the end of the boards and intersect this line at 1″  from the top of the board, half way across the width and 1″ from  bottom of these boards.  These locations will anchor these pieces to the sides.  Next, pre-drill 2 holes on each side to anchor these pieces to the legs. 032 - Copy Now drill a few screw locations for the side pieces that will anchor to the side of the legs.

Top

The top of the stand is made up of 2 wider pieces ( 3/4″ x 5 1/2″ x 24″).  These 2 pieces will be attached to the front and back of the stand.  The 2 center pieces  (3/4″ x 2″ x 24″) should be spaced out evenly in the middle of the top.  All pieces should be ripped to width on the table saw  and cross-cut on the miter saw or table saw.  Once again, pre-drill screw locations 3/8″ from each end and along one edge of the front and back.  These locations will anchor the top to the sides.  Next, make a screw locations for the top to be anchored to the leg.032 - Copy (2)

Assembly

First start by gluing (exterior glue) and screwing the sides to the legs with 1 1/2″ deck screws.  Make sure that the sides fit into the rabbets.  Next, screw the front and back to the sides and legs.039 - Copy

Next, secure the top pieces to the stand.040 - Copy

Fill each counter-sink hole with a wooden plug, trim the excess with a flush cutting saw and sand.042 - Copy

Completely seal your hive stand with your favorite exterior paint!013 - Copy  If you’d like to see how I built my honeybee boxes, please CLICK HERE.  If you’d like to see how I made my ventilated gabled roof , please CLICK HERE.

014 - Copy

Why I’m Glad I’m Not A Male Honey Bee

077 - CopyAs Valentine’s Day approaches and we focus on “love”, I am so happy I am not a male bee!  Mother Nature must have been doin’ some serious man hating on the day that she decided to create the male honey bee.  Some guy must have forgotten to put the toilet seat back down that day or left some clothes on the floor for the very last time cause the poor old male honey bee sure got a bum rap for the way his life was about to evolve.

Male honey bees are called Drones. I know that Mother Nature had nothing to do with naming them, but you’d think that the guy who made up the name could have given this a bit more thought.  To me, the word Drone conjures up images of “dim-witted” or “half-brained” .  How’s a guy suppose to get a good  start in life with that mill stone already wrapped around his neck?  It’s like naming your kid “Dork”.  Yah…that’s gonna bode well  in the school playground for Junior!

Second, Mother Nature has decided that the drone should take more time to develop than the “girl” bees in the colony.  Because of this, the Drone has become the best host for the Varroa mite who gets another 3 days to continue “sucking” on his blood.  Many a beekeeper has learned to collect these drone combs and put them in the freezer as a strategy  to help diminish Varroa mite populations in the hive.  So the poor male bee doesn’t even get to “become” a bee before he is thrown into the deep freeze!

If he is fortunate to escape the deep freeze, than the Drone hits “pay dirt” for a while and hangs out with his fellow drones not too far from the hive waiting…..and waiting………..for a virgin Queen to fly by.  It must be a good time for the drones.  Hanging out with your buddies, drinking a few honey cream ales,talkin’ about sports and telling tales about that large mouth bass that “got away”.But when they see The Queen….well…… it’s every “man” for himself as they desperately try to run her down and mate with her in mid-flight.  Now…that’s a feat that is way under appreciated.  But wait, the Queen won’t just mate with 1 drone, she’ll do this with up to around 15 of them all in the same flight!  Hey fellas, image if it was the drone who got the chance to mate with 15 virgin Queens all in a single flight.  Those poor guys would get an even more despicable rap with a whole bunch of off-colored language that linked up with “dirty dogs”, and “good for nothing nymphomaniacs”.  Yah…the drones are the decrepit ones!

But, getting back to the so-called  “lucky” drones…….if Mr. Drone successfully mates with The Queen, than his “man hood” is RIPPED RIGHT OFF as he completes his task and then Mr. Drone falls perilously to his demise.  HOLY FREAKIN’ #$*#!!!!!!!!!!!  Now, that’s no way to die…free-falling  to your demise from high up in the sky without your “winkie” as your best buddies laugh and point to the gaping void in your mid section!

And finally, if you managed to escape the “deep-freeze” and weren’t “lucky” enough to mate with The Queen, than you are banished from the hive in the autumn where you are left to freeze or starve to death!  Unfortunately for the Drone, he is seen as a freeloader in the hive at this time off the year and will only diminish the honey reserves that will get the colony through Winter.        Man oh Man……..Mother Nature is sure awful “tough” on the poor old drone.

So…there you have it.  If you don’t get frozen by your beekeeper, have your mid-section ripped off and fall perilously to your demise, than you will be evicted from your home in the Fall where you will either freeze or starve to death.  On this Valentines Day, I’ll give thanks that I am not a Drone.

“What’s that Beloved Wife…….the toilet seat?????????  No it was Dutiful Son who left it up again!”………  Hey…….Between you and me….he’s younger, stronger……..and has lots of time…………… to learn how to take one for the team!   BBBBBBBBBBBBBBBBZZZZZZZZZZ.

How To Make A Beehive:Building Honey Bee Boxes

014 - CopyIt’s been pretty darn cold up here in Southern Ontario this week and I can’t stop thinking about honeybees.  Maybe it’s because the Winter allows for time to finally get around to some other interests that seem to get crowded out during the warmer months.  Anyways, this winter I am bound and determined to make 2 Langstroth honey bee hives from scratch.  The drive to do so comes from 2 forces.  First, I’ve been working with wood for the better part of 25 years and secondly, I definitely became smitten with “the bees” last year when I got my first introduction to beekeeping up near our cottage.  So….over the next few months, I’m going to post  different segments on how to build your own hive.  I don’t mean assembling purchased parts.  I mean building the real deal.  By the end of it all, I’ll have built 2 complete hives.  I hope that I’ll inspire you to do the same!

Making your own honey bee hive can be rewarding on a number of fronts.  First, there is a cost savings (around 30 %) which will really add up if you want more than 1 hive.  Second, there is the personal satisfaction in knowing that you built your own beehive.  But, if you acquaint time with money and/or have little or no basic cabinetry skills, than purchasing a beehive may be the right choice for you.

My version of the Langstroth hive differs from the traditional hive body in that I do not use a box joint or notched hive handles.  Instead, I use a rabbet joint and screws to assemble the boxes and “homemade” handles which are screwed onto each box.  It’s a whole lot easier, a whole lot safer to make and requires a lot less experience for the “home-hobby” guy or gal.

So…..lets get started.  But first, lets talk about safety.  Make sure that you read and understand how to SAFELY operate your power equipment.  In  some of the pictures below, the safety guard has been removed so that you can get a better understanding of the photo.  NEVER operate your equipment without a guard in place!

The only difference between the honey bee boxes is depth.  For the purpose of this post, I will be making a box which is 6 -5/8″ deep.  If you want to make a shallow box, it will be 5-11/16″ deep and a deep box will be 9-5/8″ deep.  All parts are 3/4″ thick.

Start by ripping the boards to width.  This is best done at the table saw. Note* If you have a jointer, it would be best to make a few passes on the board edge before ripping.012

Now cross-cut your pieces to length.  This can either be done on a table saw with a miter gauge or  a miter saw that is larger than the 10″ standard saw.  Either way, make sure to use a “stopper” so that every piece is exactly the same.  For the fronts and backs, cut them at 15-1/2″.  For the sides, cut them at 19-7/8″.  Note* When using the table saw, never butt the lumber up to the rip fence when cross-cutting. Make sure to have an axillary fence or scrap of wood clamped to the fence for this operation.  This will definitely prevent the wood from binding between the blade and the fence preventing dangerous kick-back. 016

Now, cut the rabbet joint in the sides.  The rabbet will be 3/8″ deep and 3/4″ wide.  This can be done with a router and rabbet bit or 2 passes on the table saw.  For the purpose of this post, I am doing the rabbet on the table saw.  First, start by cutting the rabbet to its correct depth with the workpiece facedown on the table saw. Once again, use an auxiliary fence or a scrap of wood clamped to the fence in order to prevent kickback. 019 Next,  stand the piece on edge to cut the rabbet to width.  Make sure to use a feather board to help keep your piece straight and cover the exposed blade.026

In the picture below, the feather board was only removed for the benefit of the picture.

025

Now, cut the 5/8″ x 3/8″ rabbet for the tops of the fronts and backs (these will hold the  honey bee frames). This is done the same way as the previous rabbet.028

Now, using a homemade marking jig that was ripped to 3/8″ thick, mark the screw locations on both sides.  By using this “jig”, you will only have to measure out one time for all of your sides.  Simply place the jig on the edge of your board and mark the screw locations with your pencil.031

Using another template, mark out the two screw locations for each side of each box.  You will notice that there are 4 holes in this template.  That’s because it can be used to mark the handle screw locations for the front/back & the sides.   Just make sure to consistently mark your pieces from the same side.033

Now, pre-drill your sides and handle locations using a hand-held drill or drill press equipped with a countersink bit.  Note* It’s essential to pre-drill so that you don’t split the ends of the board.037

Now, make the handles for the boxes.  I like to use 2×6 for this part.  First, rip the 2×6 into 1-1/2″ width strips.  Then tilt the blade to 8 degrees and rip the strips again. (The 8 degree angle will allow for rain run off from the handles.) 039 Next, lower the blade to a 3/4″ height and set the rip fence to 3/4″.  Run the strips through the table saw making sure that the angled surface is positioned on the left side of the strip. 040 Next, turn the strip so that the angled surface is “facing up” and rip again.  By the end of the “rip”, the waste from the handle will fall away from the strip.  042Next, set up a stop block on the miter saw or table saw and cross-cut the strips to 6-1/4″ lengths.  Make sure that the 8 degree beveled face is not resting on the miter gauge (for the table saw) or the fence (for the miter saw).044

Glue and screw the handles, using 1-1/4″ deck screws,  to the outside of each box part.  I made a jig out of some scrap plywood which allows me to position the handle on to the exact spot of the box side.  I just reverse the jig for a hive body because it is wider.048

046

Now, assemble each box using 1-1/2″ deck screws and exterior glue.049

Finally, carefully rip a few strips of that “waste” from the handles to 3/8″ x 3/8″.  Fill the 3/8″ spaces at the ends of the rabbets on the inside of the front and back pieces.  I used a Japanese flush cutting hand saw for trimming the “filler” piece.050

And…Volah!  You’re on your way to making your own  beehive(s).  To see how I built my hive stands CLICK HERE.  To see how I built my ventilated gabled roof, CLICK HERE.  To see how I built my ventilated bottom board CLICK HERE.053

My Honey Bee Queen is………. DEAD!

014I should have heard them screaming that the Queen was Dead.  I should have seen that the flag was at half mast beside the hive.  I should have been there as the funeral procession  exited the hive and their little bee heads hung in grief when they carried their beloved Queen to her final resting place.  I should have noticed, but…………… I wasn’t there.  Maybe I was back at home in the City.  Maybe I was up at the cottage sitting on the dock sipping beer from a local micro-brewery.  Either way, it didn’t matter.  I wasn’t at the hive.  Not that I really could have done much. It’s not like I could have saved her.   I don’t even know why she died or how she died……….  I just know she’s………. dead……(A momentary  pause for dramatic effect!)

So….maybe you’re asking yourself how I knew for certain that the hive was queenless?  I knew I was in trouble yesterday afternoon as soon as I took the first frame out of the hive.  There was no brood to be found anywhere in the comb.  There were plenty of bees, lots of pollen and even some honey, but no brood to be found.  Considering that a Queen can lay upwards of 1000 eggs each day, you’d think that I’d find some brood tucked away in that comb. Take a look at the picture below.  It is from my hive in July.  If you look carefully at the yellow circled frames, you will see brood tucked into the comb.  They look like fat white grubs.

Drawn out comb filled with nectar or brood.

Drawn out comb filled with nectar or brood.

Anyways, I continued to inspect each frame with the same dismal results.  Zilch, Nadda, Niente!  I couldn’t believe my luck.  First, I couldn’t get a mated Queen until early July because there was such a shortage this year in Northern Ontario.  Now, she up and died, leaving thousands of bees without a Queen.  But worst of all, Fall has begun and the hive Will Not survive without a Queen to produce the Winter Bees who will carry the hive through the  cold months ahead.    So…..if I don’t do something soon, I’ll be starting again from square one next Spring.   But, it isn’t not only for me that I must find a solution…….it is also for the remaining bees that will need my help.

It turns out that one of Dan’s hives (my mentor) has been suffering this year and it is having trouble building up to a strong colony.  It too, would not survive the harsh Northern Ontaio Winter.  After sitting down in the apiary together and discussing our individual delemas, we decided to combine our hives in order to make one strong hive that still had time to learn to get along and become one happy colony.  After taking a quick look through Bee Keeping For Dummies, we confirmed our plan of attack and thus was born our attempt at the newspaper method.

According to Howland Blackiston “ you can’t just dump the bees from one hive into another. If you do, all hell will break loose. Two colonies must be combined slowly and systematically so that the hive odors merge gradually. This is best done late in the summer or early in the autumn”.

Well……I guess are timing was good because we got the early autumn part right.  Now, we just had to move my hive into Dan’s weaker, but Queen maintained, hive.  So I took the cover off of my hive and began shaking  the bees off of the honey bee frames that were in the top hive body (the upper box).  In doing so, my bees would drop down into the lower hive body which was the one that would be placed on Dan’s hive..  Believe it or not, we did this process without even using the smoker to help keep the bees calm.

Next, the hive cover was taken off of Dan’s hive and a single sheet of newspaper was placed on top of his top hive body.  I then cut a few slits in the newspaper which would act as the innitial passageway between the 2 hives.  In doing so,the hive odors from each hive would  “slowly and systematically” begin to merge together.033

Once this was done, the hive cover was then placed on top of the new combined hive.

According to Blackiston, , the bees should chew through the newspaper in about a week and Dan & I should have a ” happily joined into one whacking strong colony”.

Well……“whacking strong” seems pretty impressive from where I stand.  I’ll shoot for strong and hope for the best.  “Hey Dan………..what part of the newspaper did we put on the hive?   I hope it was something interesting because them there bees are gonna’ be doing some recreational reading for the next 7 days.  I just hope it wasn’t the obituary section”036

There’s NEVER enough time!

Part 1

Last week was a busy week at City Boy Hens and I have no one to blame but myself.  Dan the beekeeper gave me my first assignment and I was instructed to put together 2 hive bodies or “supers” as they are referred to by beekeepers.  It really was an easy job because most hive parts are sold pre cut and ready for assembly. 006 So off I went back down to the city and assembled my two supers in an about an hour. 010 Then I got to thinking……….I could make some supers from scratch and, while I’m at it, I’d  better make  a base and a hive cover as well…….And I still have a couple of  days before I have to go back up to the cottage……… so I might as well paint them all as well.  And before I knew it….I made my very first hive!  My wife often reminds me that I “sometimes” try to accomplish too much in too little time, but I reminded her that there is no way that my hive was going to fit into the van with the family, dog and chickens when we all go up to the cottage in a few weeks time. Well… I’m sticking to that story, though I don’t think she believes me!017
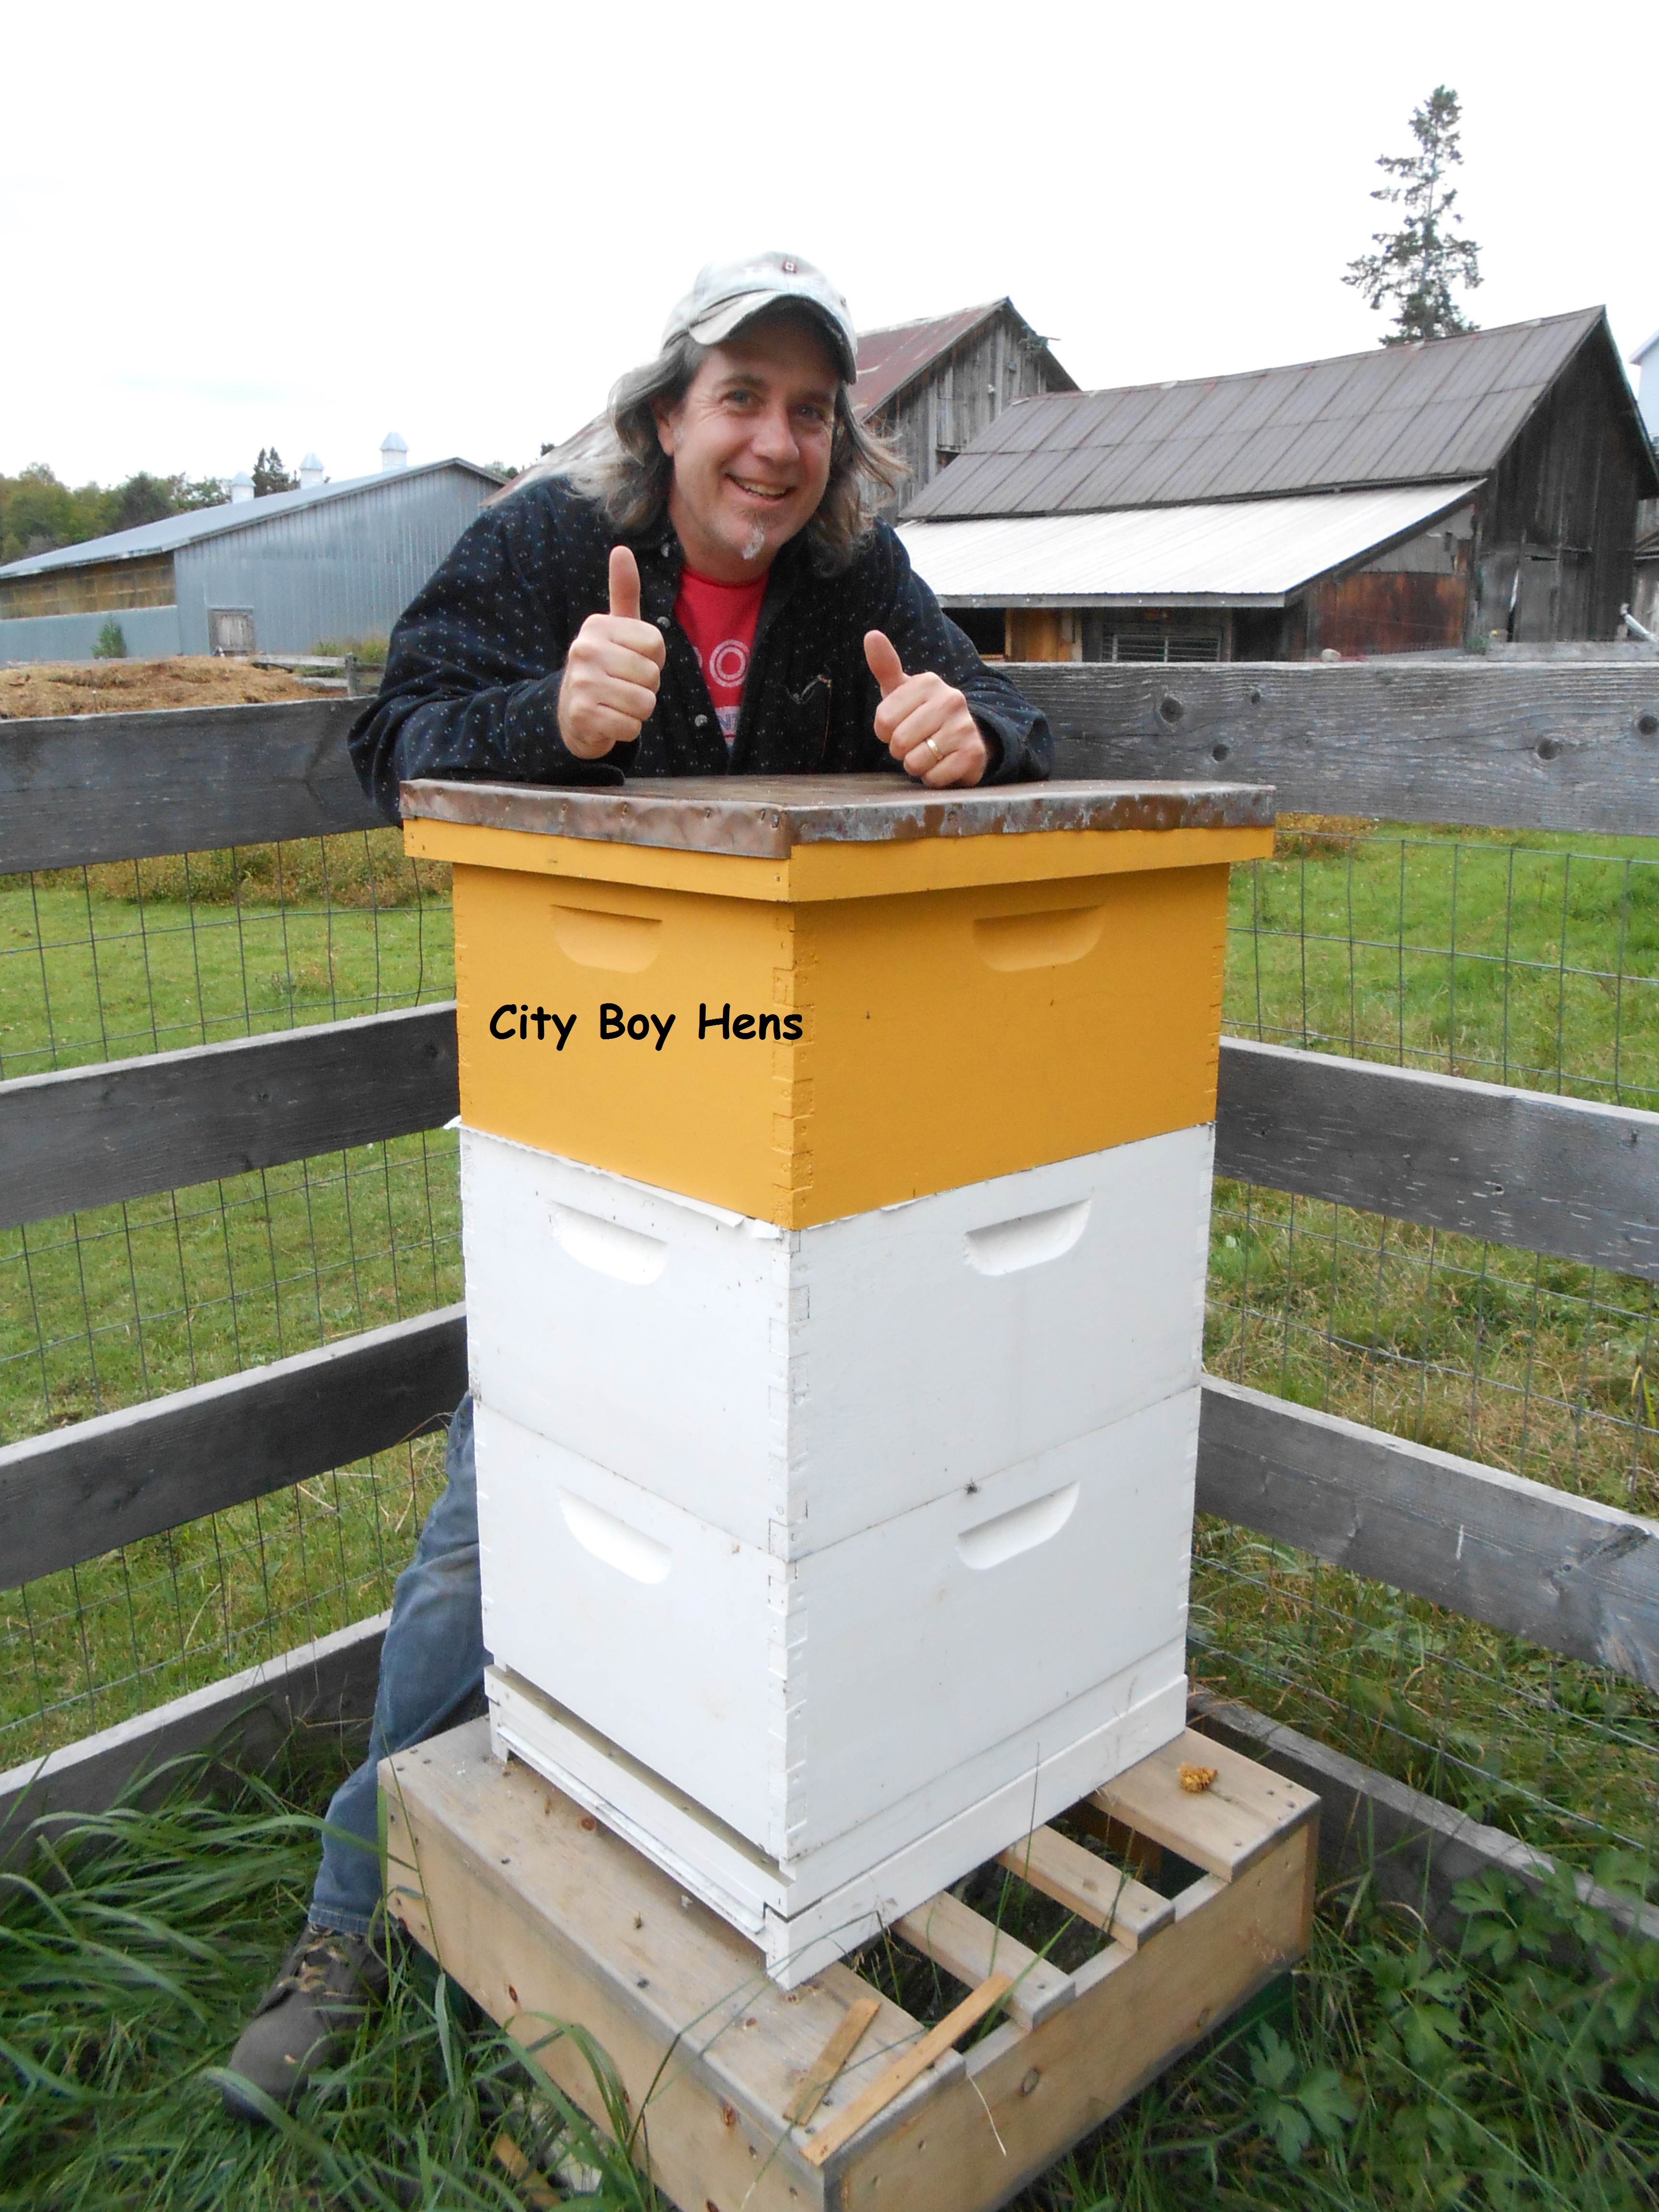
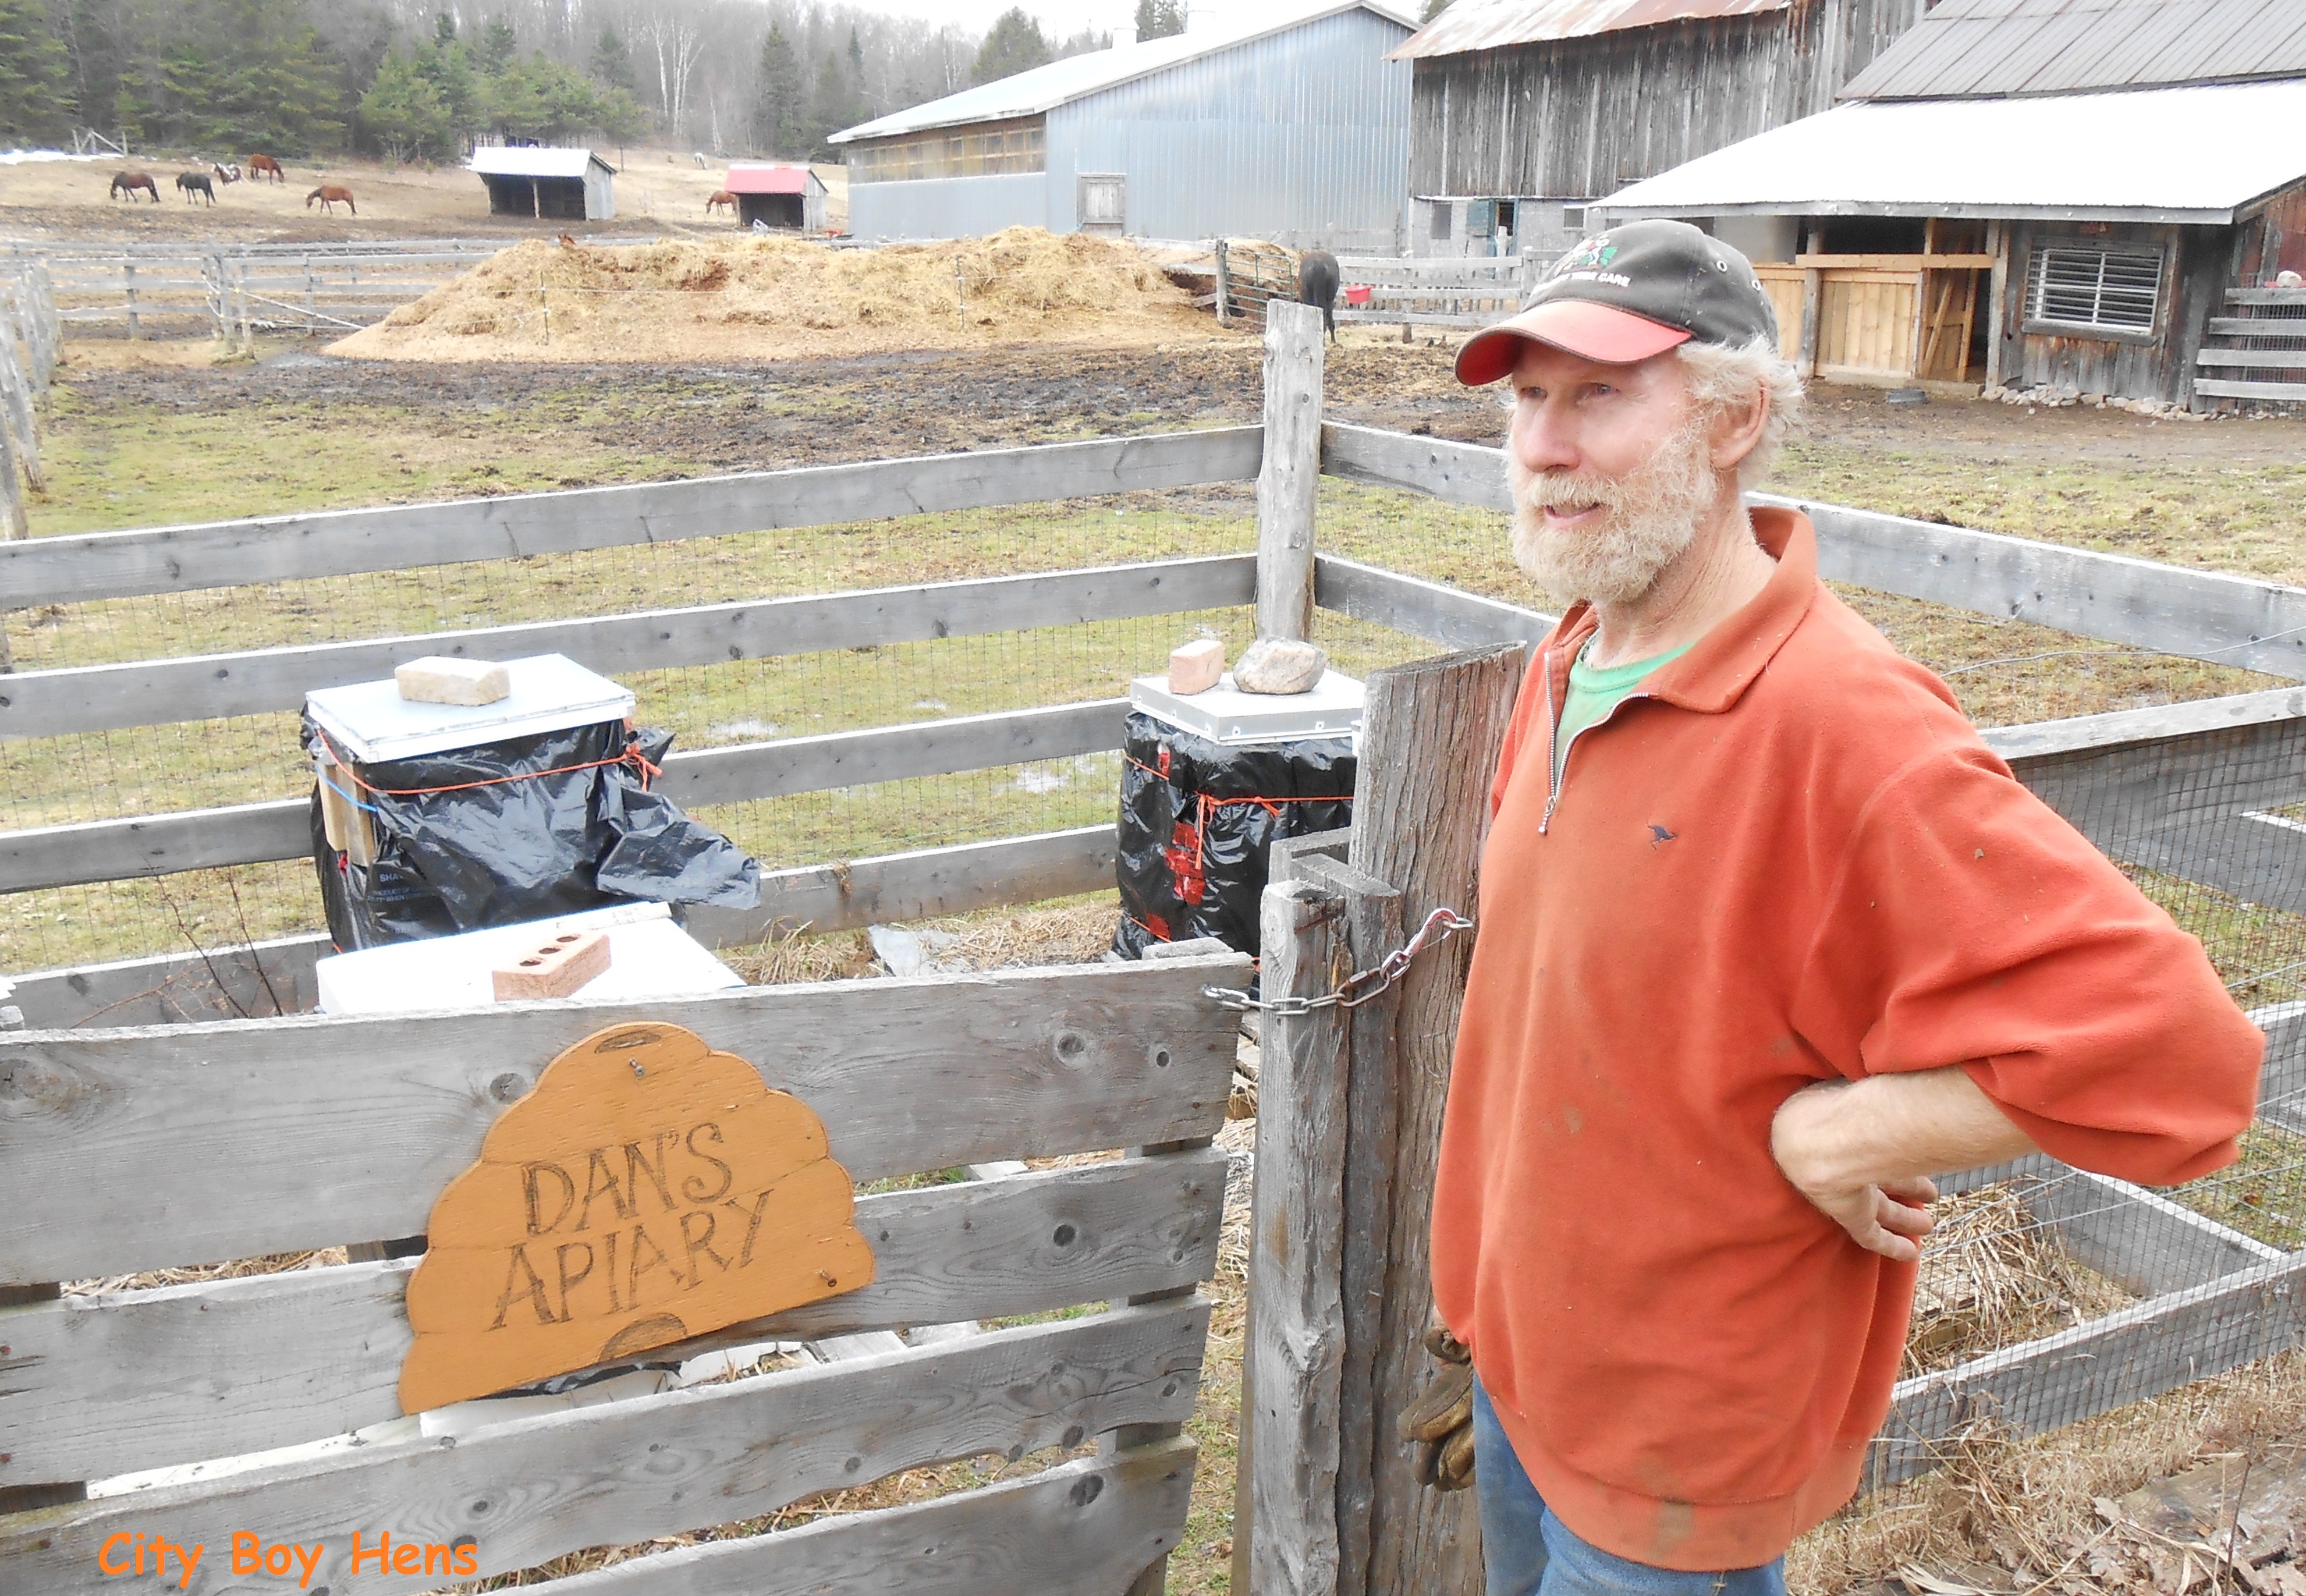
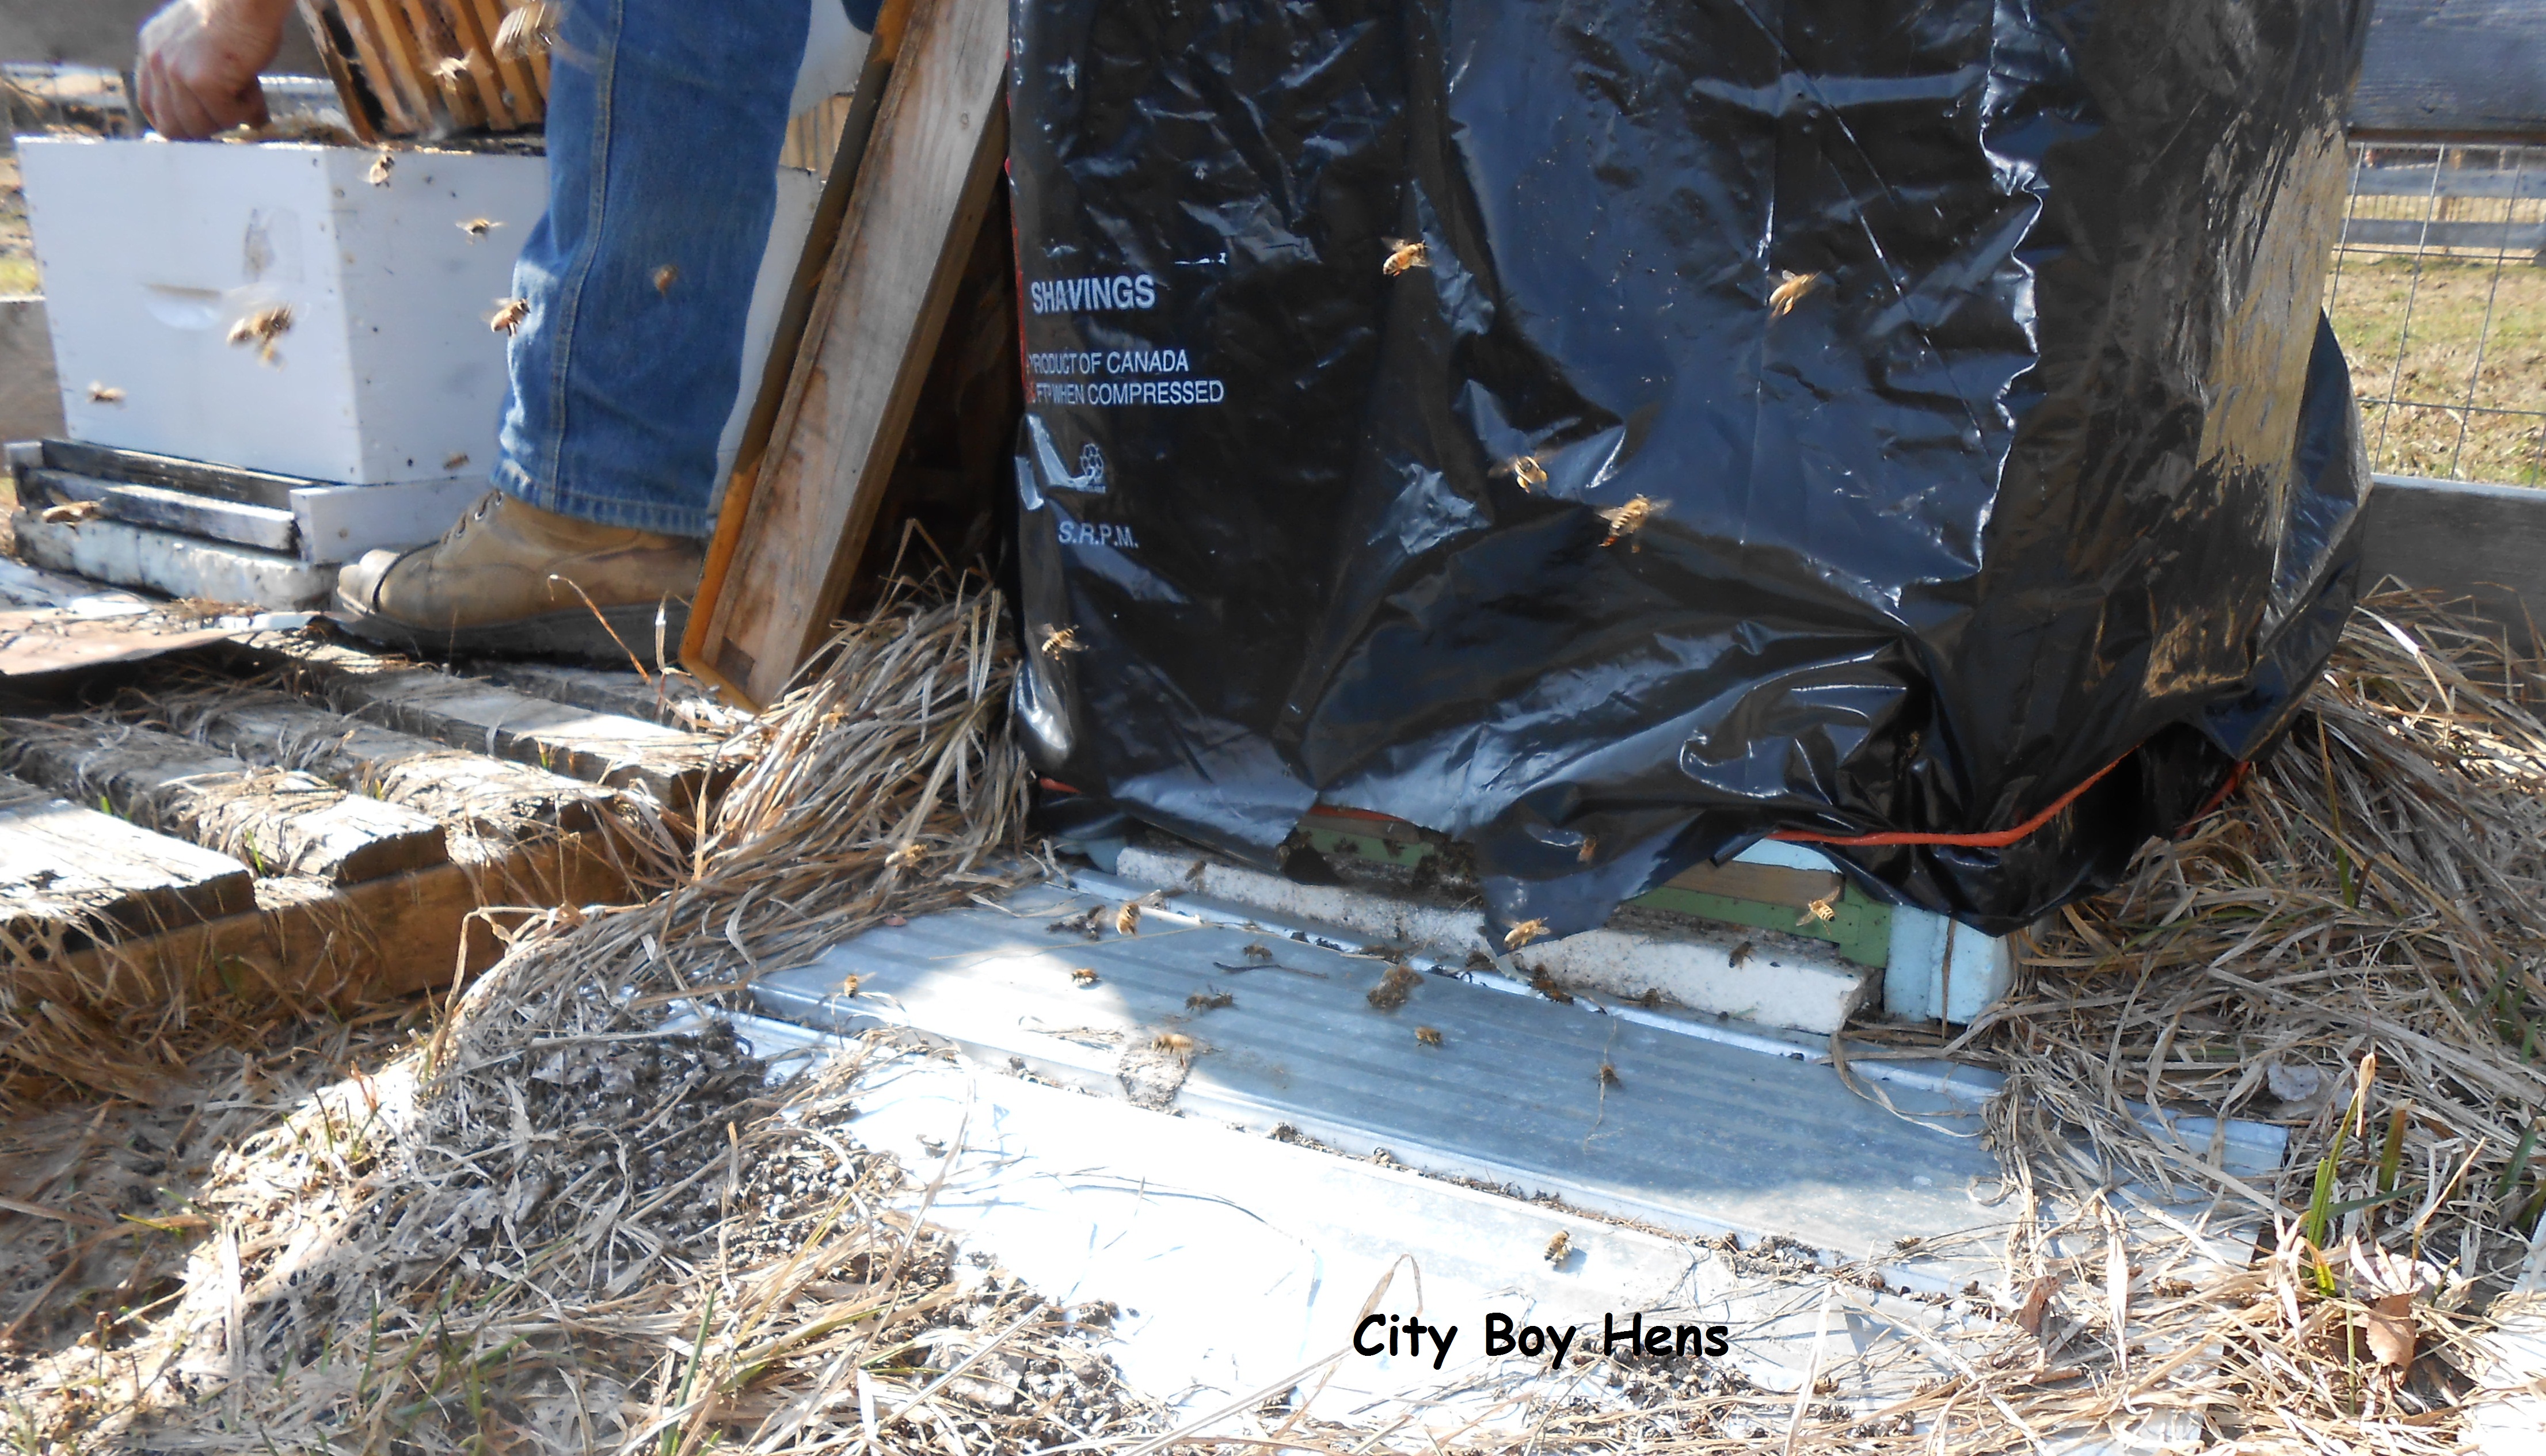
On Sunday morning, I met up with Dan and brought my hive to its new home.  It will sit in his barn for a few weeks until we can purchase a few more queens and re-start the 2 other hives.

Dan’s two surviving hives are doing well and the bees are starting to bring in some pollen.  You can see the yellow pollen that is attached to the legs of the bee in the picture below.  This is a great sign that all is well with the bees.027

Part 2

This past weekend also presented itself with the opportunity to build our raised bed vegetable garden at the cottage.  It was also the annual Spring weekend with my two great friends from my high school days.  It was great to have their help, laughter and practical jokes for an entire weekend.  Thanks guys!  Your sweat was greatly appreciated!011

018

032

So…the week is over and a lot was accomplished in those blurry seven days.  Sometimes everything comes at once, but I know I’ll look back in the summer when the honey is a flowin’ and the garden is a growin’ and know that it was all worth while.  In the mean time, sleep is looking pretty darn good!

City Boy Hens….. & Honey???

023

City Boy Hens & Honey ….It’s gotta nice ring to it.

Over the last few months, I’ve been thinking a lot about honey.  It all started with a bottle of honey that ended up in our house because my daughter wanted it on her morning pancakes.  I then began using it as a sweetener in my tea.  And then…..I started thinking.

As my wife will testify, thinking & me can become a dangerous obsessive combination which generally leads to something new.

Well…..I’m happy to report that this city boy is movin’ into the honey business.  It might be a bit premature, but I want to tell you how I got to this point.  The desire to make honey (well.. I’m not really makin’ it..the bees will) is no different from my desire to make lots of other foods from yesteryear.  Like all the other stuff, it has the right combination of interest, technique and loads of knowledge that fits right up my alley.

In my initial investigation, I thought that maybe I could co-op into one of the various hives that are maintained by a local honey bee association in our city.  That idea hit the skids when I found out that there is a long waiting list and I’d have to do a lot of volunteer hours for a little bit of honey.  Not to mention that the majority of those hours would have to be given in the summer when I want to be at the cottage.

At first, I thought that was the end of City Boy Honey, but then I started thinking in broader terms that could potentially fit into  my desire to harvest this golden nectar.  What about if I partnered with someone else like a local farmer who was willing to share the responsibilities with me?  Then I shot that one down when I realized that I’d have to leave my summer sanctuary in order to harvest the honey in late summer and I’d never get the chance to see how the bees were progressing through the summer.   Then…..I remembered Dan!024

Dan is a local farmer near our cottage who sells antiques and boards horses.  I have known him for around 8 years and I have lovingly restored some of the pieces that I have bought from him over these years.  But best of all….DAN KEEPS BEES!!!!!

I called him about 3 seconds after I remembered this and asked him if he would be willing to share a hive with me.  I am delighted to say that Dan is also excited to join in this venture with me.  For him, it’s really an opportunity to share his knowledge with a Newby.  As I have said before, you meet great people in your discoveries who generally want to share their interests.

Well, off I went up to the cottage for the weekend and arranged to meet with Dan on Saturday.  This Spring is really late up North.  In fact, the ice just went out of our lake on Saturday.011 As a result, Dan’s hives are still wrapped up from the Winter and it wasn’t until the sun came out that the bees began pouring out of one of the hives, which is ALWAYS a great sign after a long winter.033  Unfortunately, 2 of the hives did not survive the Winter.  From what I have read, this seems to be the norm for this year.

As I close this post, I am sipping on a hot cup of tea that is sweetened with Dan’s honey.  If all goes well, I’ll be tasting some of my own honey by the end of August.  In the mean time, I’ll keep you up to date with what I am learning in the wonderful world of the apiary.