How To Make A Beehive:Building Honey Bee Boxes

014 - Copy
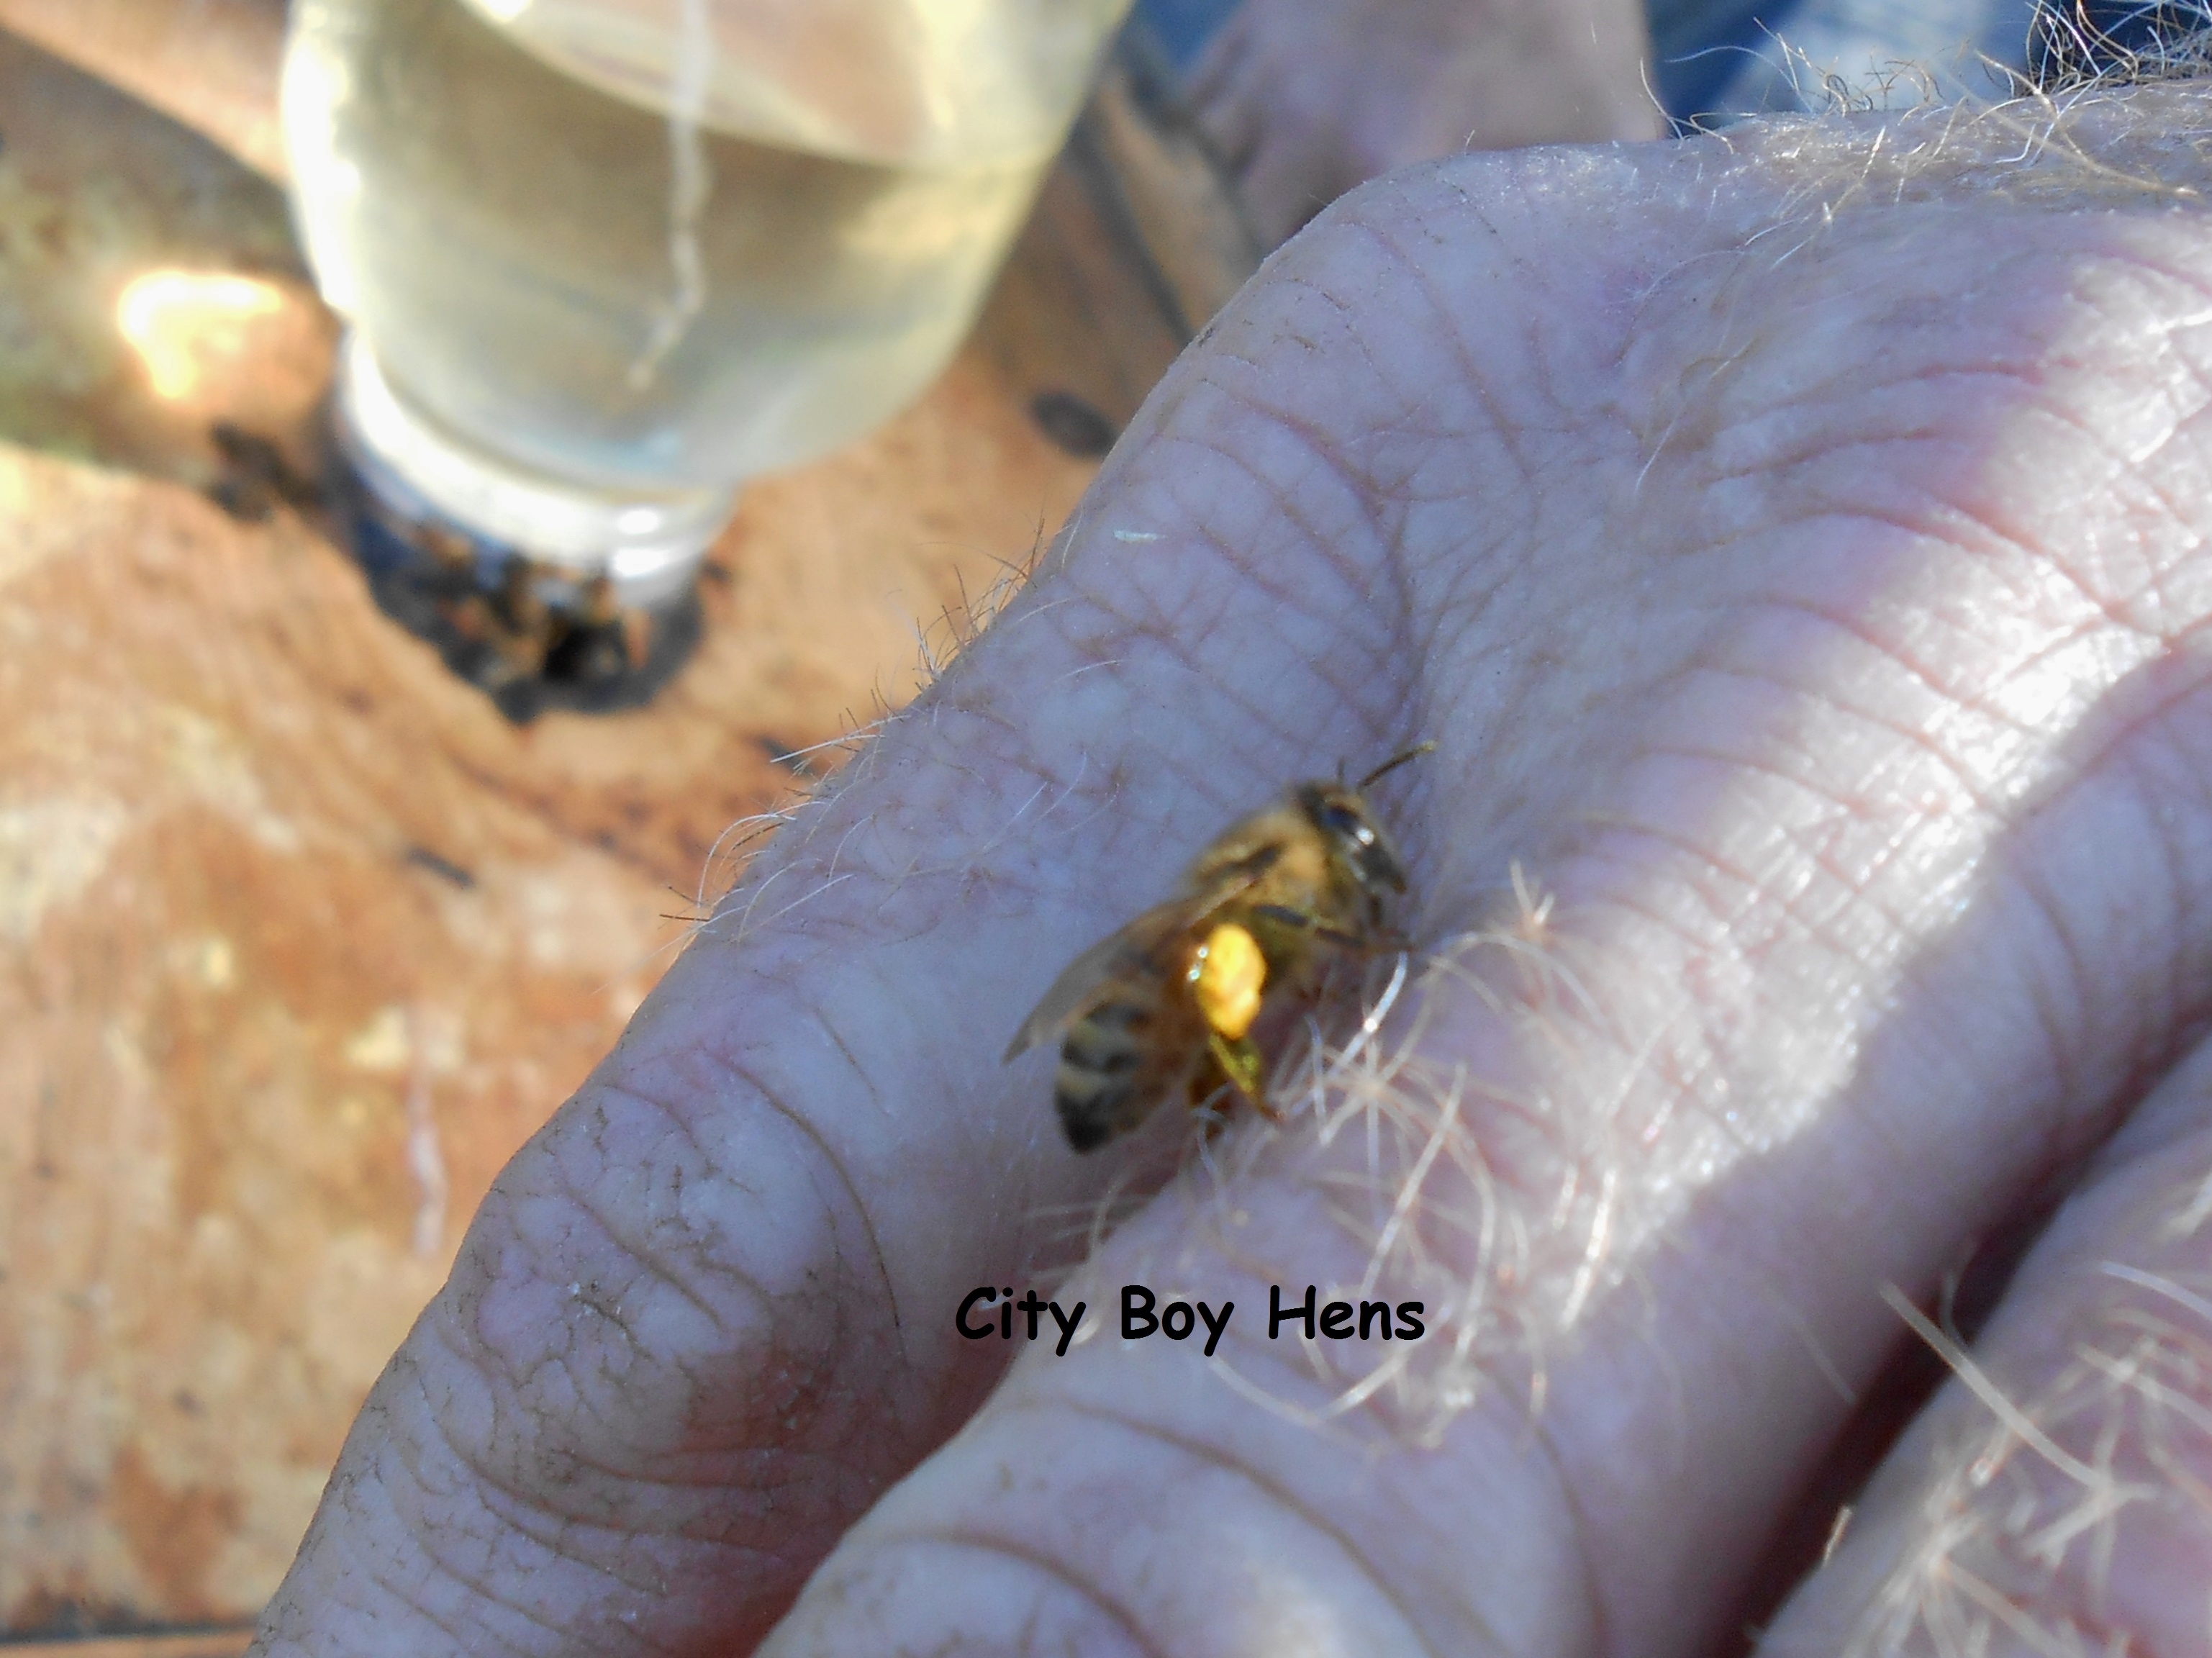
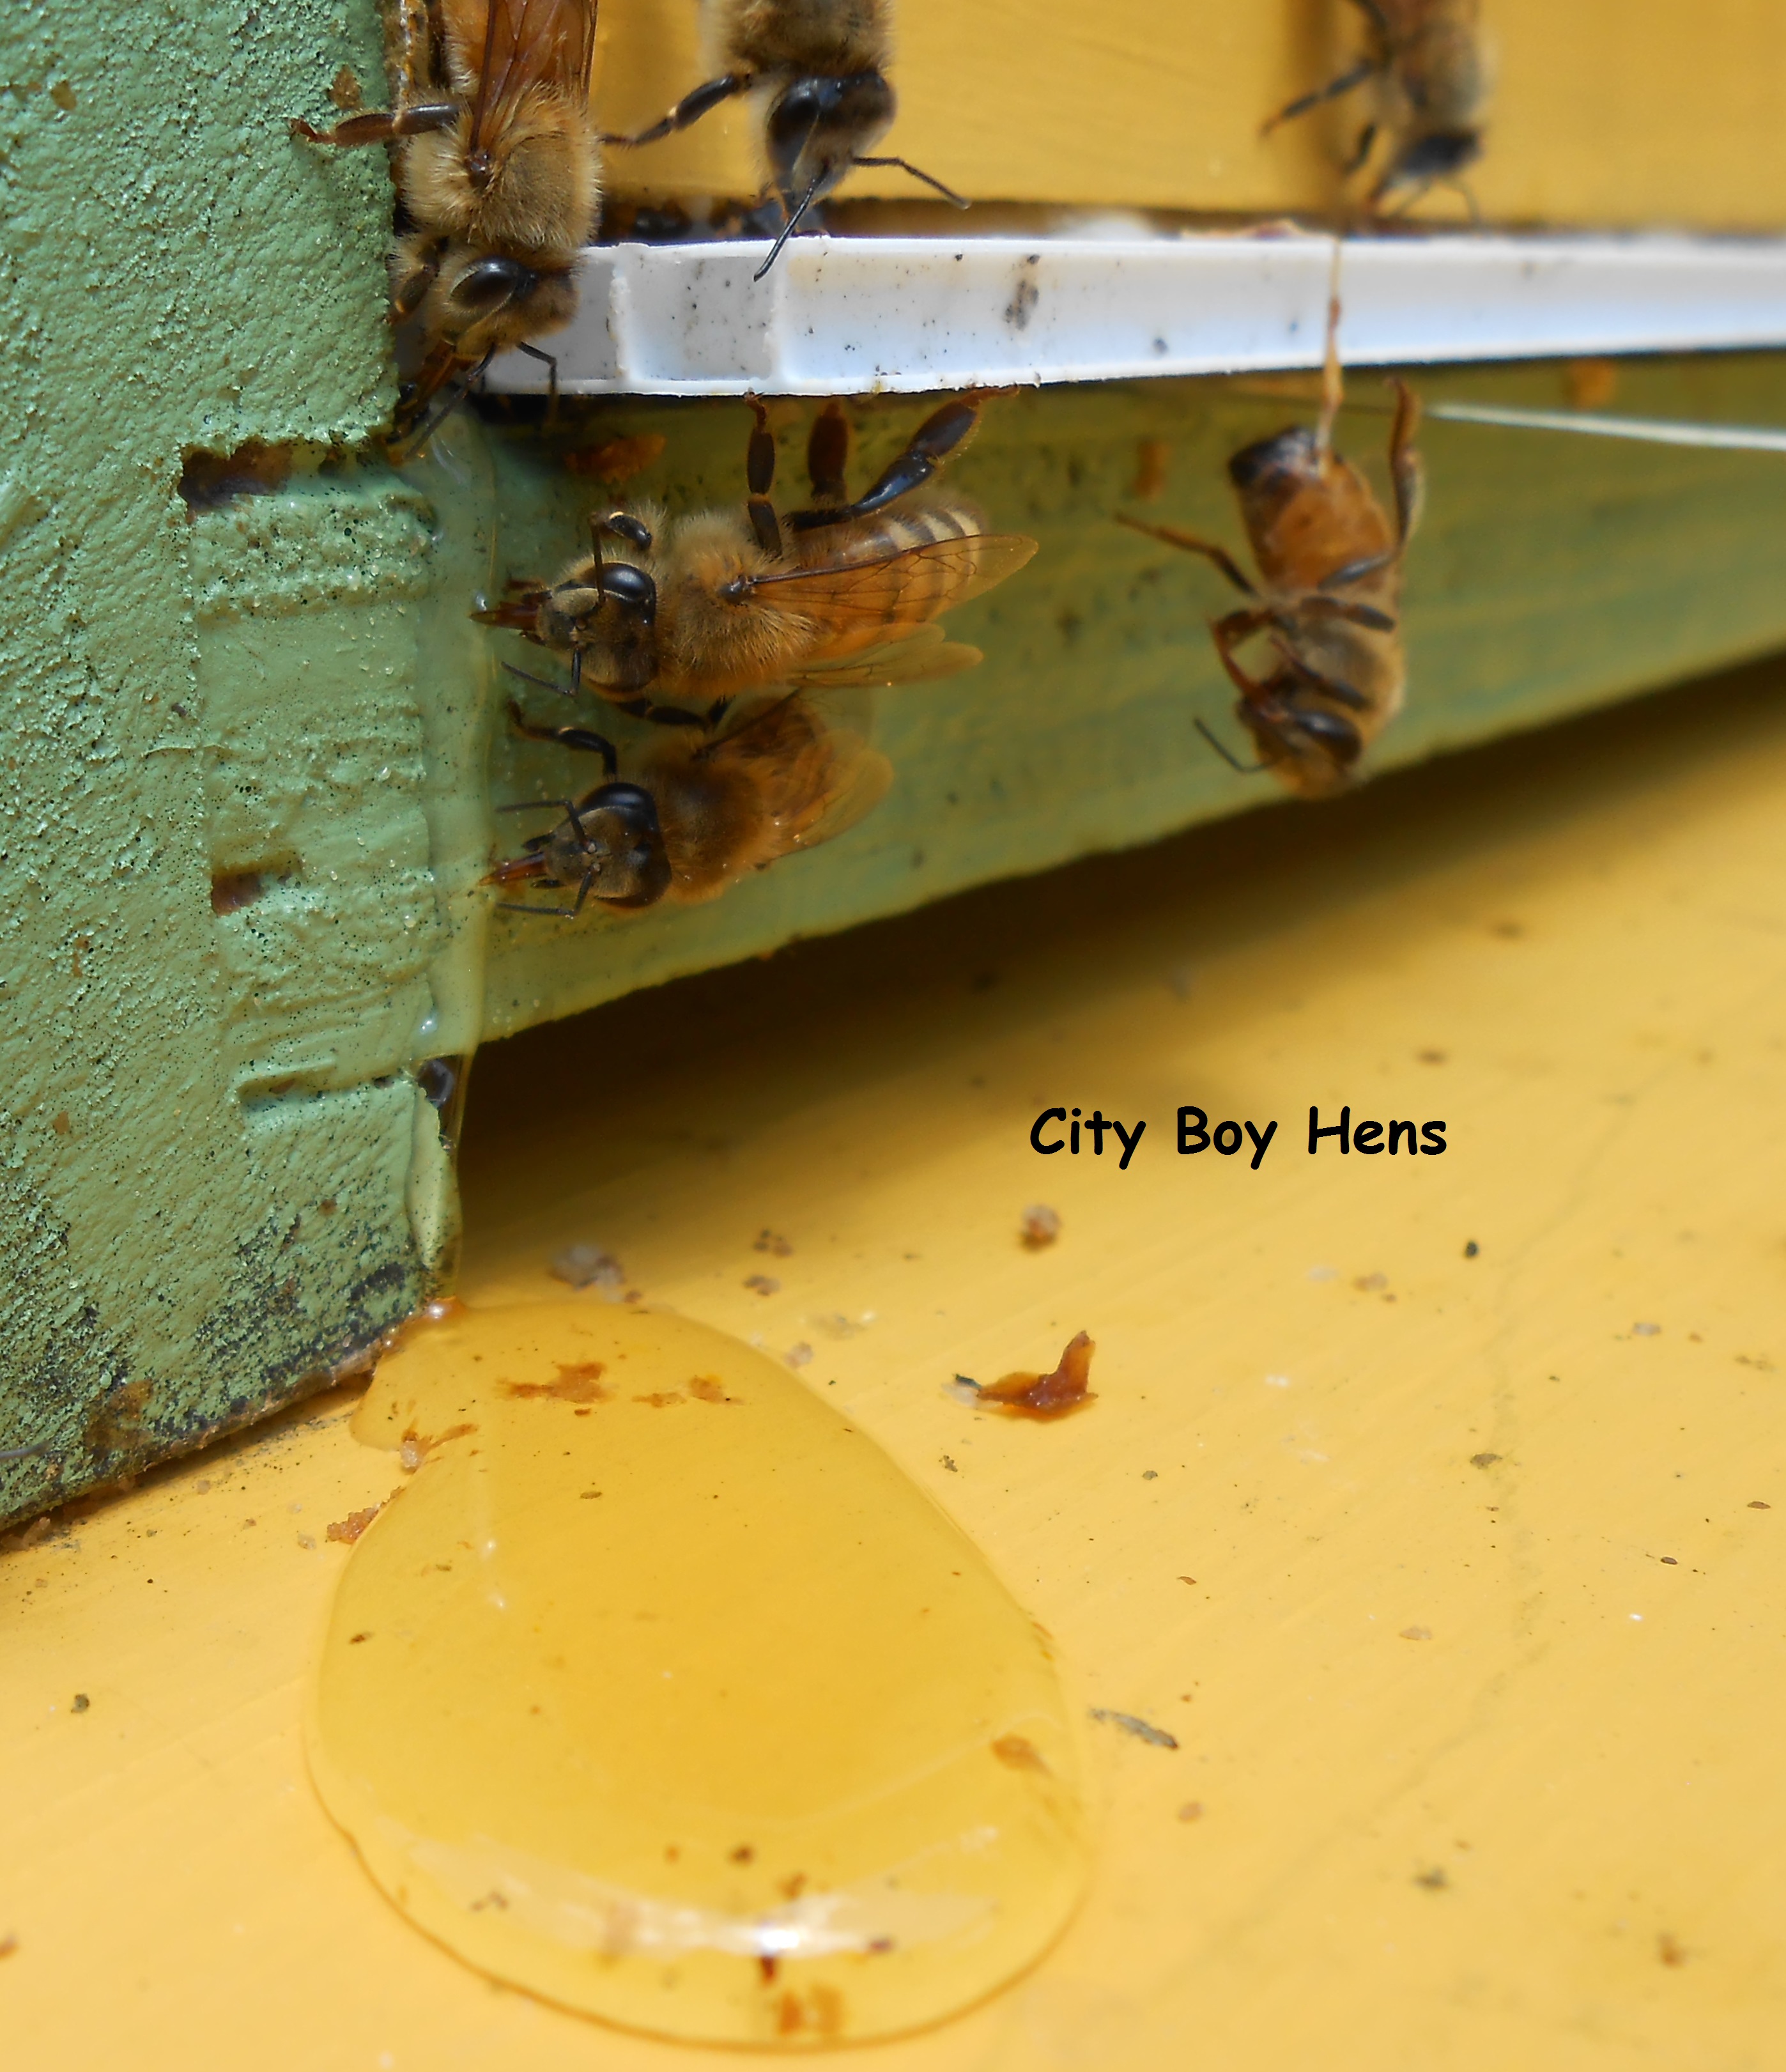
It’s been pretty darn cold up here in Southern Ontario this week and I can’t stop thinking about honeybees.  Maybe it’s because the Winter allows for time to finally get around to some other interests that seem to get crowded out during the warmer months.  Anyways, this winter I am bound and determined to make 2 Langstroth honey bee hives from scratch.  The drive to do so comes from 2 forces.  First, I’ve been working with wood for the better part of 25 years and secondly, I definitely became smitten with “the bees” last year when I got my first introduction to beekeeping up near our cottage.  So….over the next few months, I’m going to post  different segments on how to build your own hive.  I don’t mean assembling purchased parts.  I mean building the real deal.  By the end of it all, I’ll have built 2 complete hives.  I hope that I’ll inspire you to do the same!

Making your own honey bee hive can be rewarding on a number of fronts.  First, there is a cost savings (around 30 %) which will really add up if you want more than 1 hive.  Second, there is the personal satisfaction in knowing that you built your own beehive.  But, if you acquaint time with money and/or have little or no basic cabinetry skills, than purchasing a beehive may be the right choice for you.

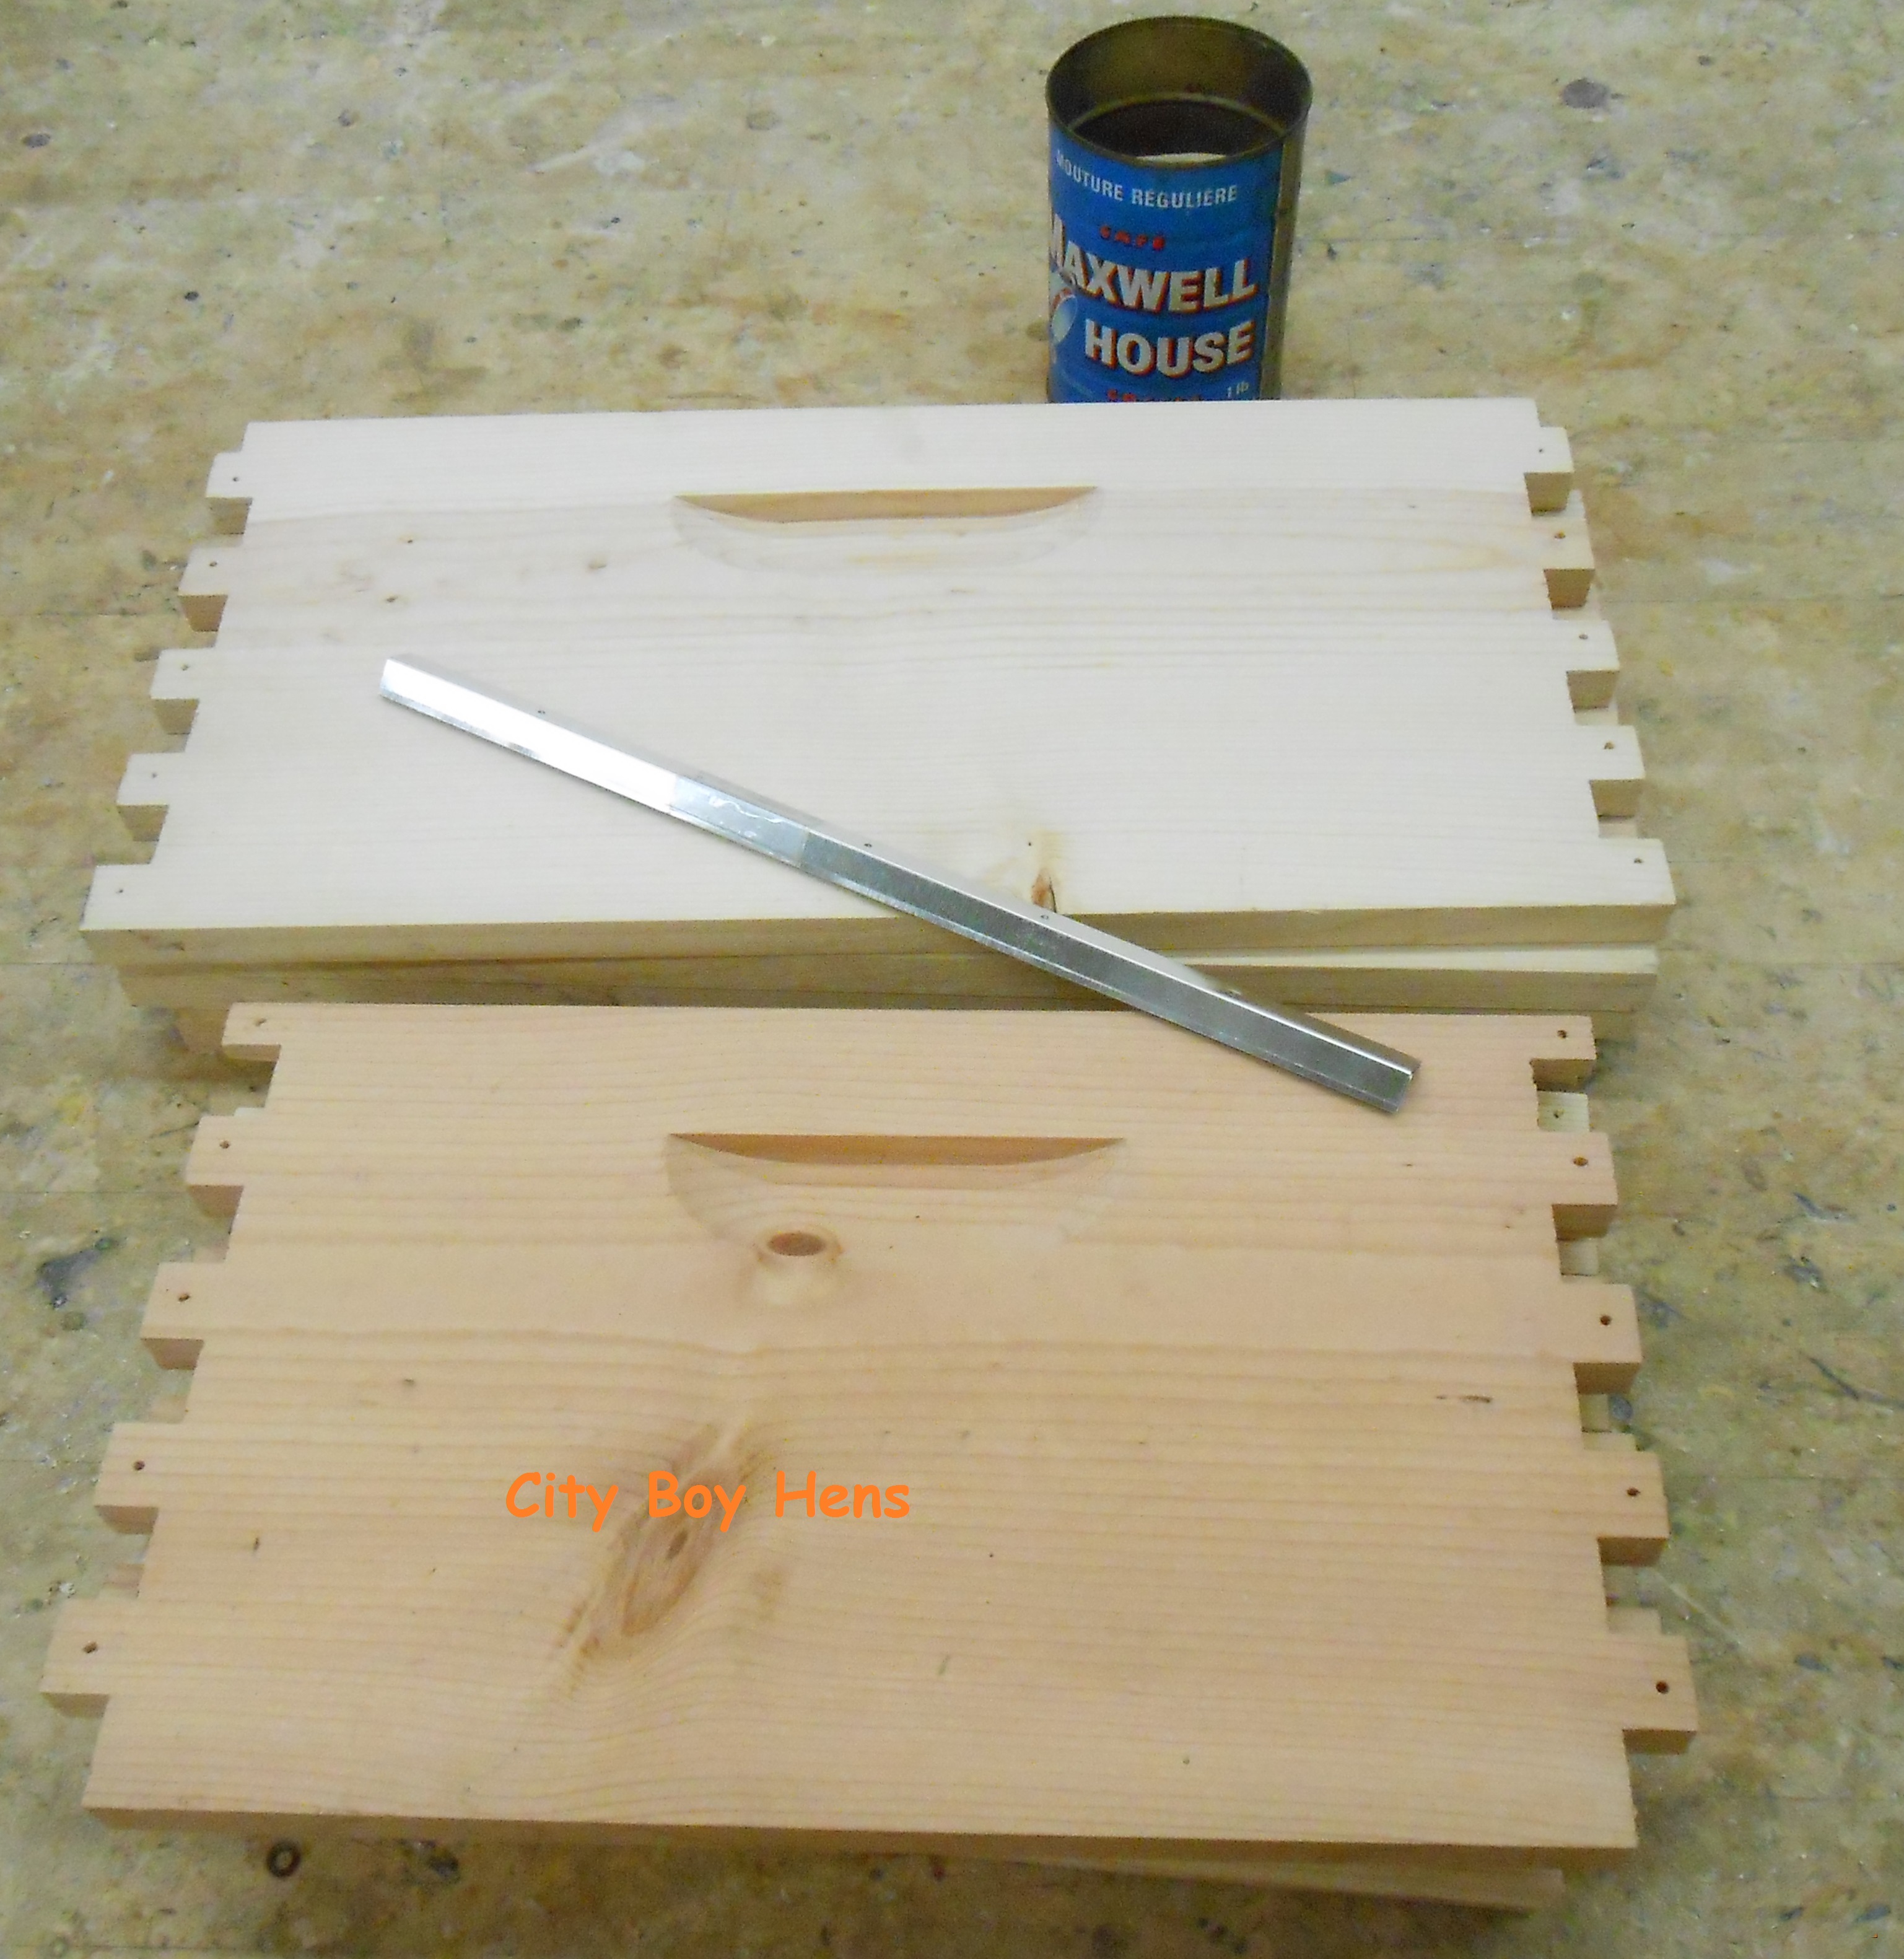
My version of the Langstroth hive differs from the traditional hive body in that I do not use a box joint or notched hive handles.  Instead, I use a rabbet joint and screws to assemble the boxes and “homemade” handles which are screwed onto each box.  It’s a whole lot easier, a whole lot safer to make and requires a lot less experience for the “home-hobby” guy or gal.

So…..lets get started.  But first, lets talk about safety.  Make sure that you read and understand how to SAFELY operate your power equipment.  In  some of the pictures below, the safety guard has been removed so that you can get a better understanding of the photo.  NEVER operate your equipment without a guard in place!

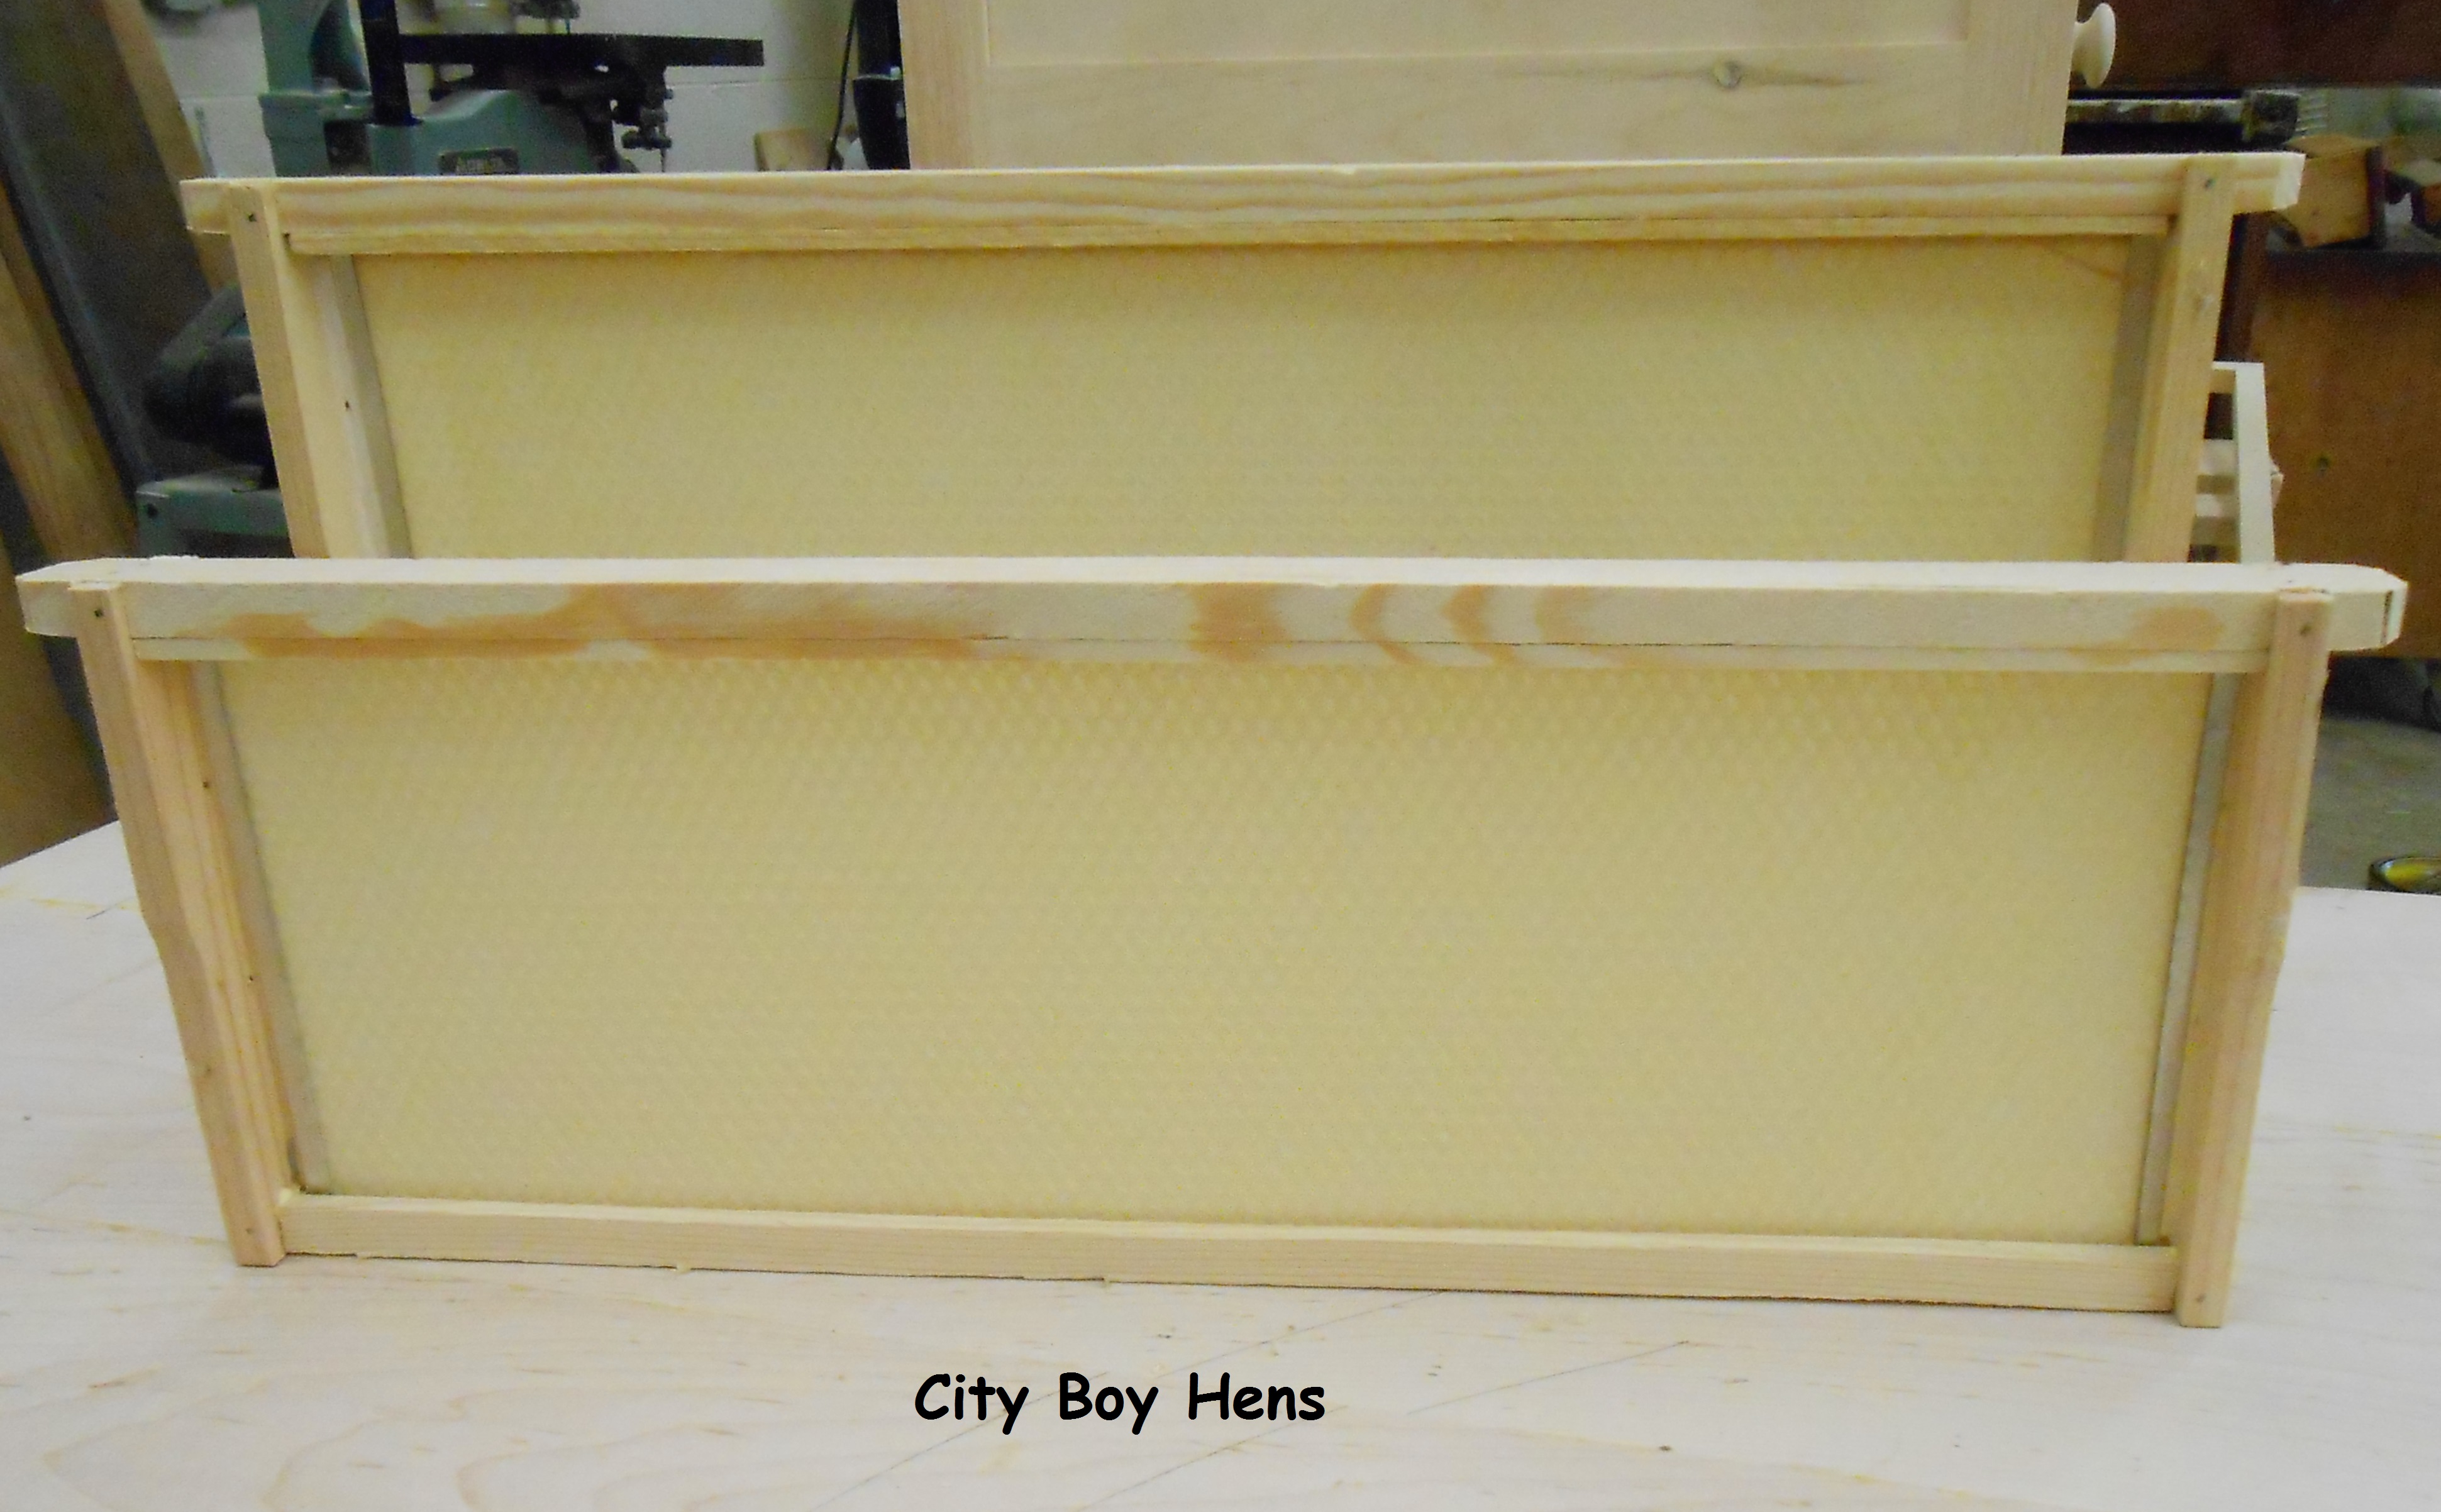
The only difference between the honey bee boxes is depth.  For the purpose of this post, I will be making a box which is 6 -5/8″ deep.  If you want to make a shallow box, it will be 5-11/16″ deep and a deep box will be 9-5/8″ deep.  All parts are 3/4″ thick.

Start by ripping the boards to width.  This is best done at the table saw. Note* If you have a jointer, it would be best to make a few passes on the board edge before ripping.012

Now cross-cut your pieces to length.  This can either be done on a table saw with a miter gauge or  a miter saw that is larger than the 10″ standard saw.  Either way, make sure to use a “stopper” so that every piece is exactly the same.  For the fronts and backs, cut them at 15-1/2″.  For the sides, cut them at 19-7/8″.  Note* When using the table saw, never butt the lumber up to the rip fence when cross-cutting. Make sure to have an axillary fence or scrap of wood clamped to the fence for this operation.  This will definitely prevent the wood from binding between the blade and the fence preventing dangerous kick-back. 016

Now, cut the rabbet joint in the sides.  The rabbet will be 3/8″ deep and 3/4″ wide.  This can be done with a router and rabbet bit or 2 passes on the table saw.  For the purpose of this post, I am doing the rabbet on the table saw.  First, start by cutting the rabbet to its correct depth with the workpiece facedown on the table saw. Once again, use an auxiliary fence or a scrap of wood clamped to the fence in order to prevent kickback. 019 Next,  stand the piece on edge to cut the rabbet to width.  Make sure to use a feather board to help keep your piece straight and cover the exposed blade.026

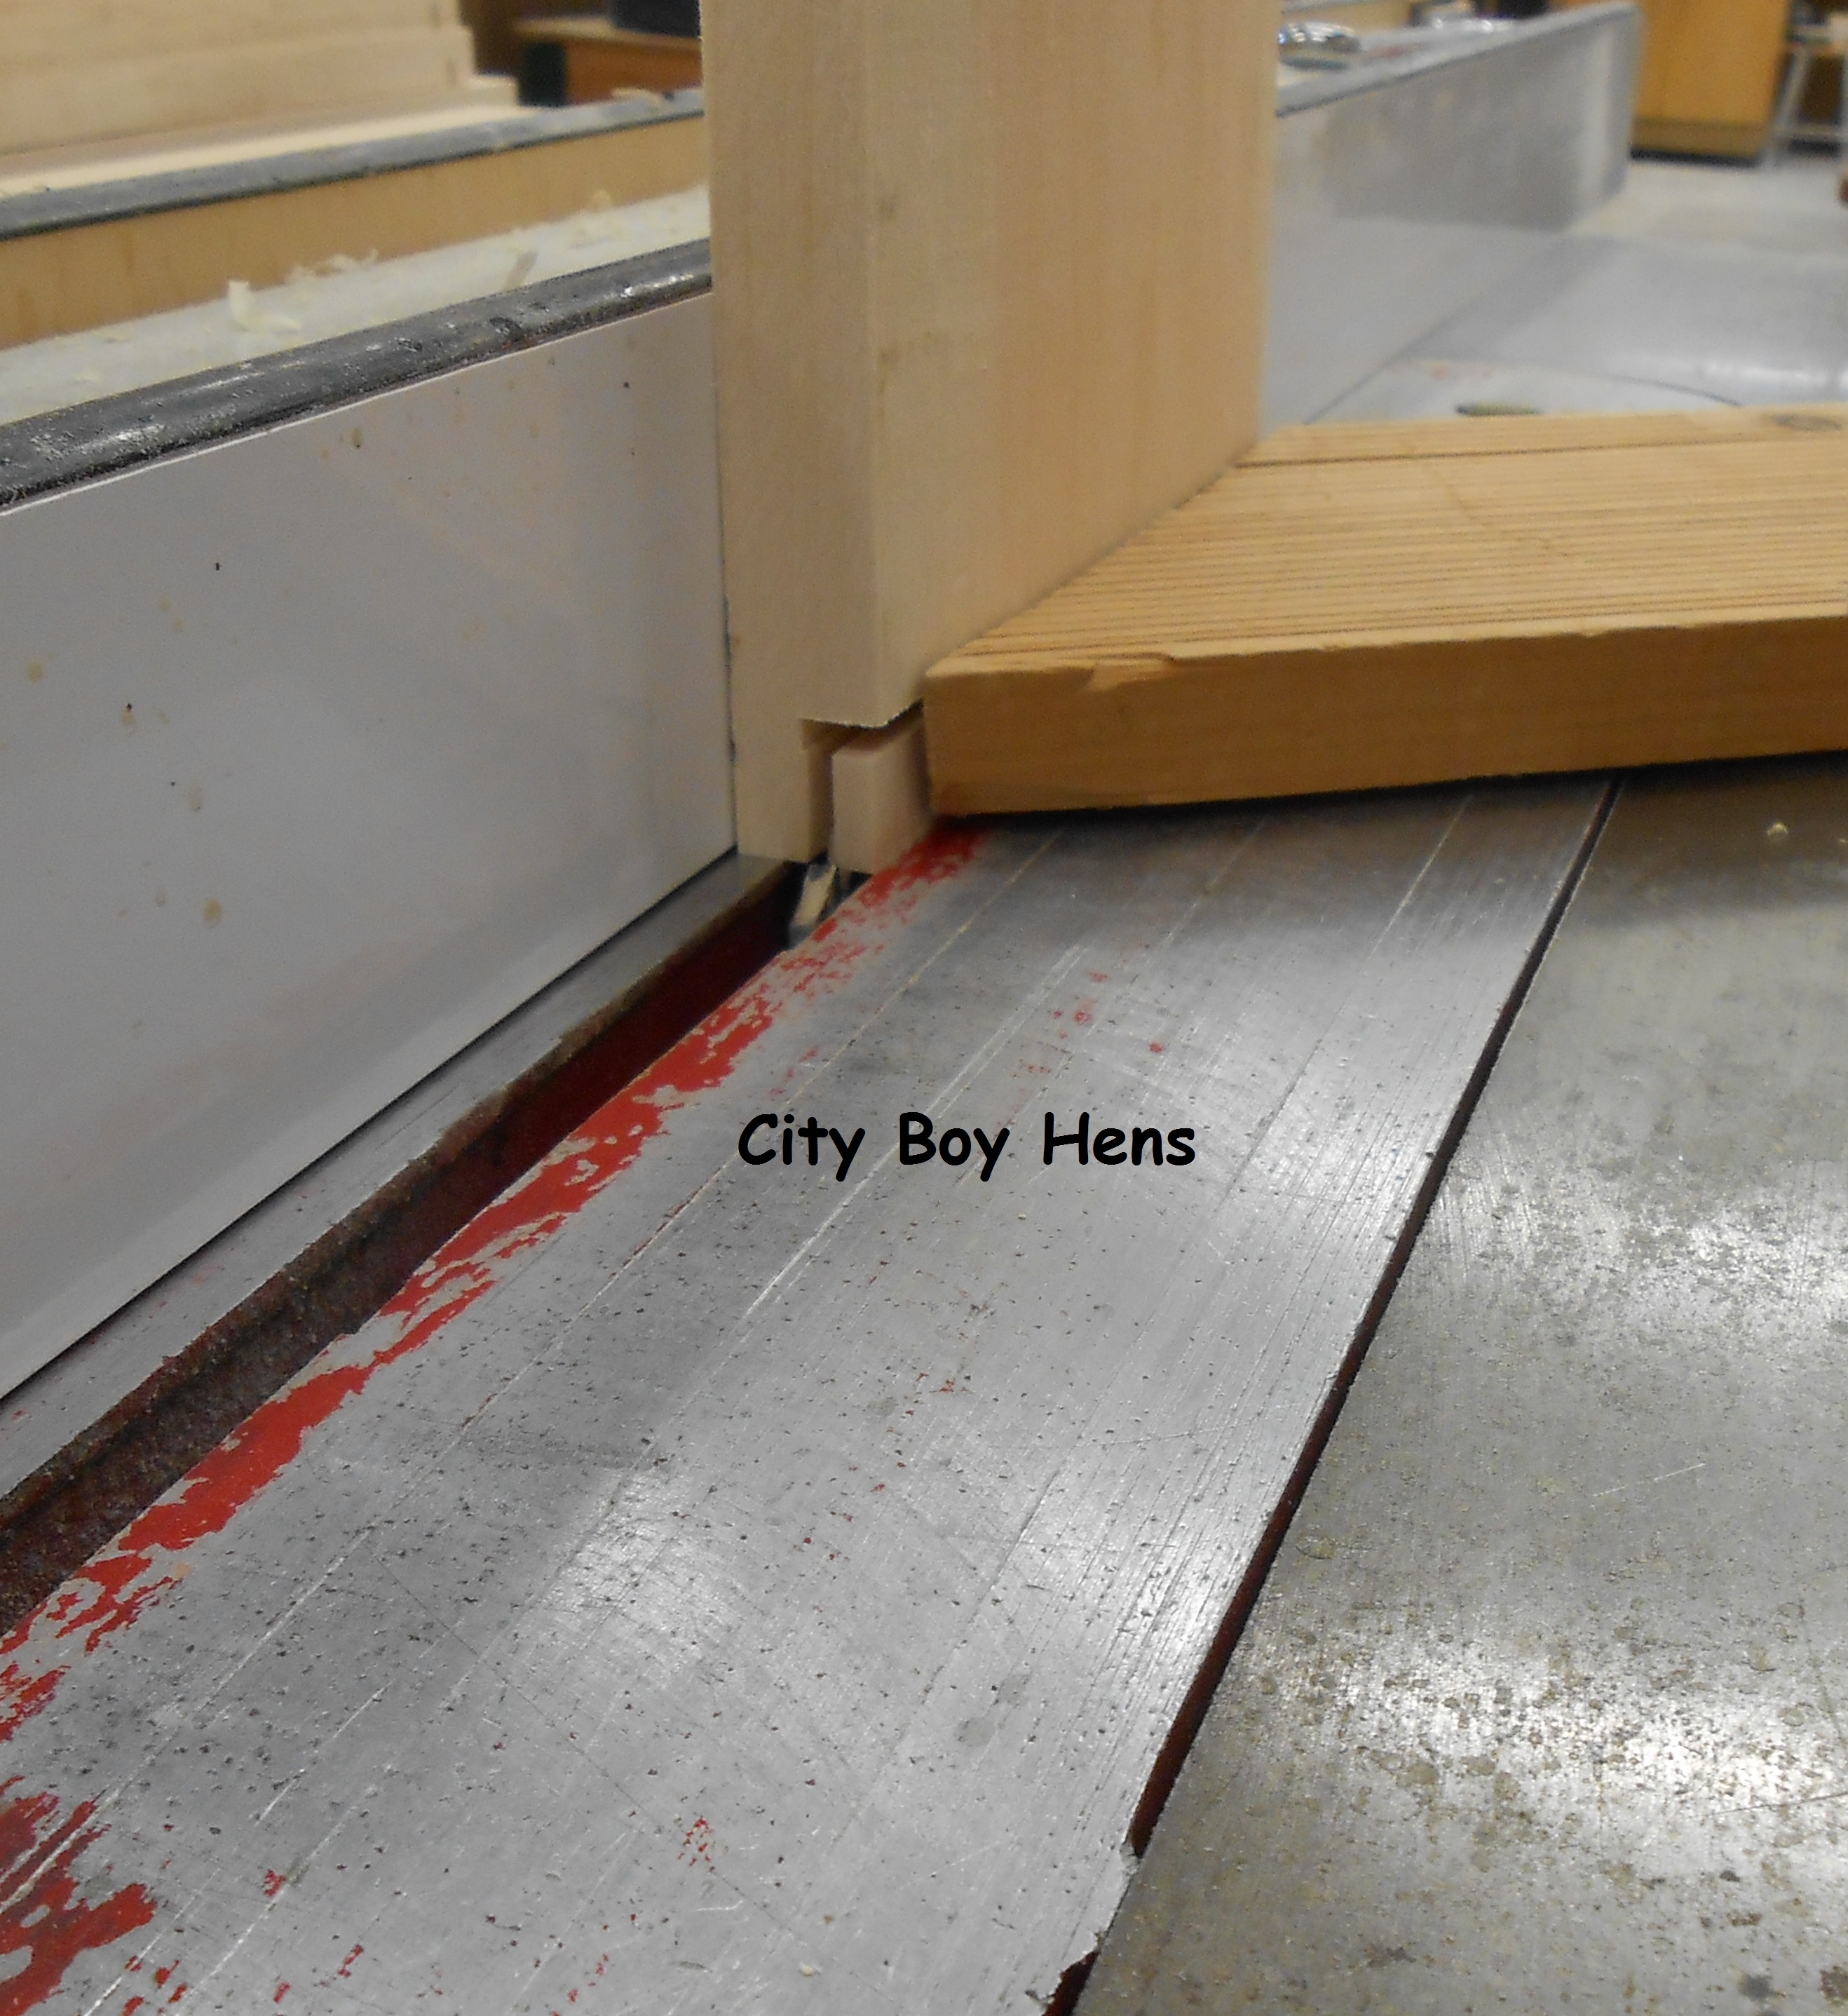
In the picture below, the feather board was only removed for the benefit of the picture.

025

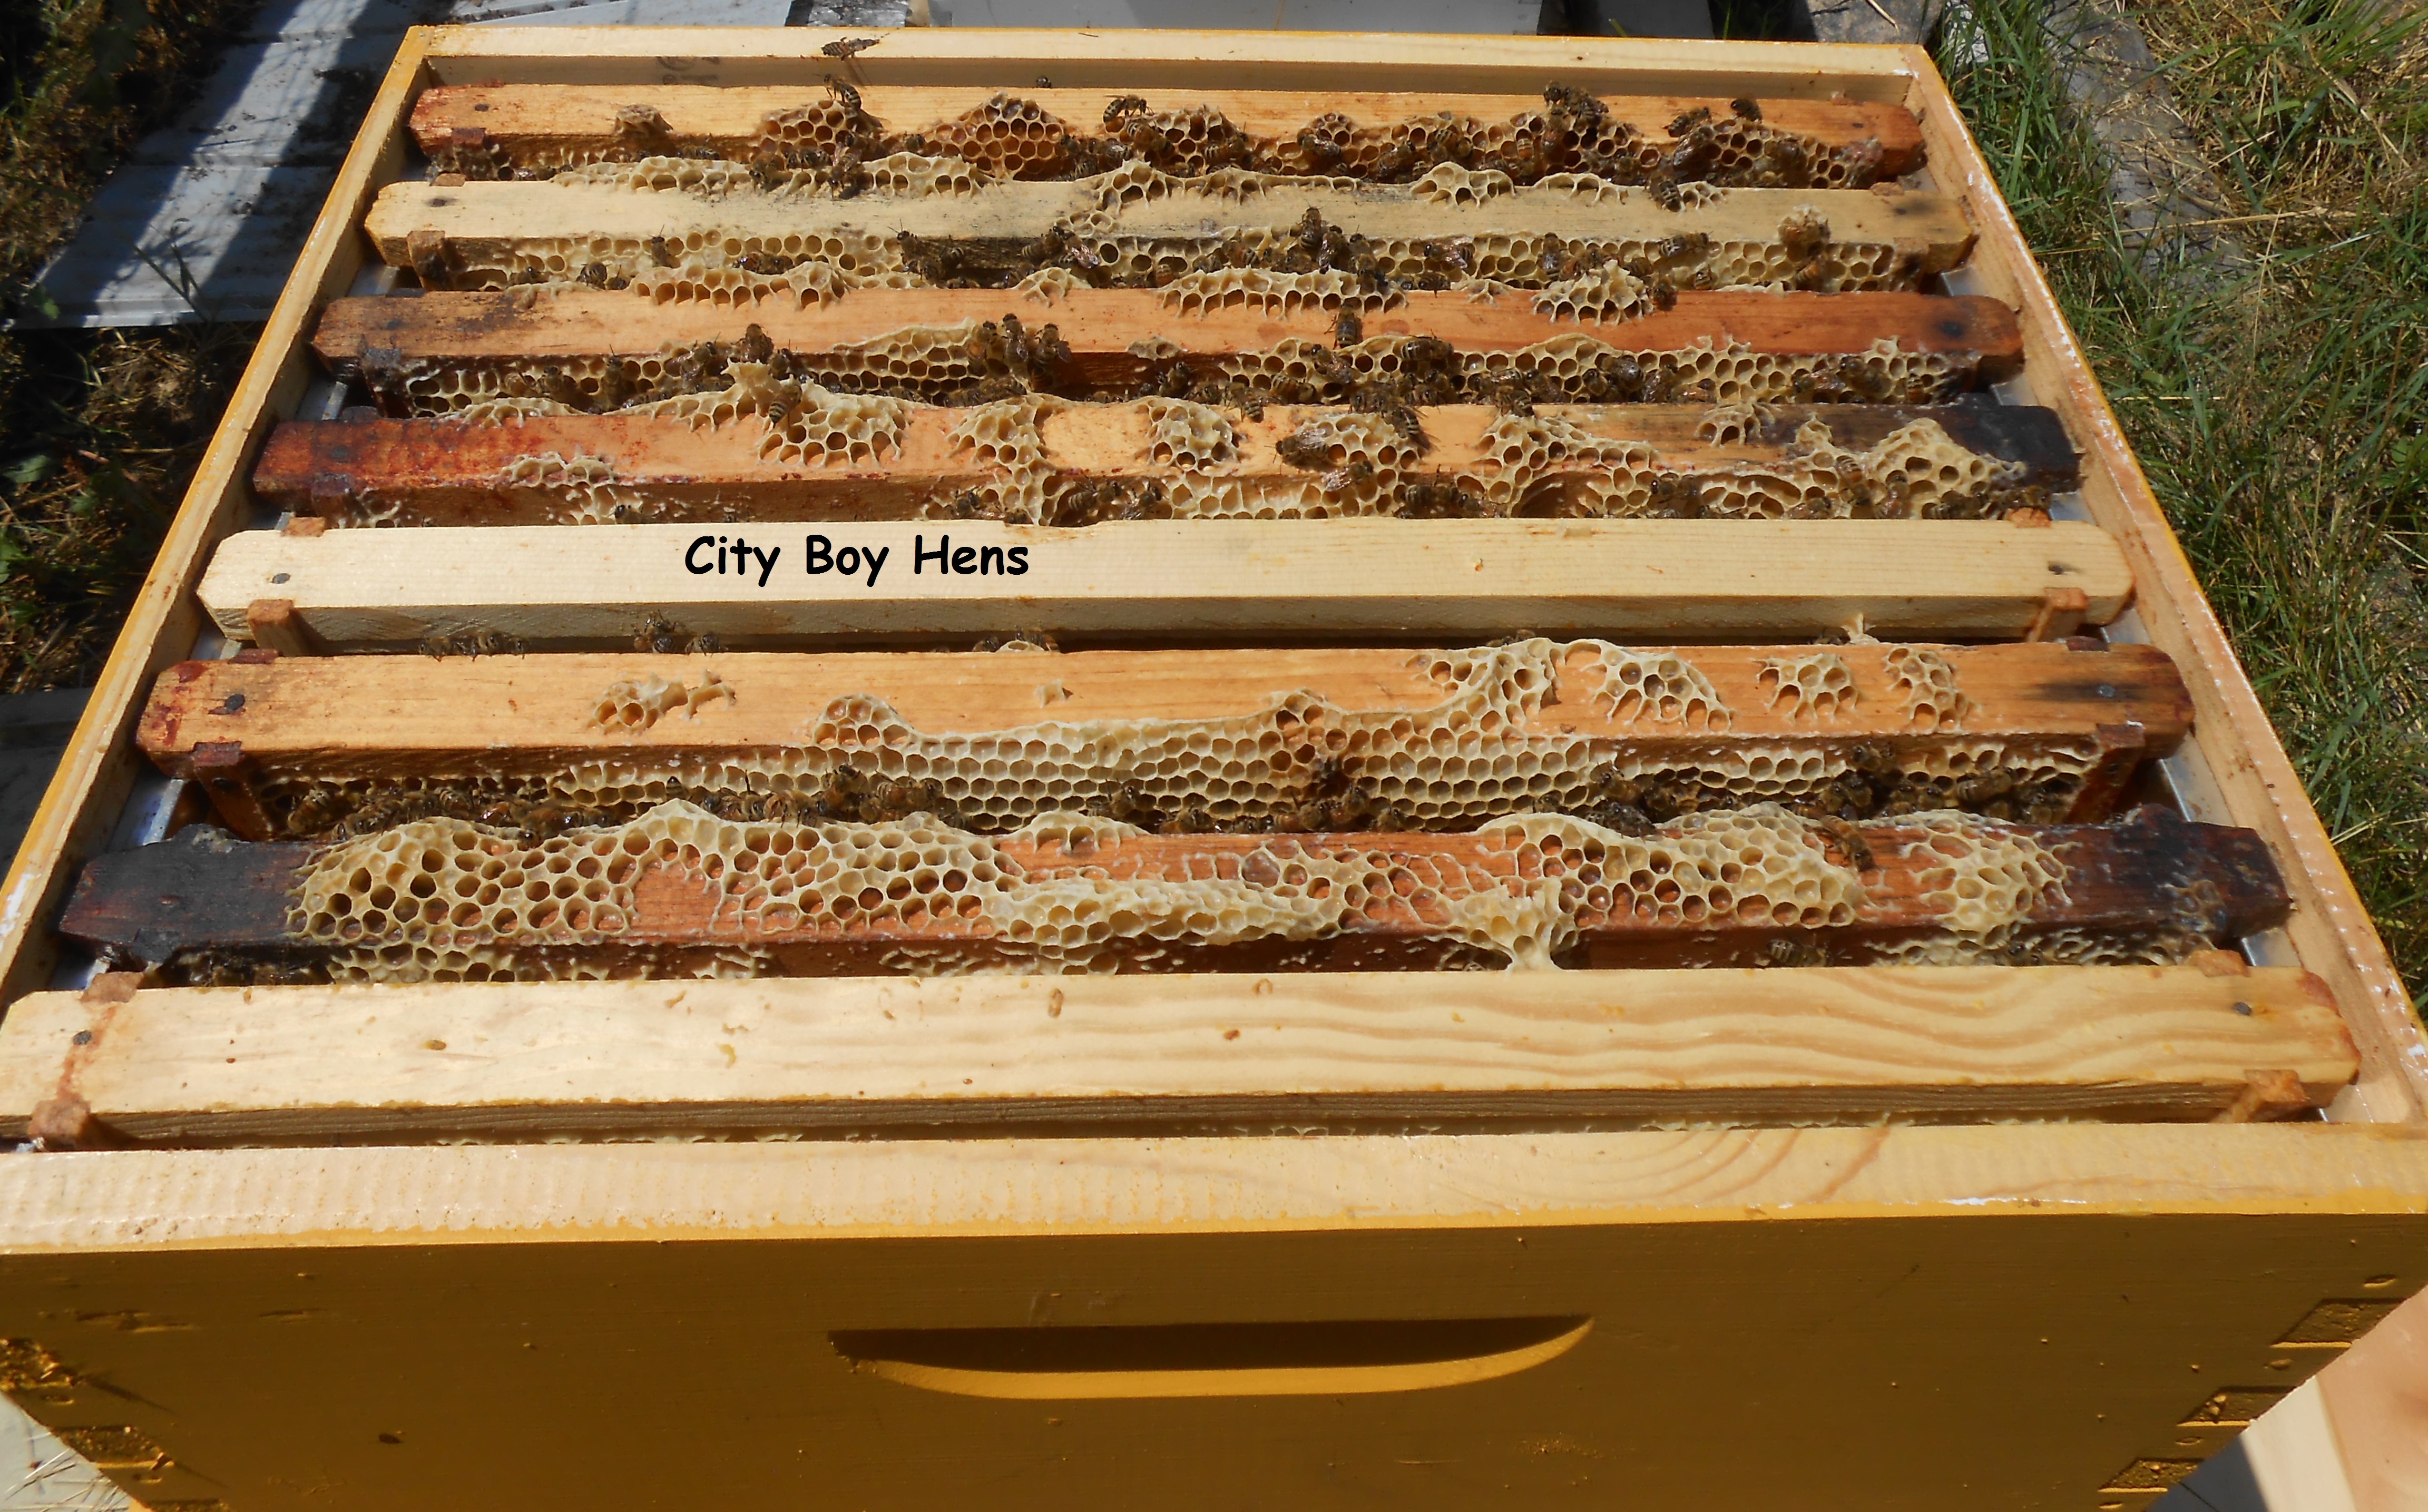
Now, cut the 5/8″ x 3/8″ rabbet for the tops of the fronts and backs (these will hold the  honey bee frames). This is done the same way as the previous rabbet.028

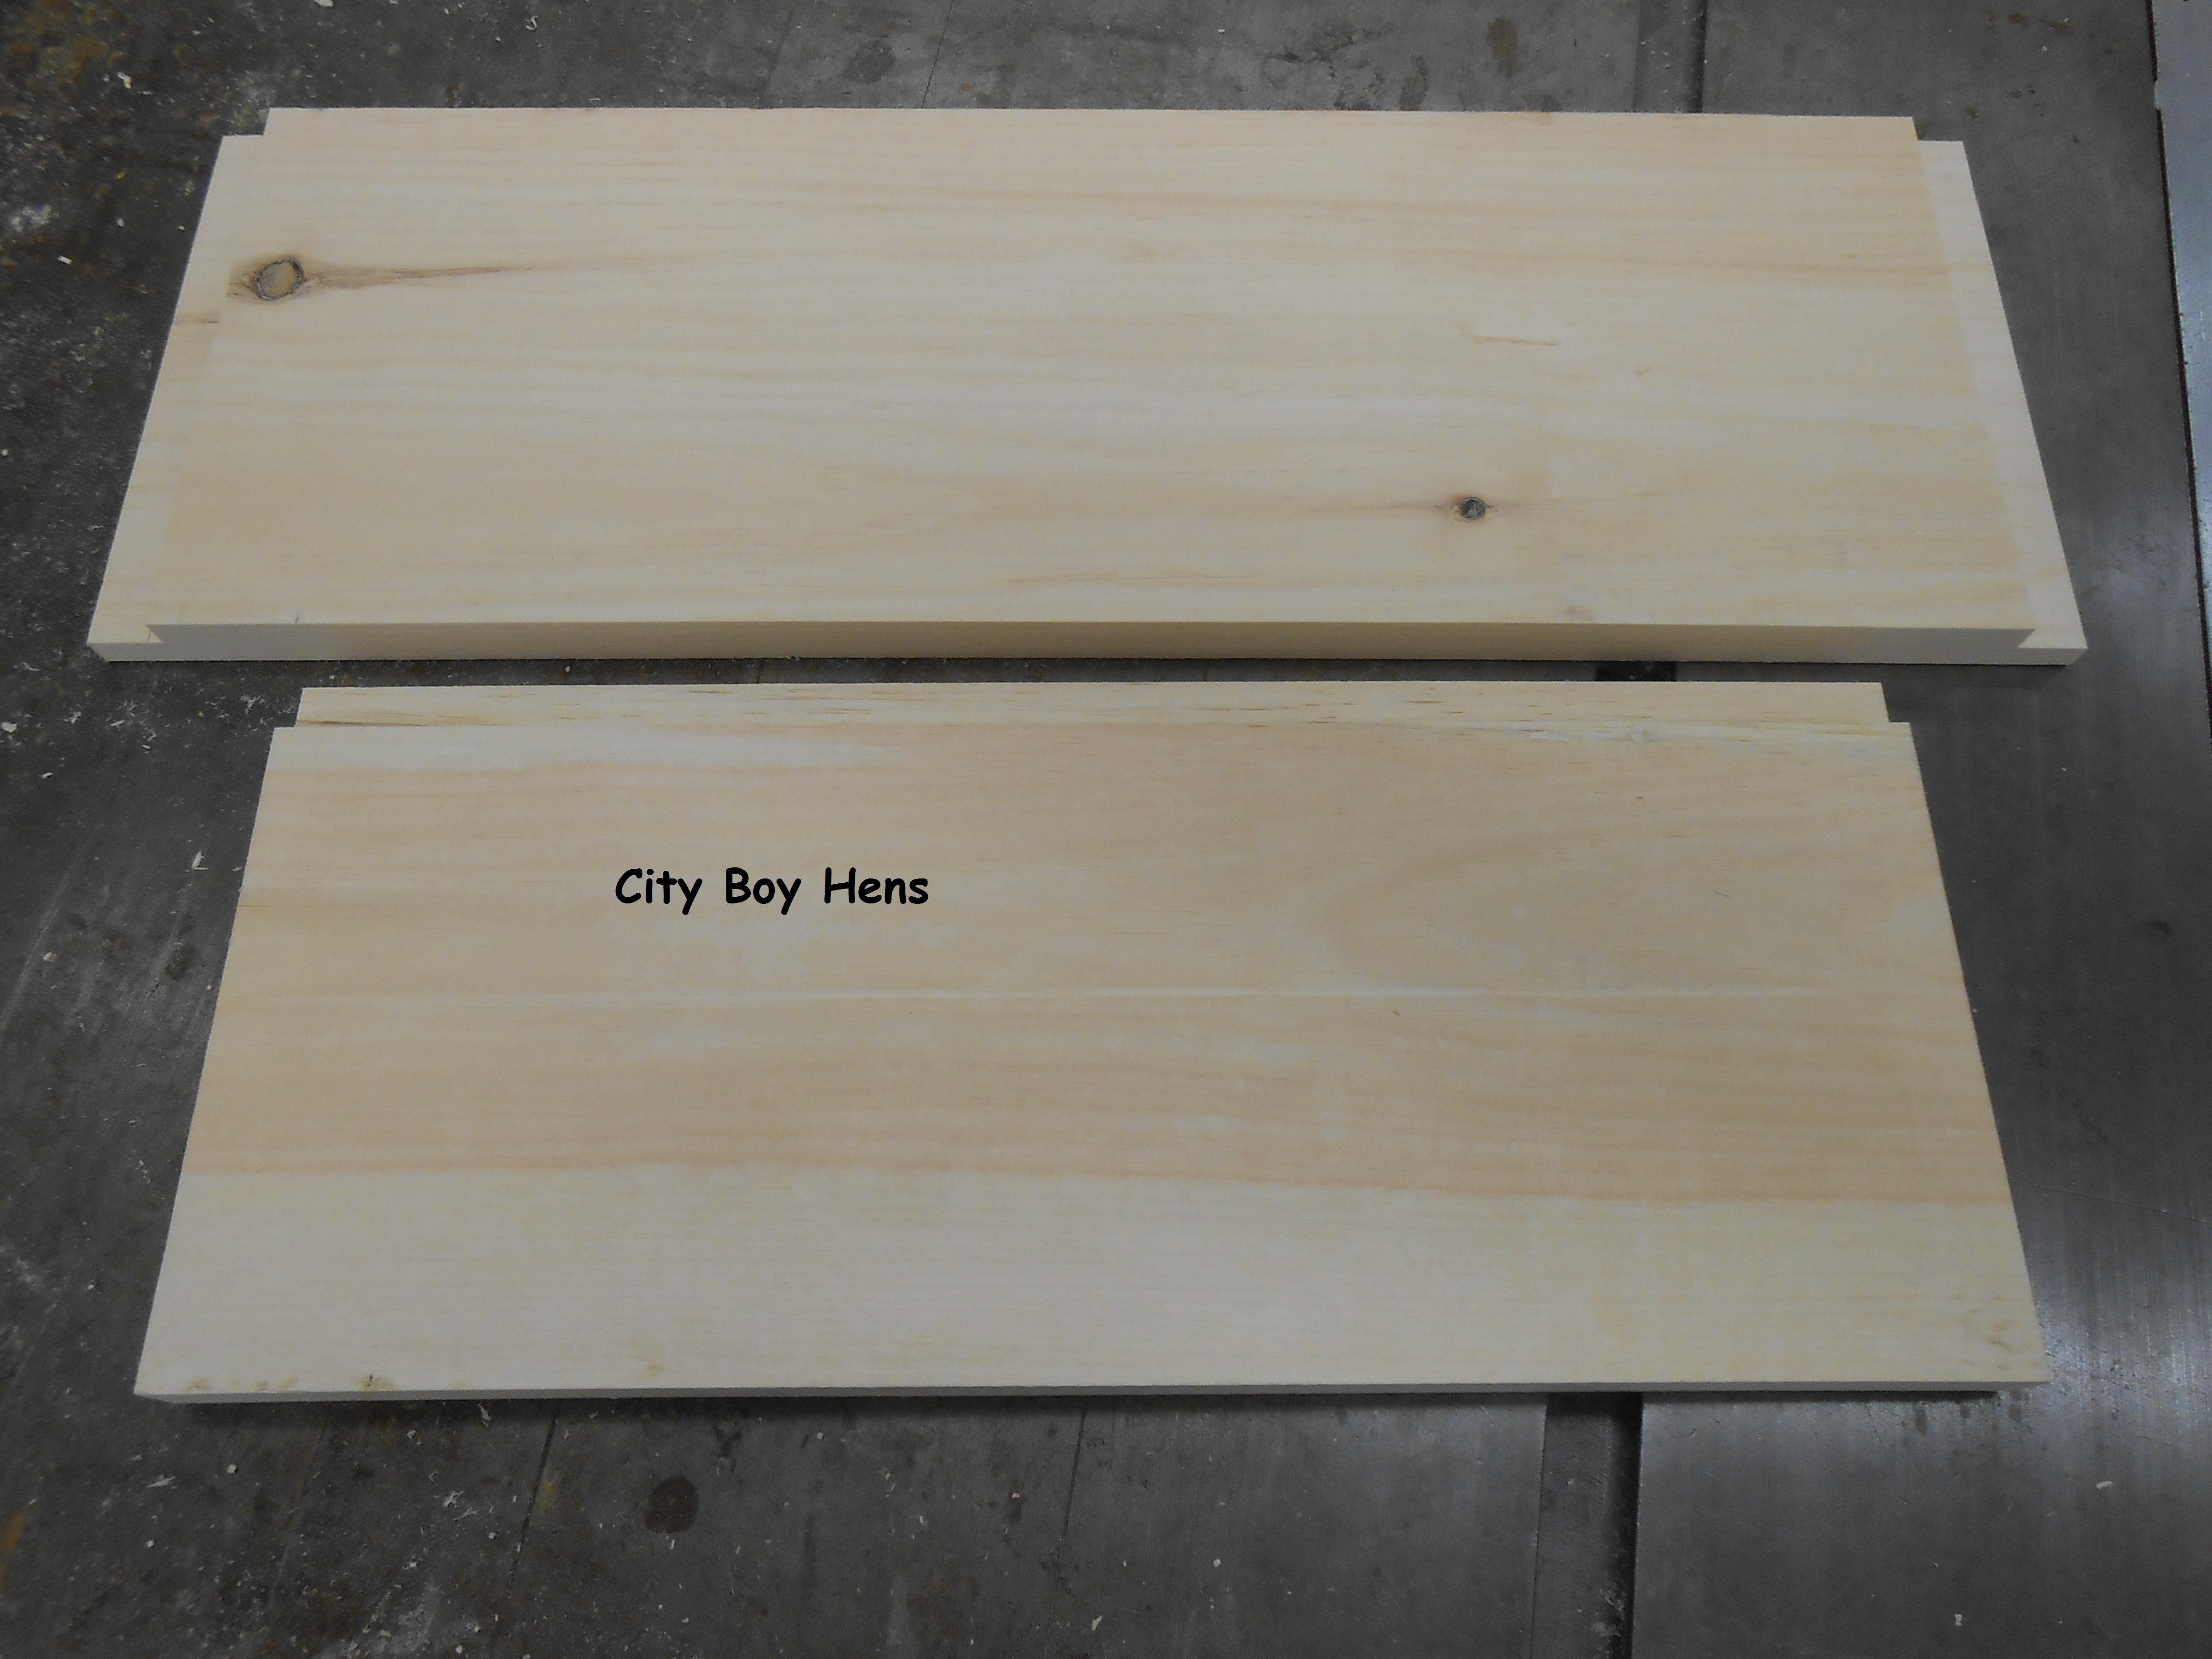
Now, using a homemade marking jig that was ripped to 3/8″ thick, mark the screw locations on both sides.  By using this “jig”, you will only have to measure out one time for all of your sides.  Simply place the jig on the edge of your board and mark the screw locations with your pencil.031

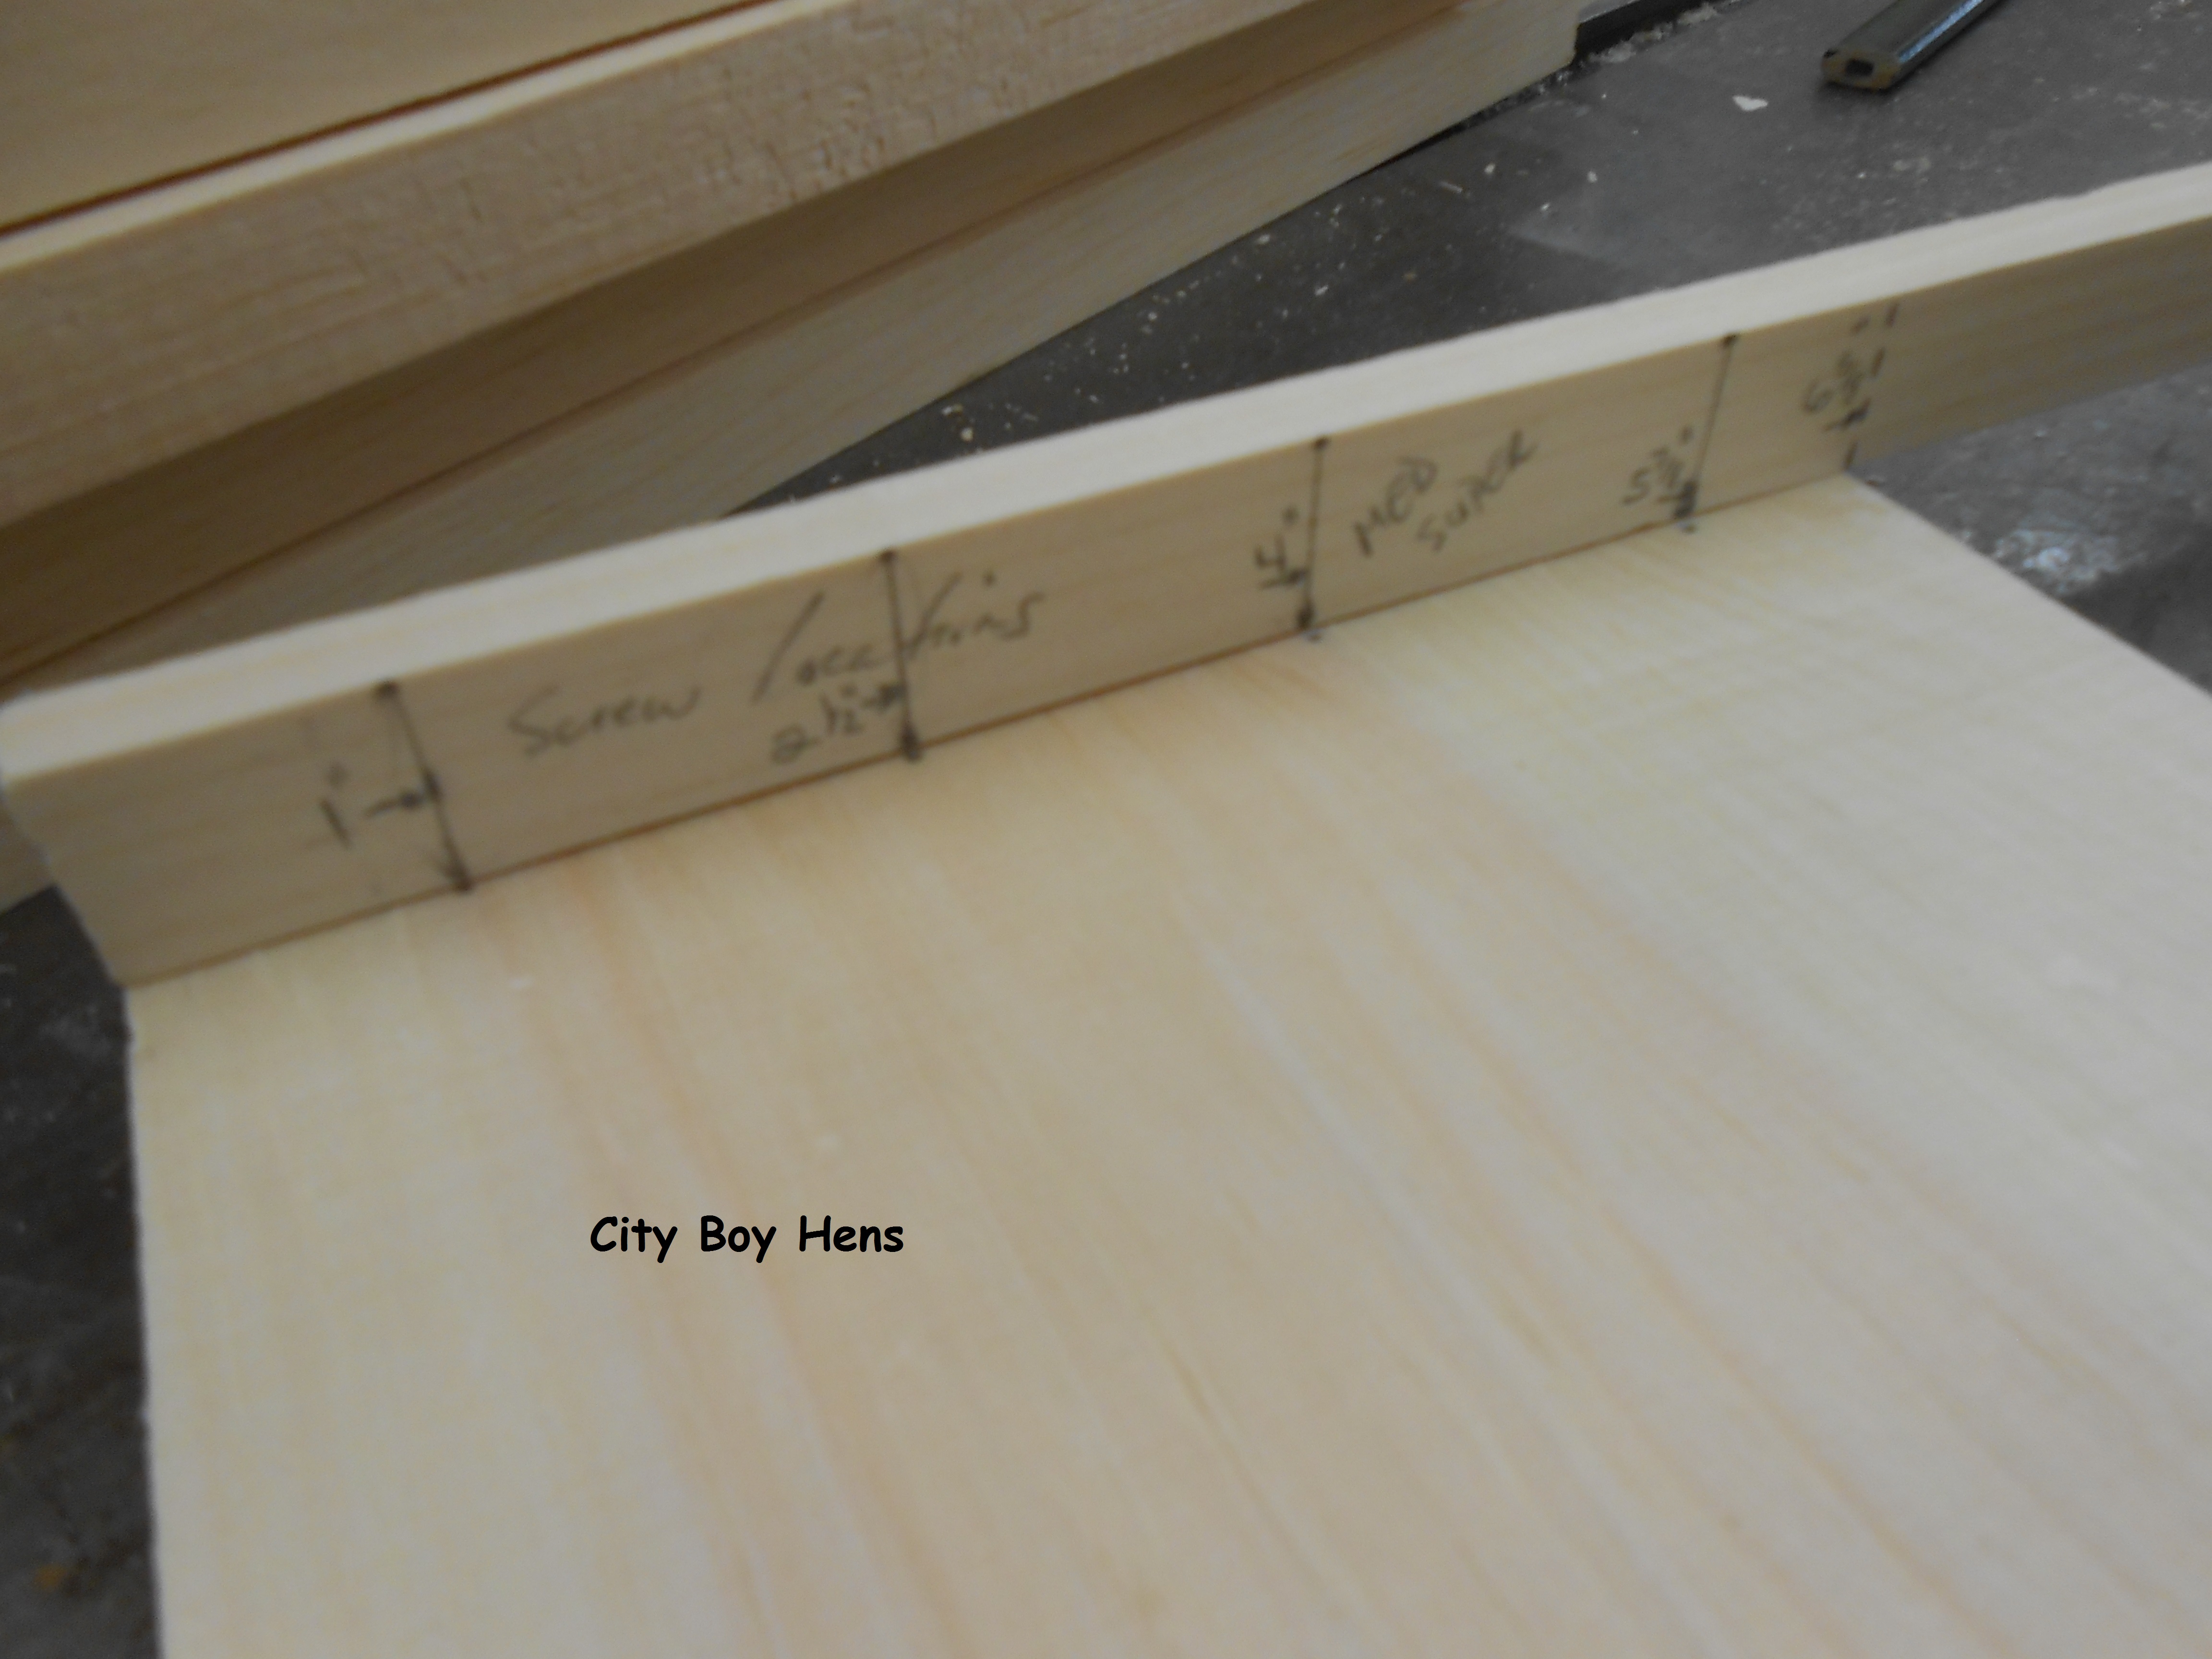
Using another template, mark out the two screw locations for each side of each box.  You will notice that there are 4 holes in this template.  That’s because it can be used to mark the handle screw locations for the front/back & the sides.   Just make sure to consistently mark your pieces from the same side.033

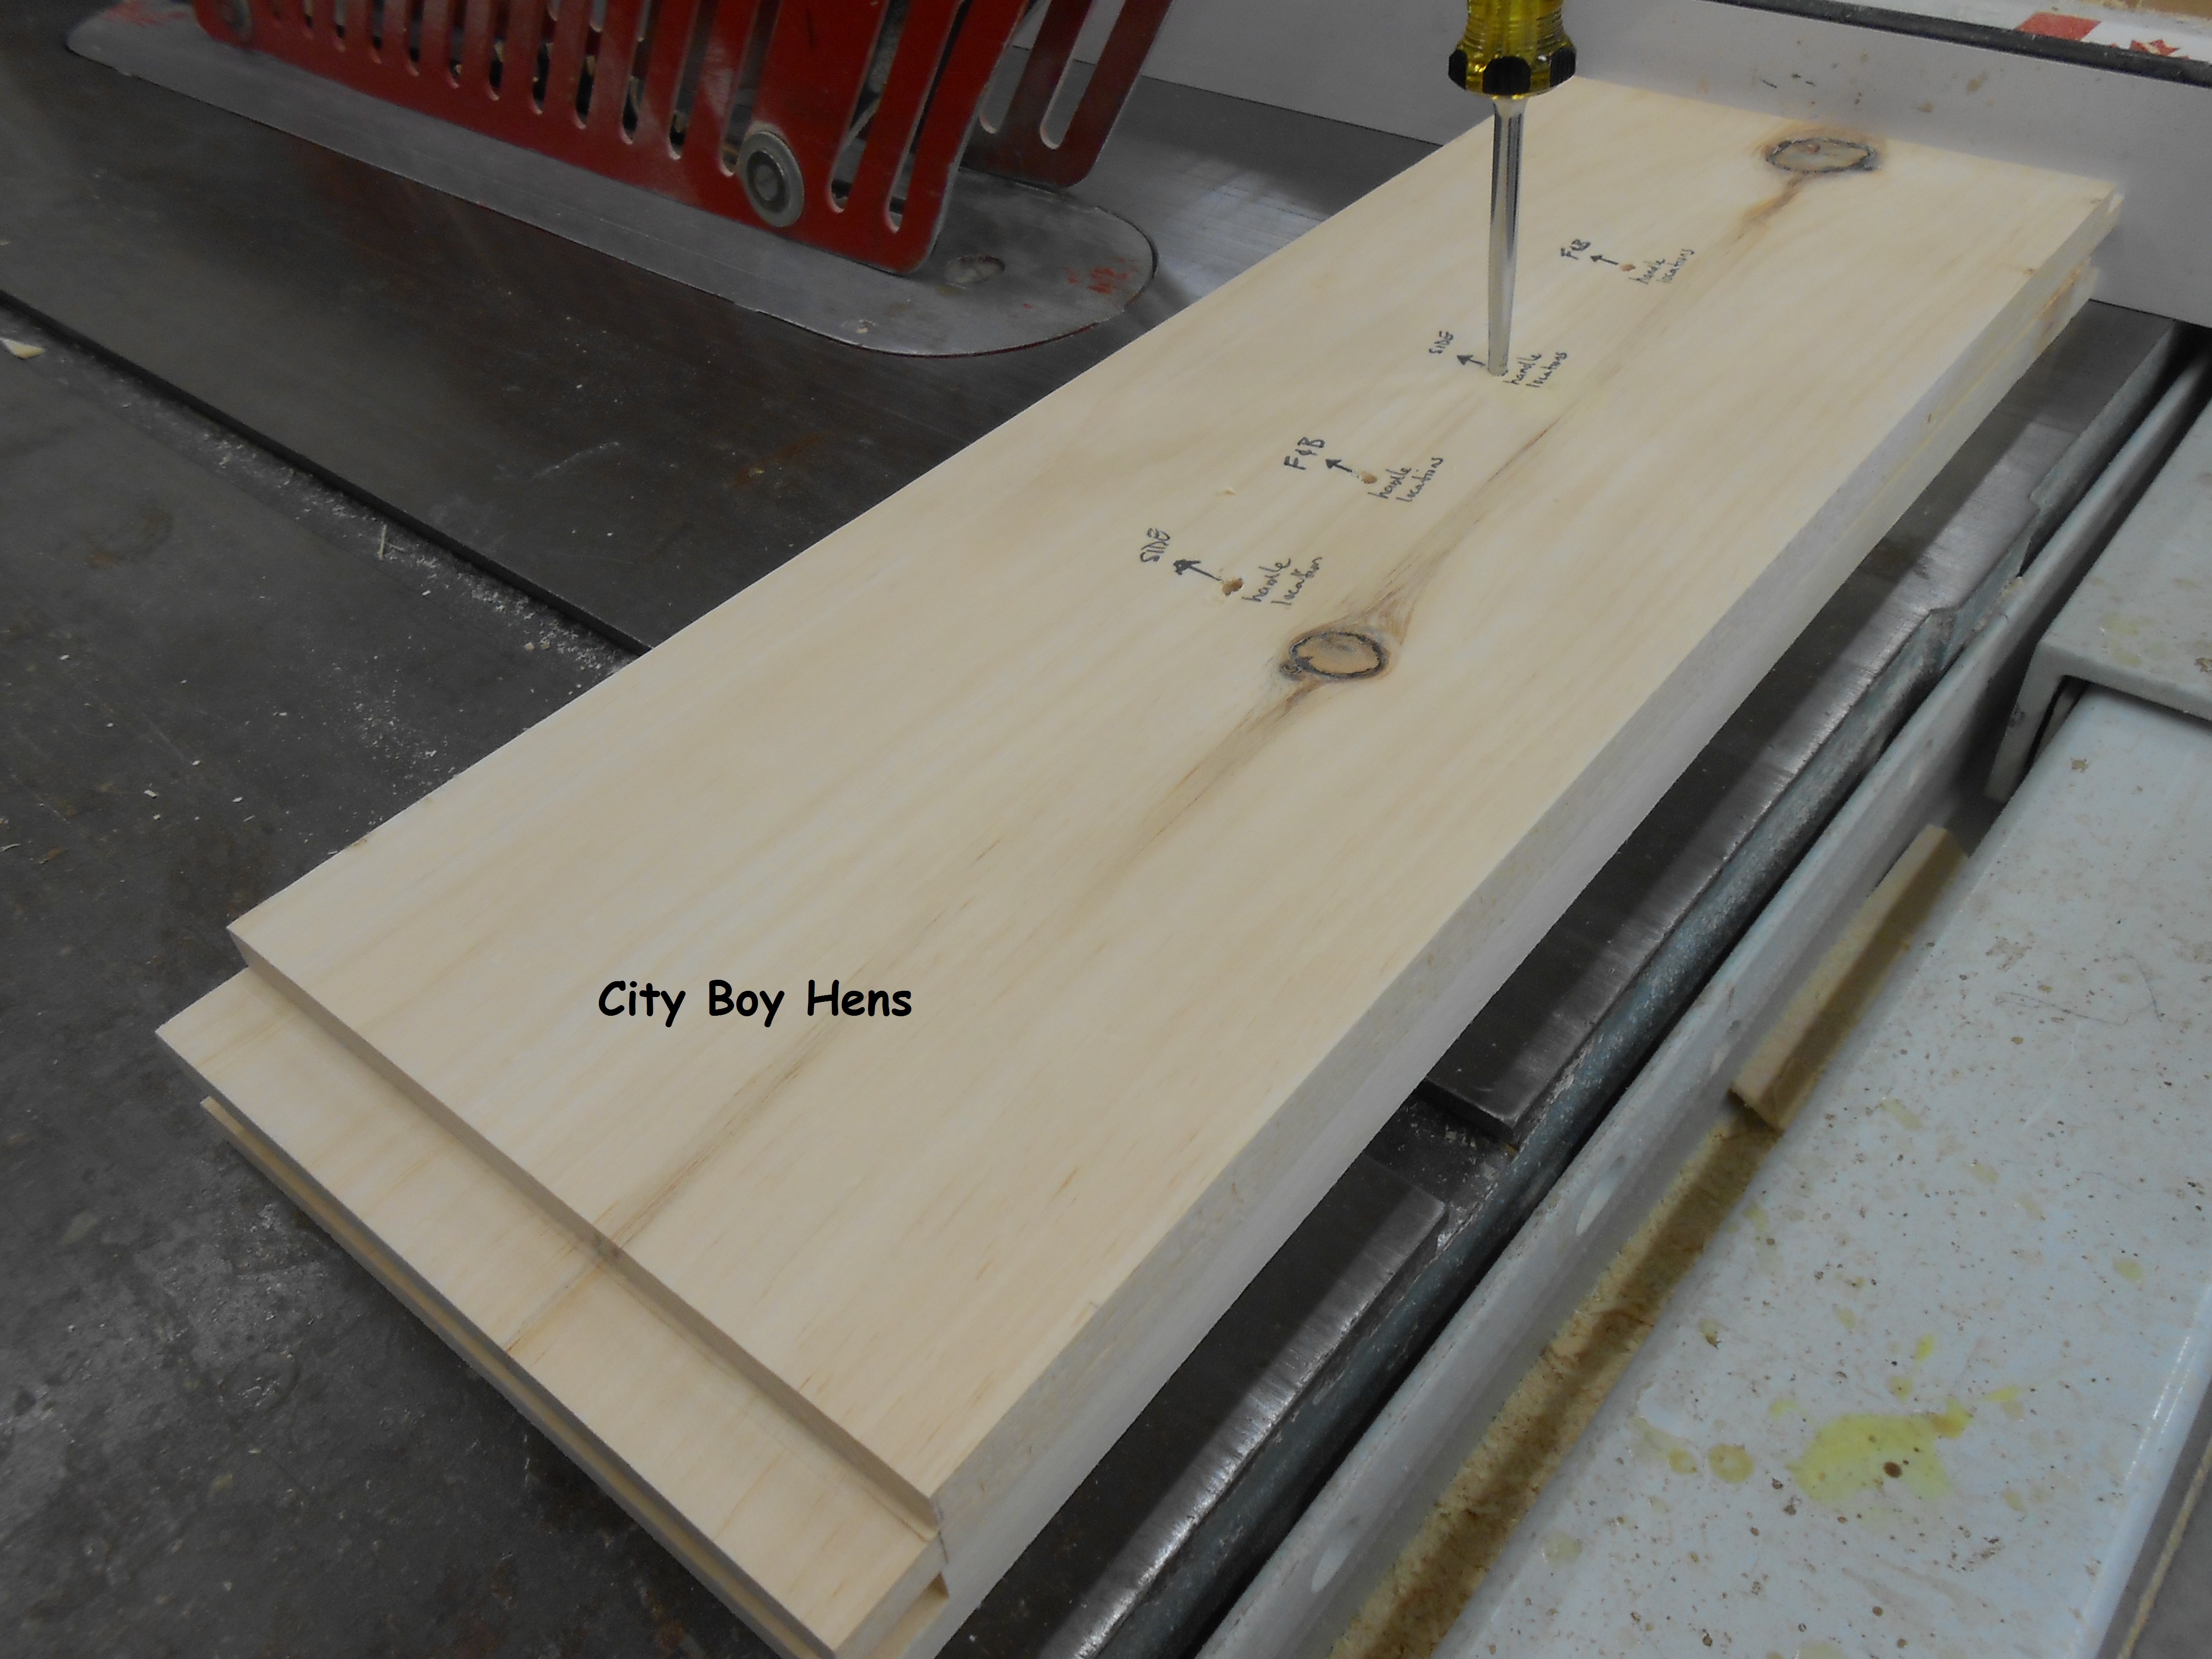
Now, pre-drill your sides and handle locations using a hand-held drill or drill press equipped with a countersink bit.  Note* It’s essential to pre-drill so that you don’t split the ends of the board.037

Now, make the handles for the boxes.  I like to use 2×6 for this part.  First, rip the 2×6 into 1-1/2″ width strips.  Then tilt the blade to 8 degrees and rip the strips again. (The 8 degree angle will allow for rain run off from the handles.) 039 Next, lower the blade to a 3/4″ height and set the rip fence to 3/4″.  Run the strips through the table saw making sure that the angled surface is positioned on the left side of the strip. 040 
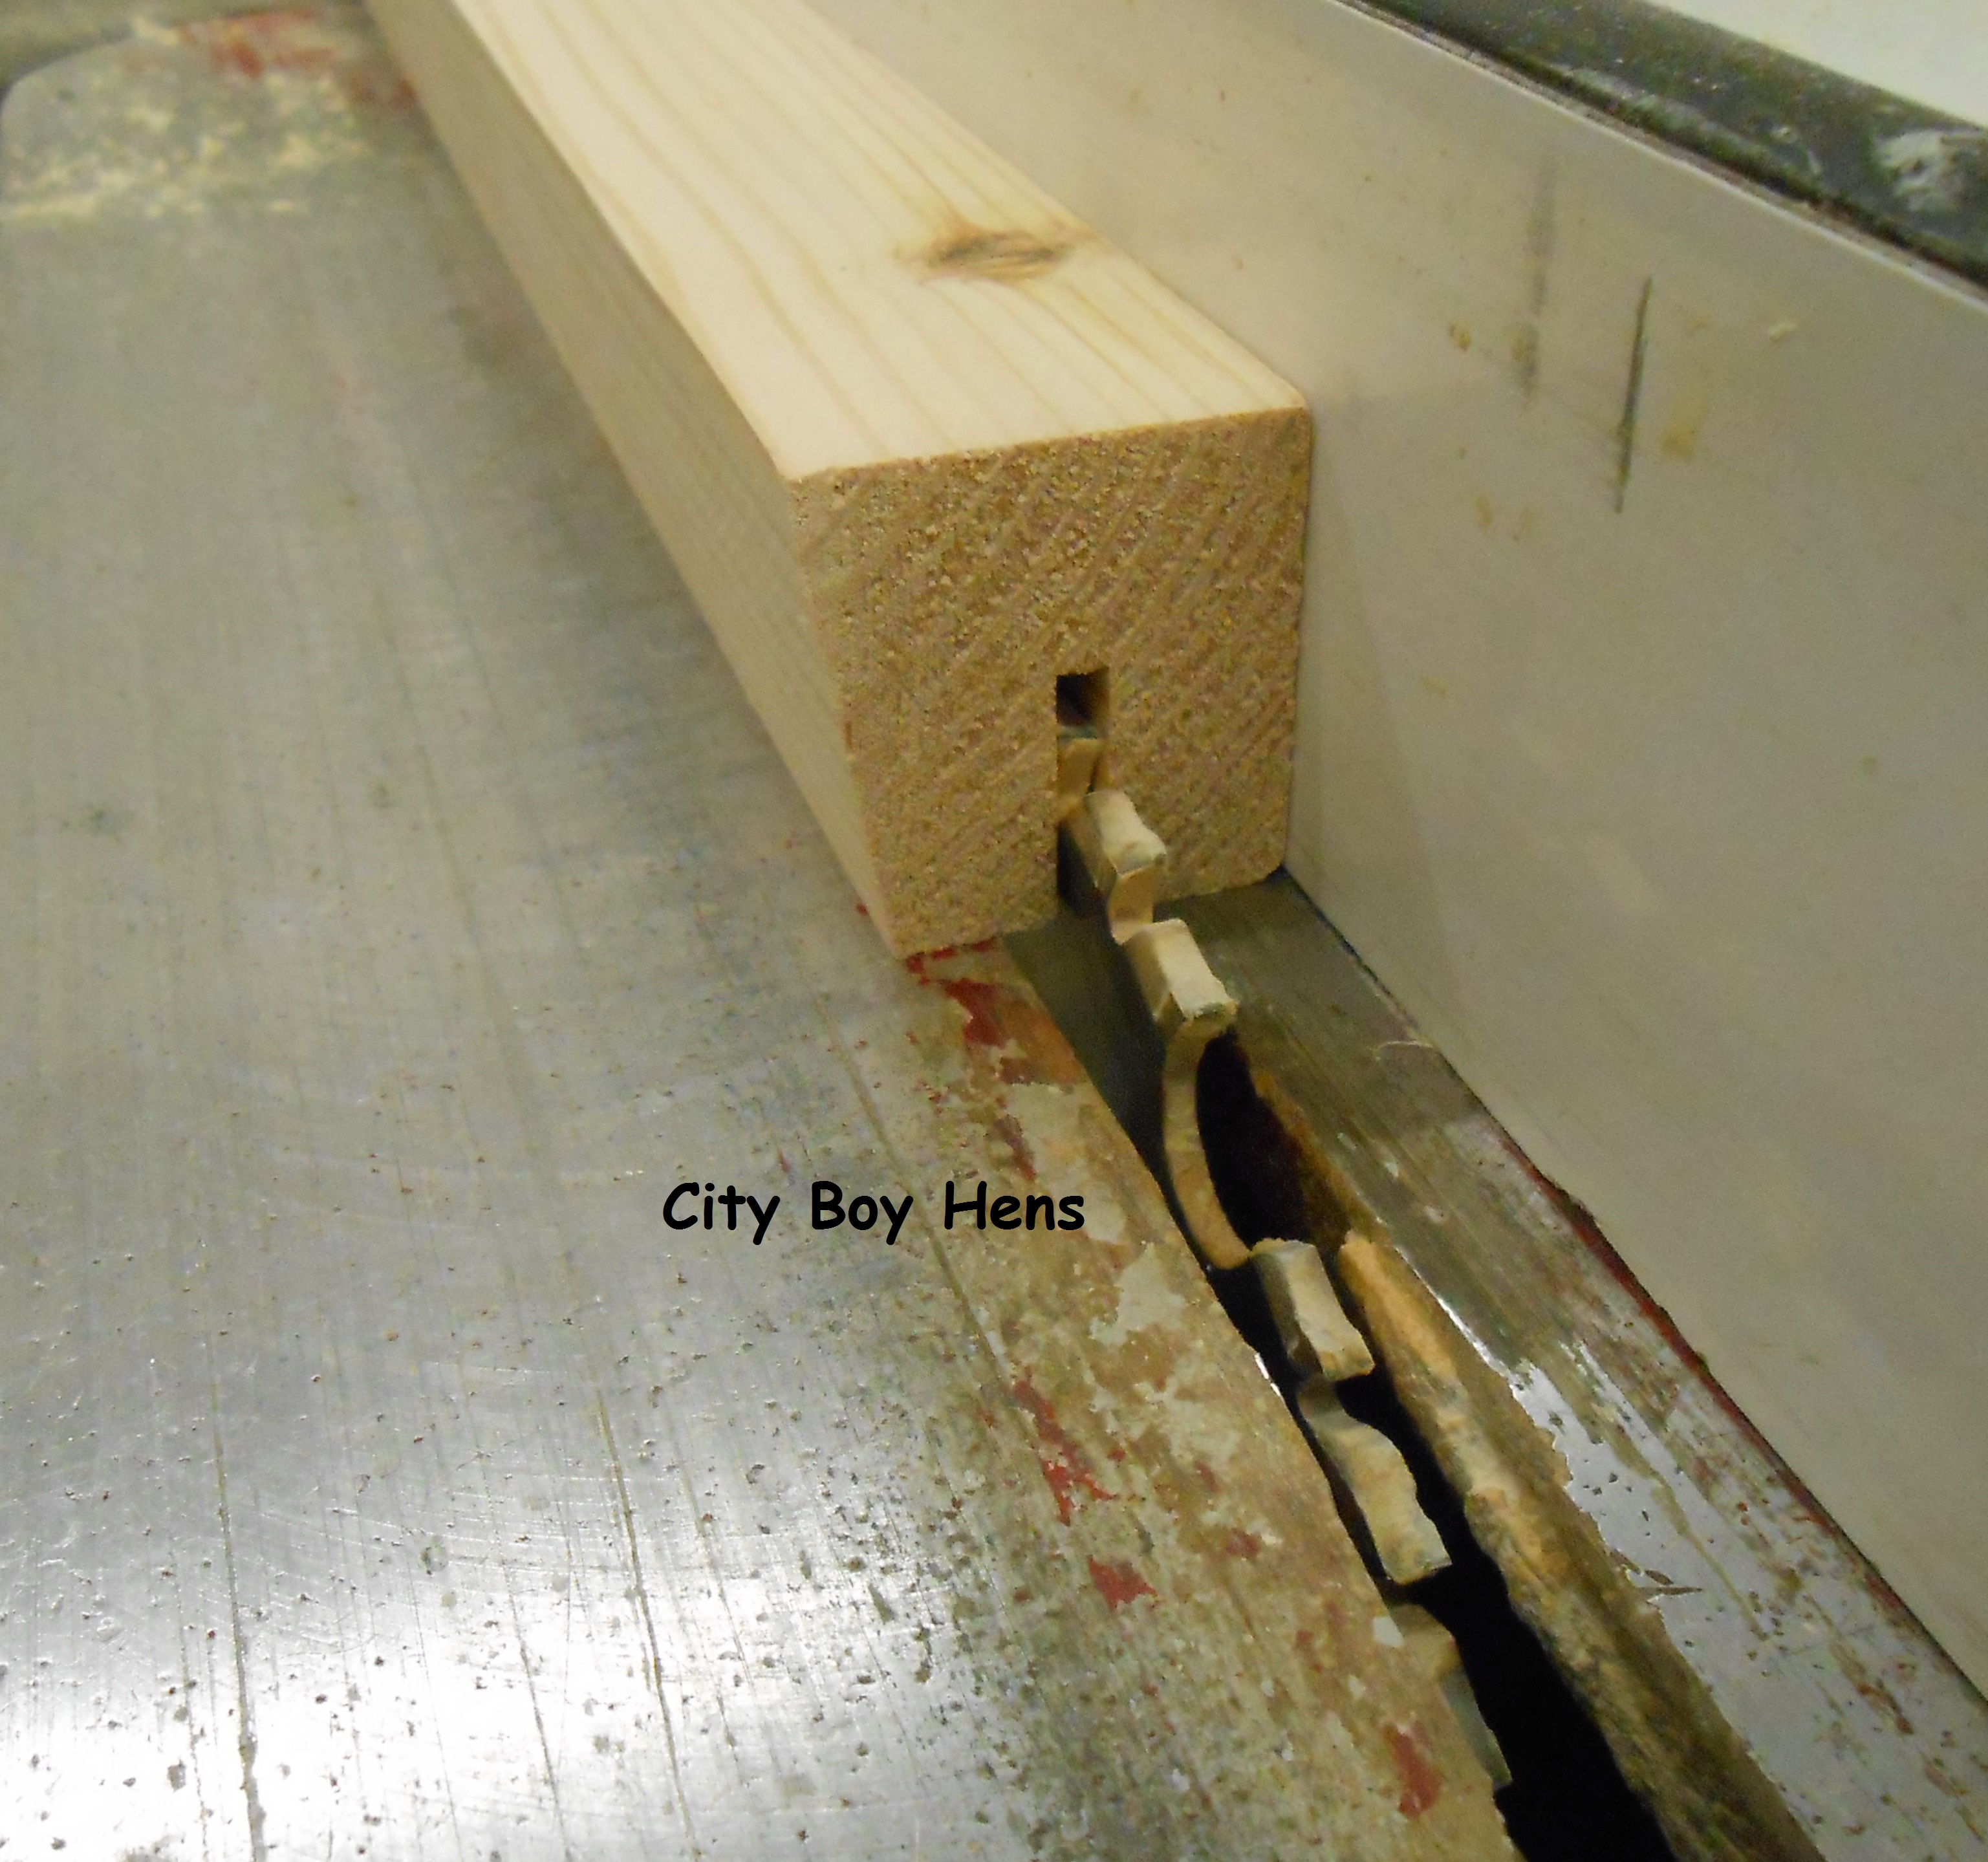
Next, turn the strip so that the angled surface is “facing up” and rip again.  By the end of the “rip”, the waste from the handle will fall away from the strip.  042Next, set up a stop block on the miter saw or table saw and cross-cut the strips to 6-1/4″ lengths.  Make sure that the 8 degree beveled face is not resting on the miter gauge (for the table saw) or the fence (for the miter saw).044

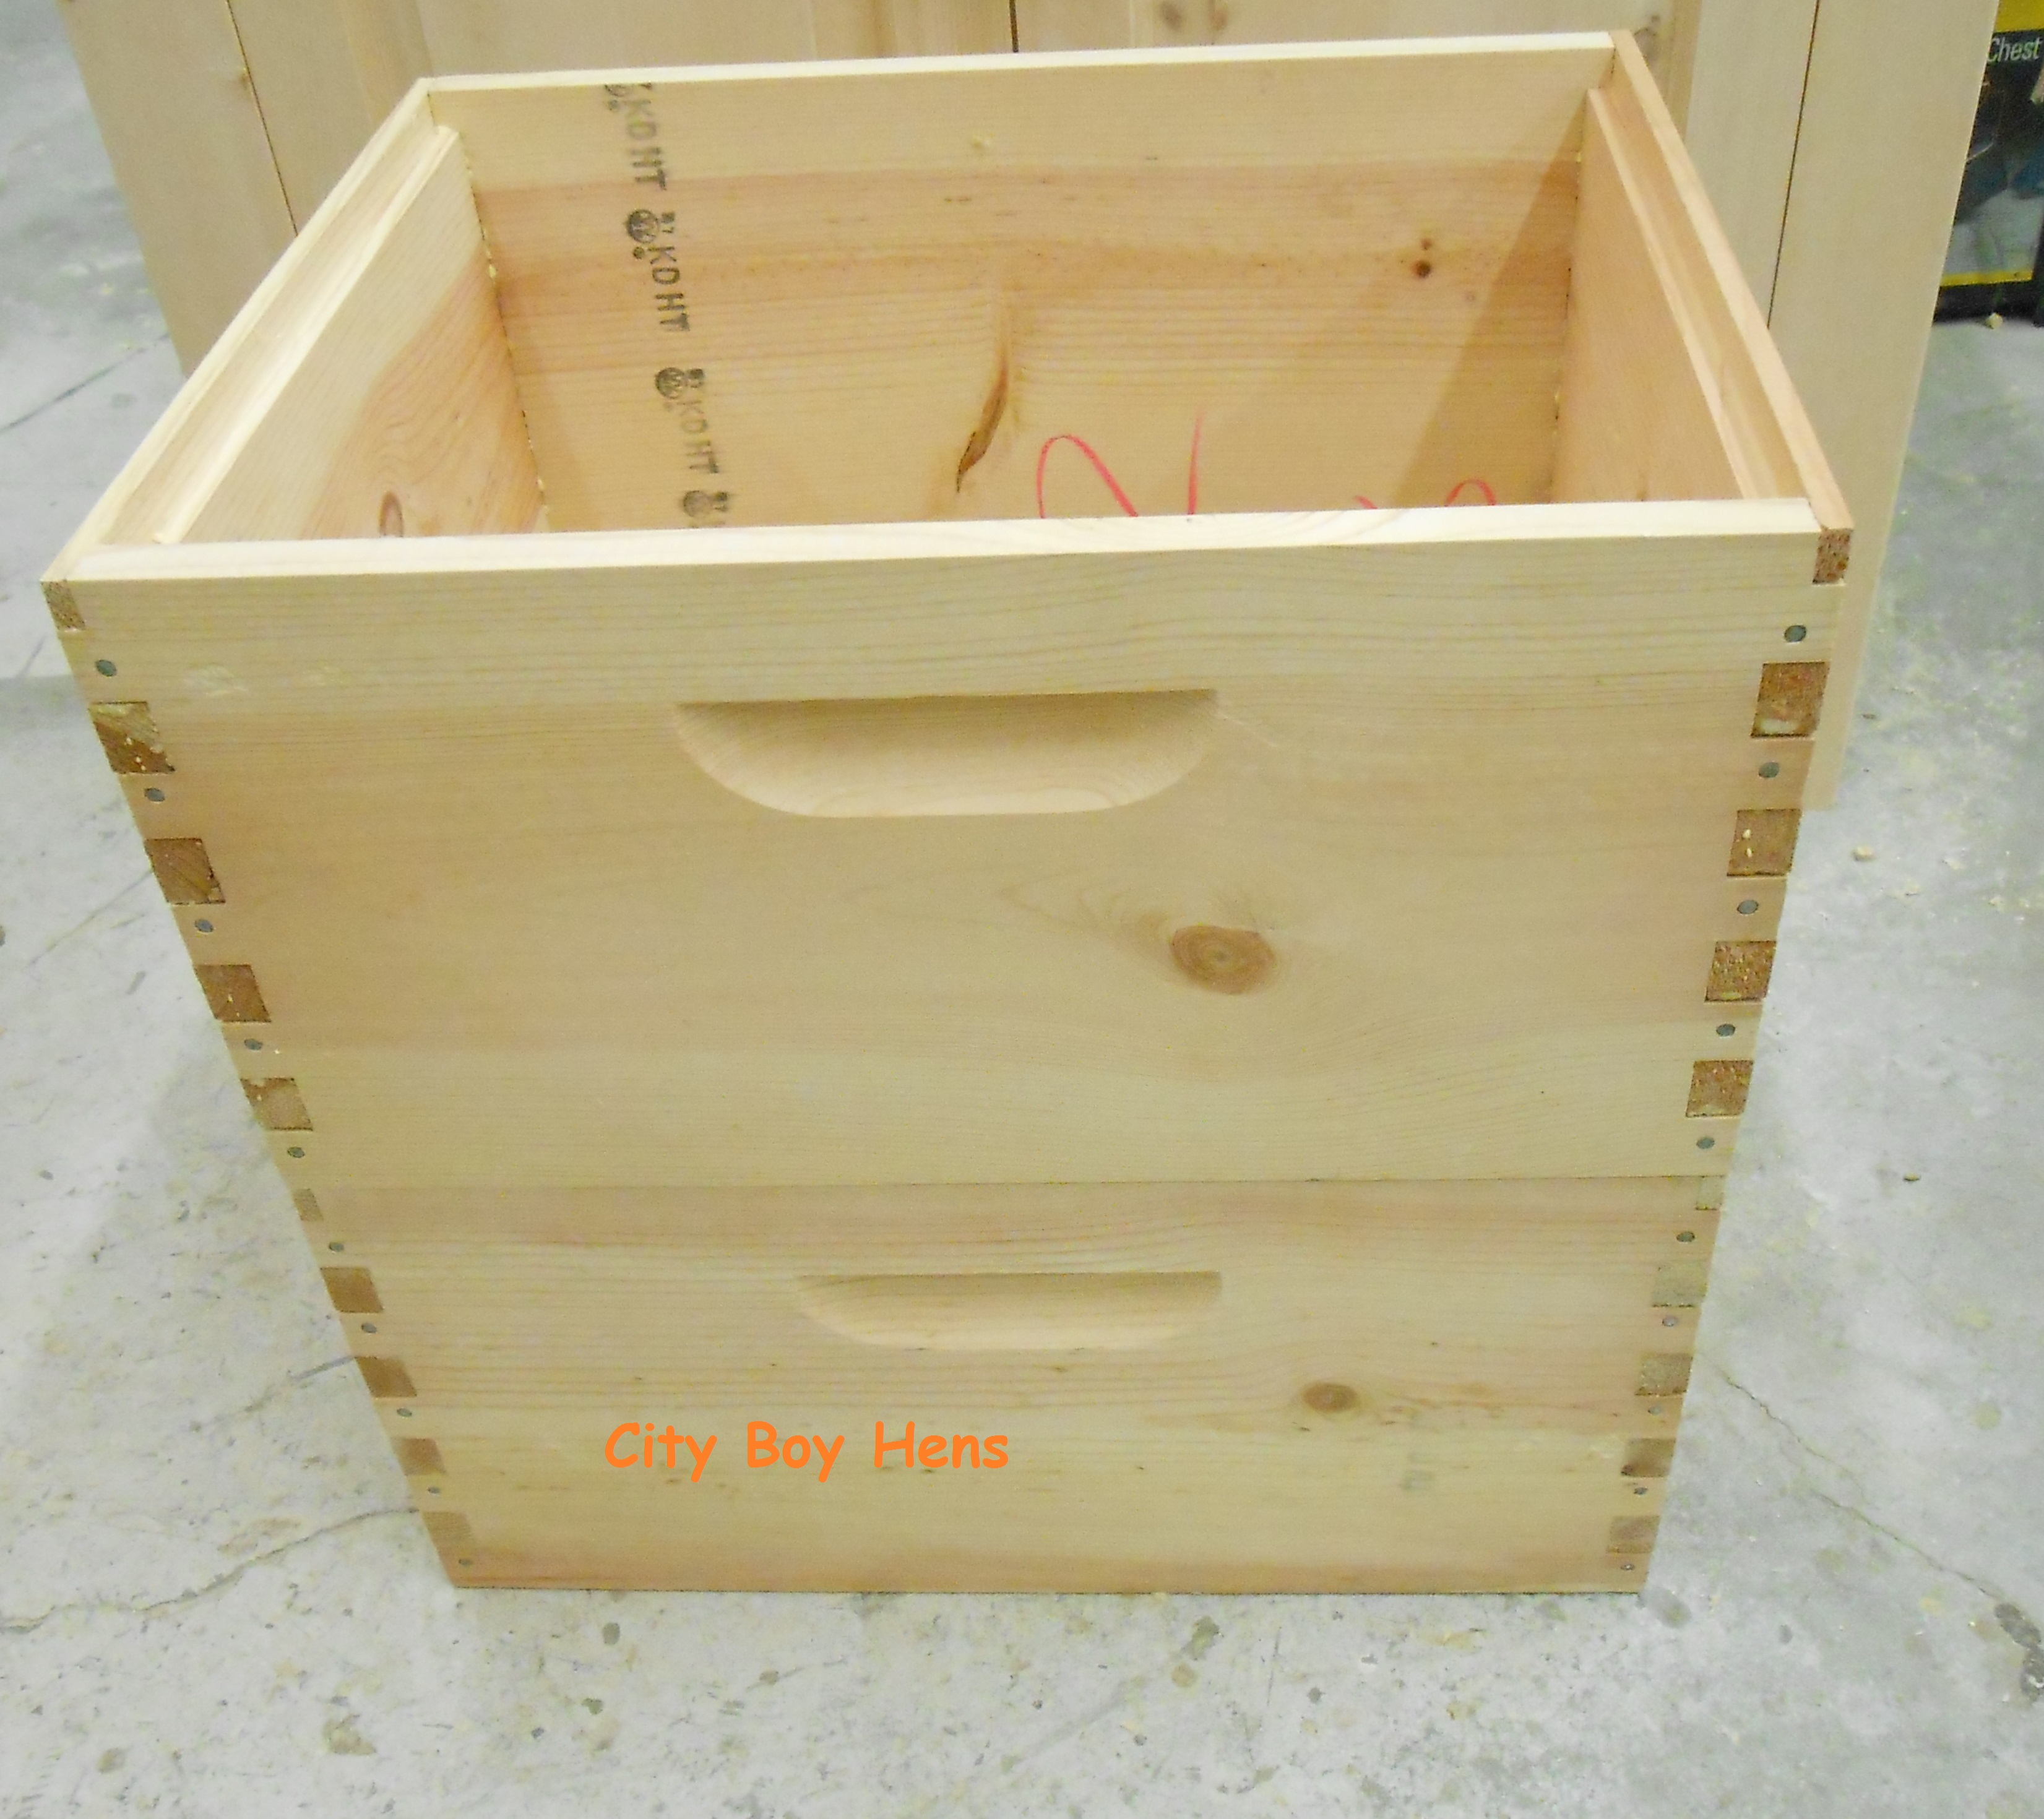
Glue and screw the handles, using 1-1/4″ deck screws,  to the outside of each box part.  I made a jig out of some scrap plywood which allows me to position the handle on to the exact spot of the box side.  I just reverse the jig for a hive body because it is wider.048

046

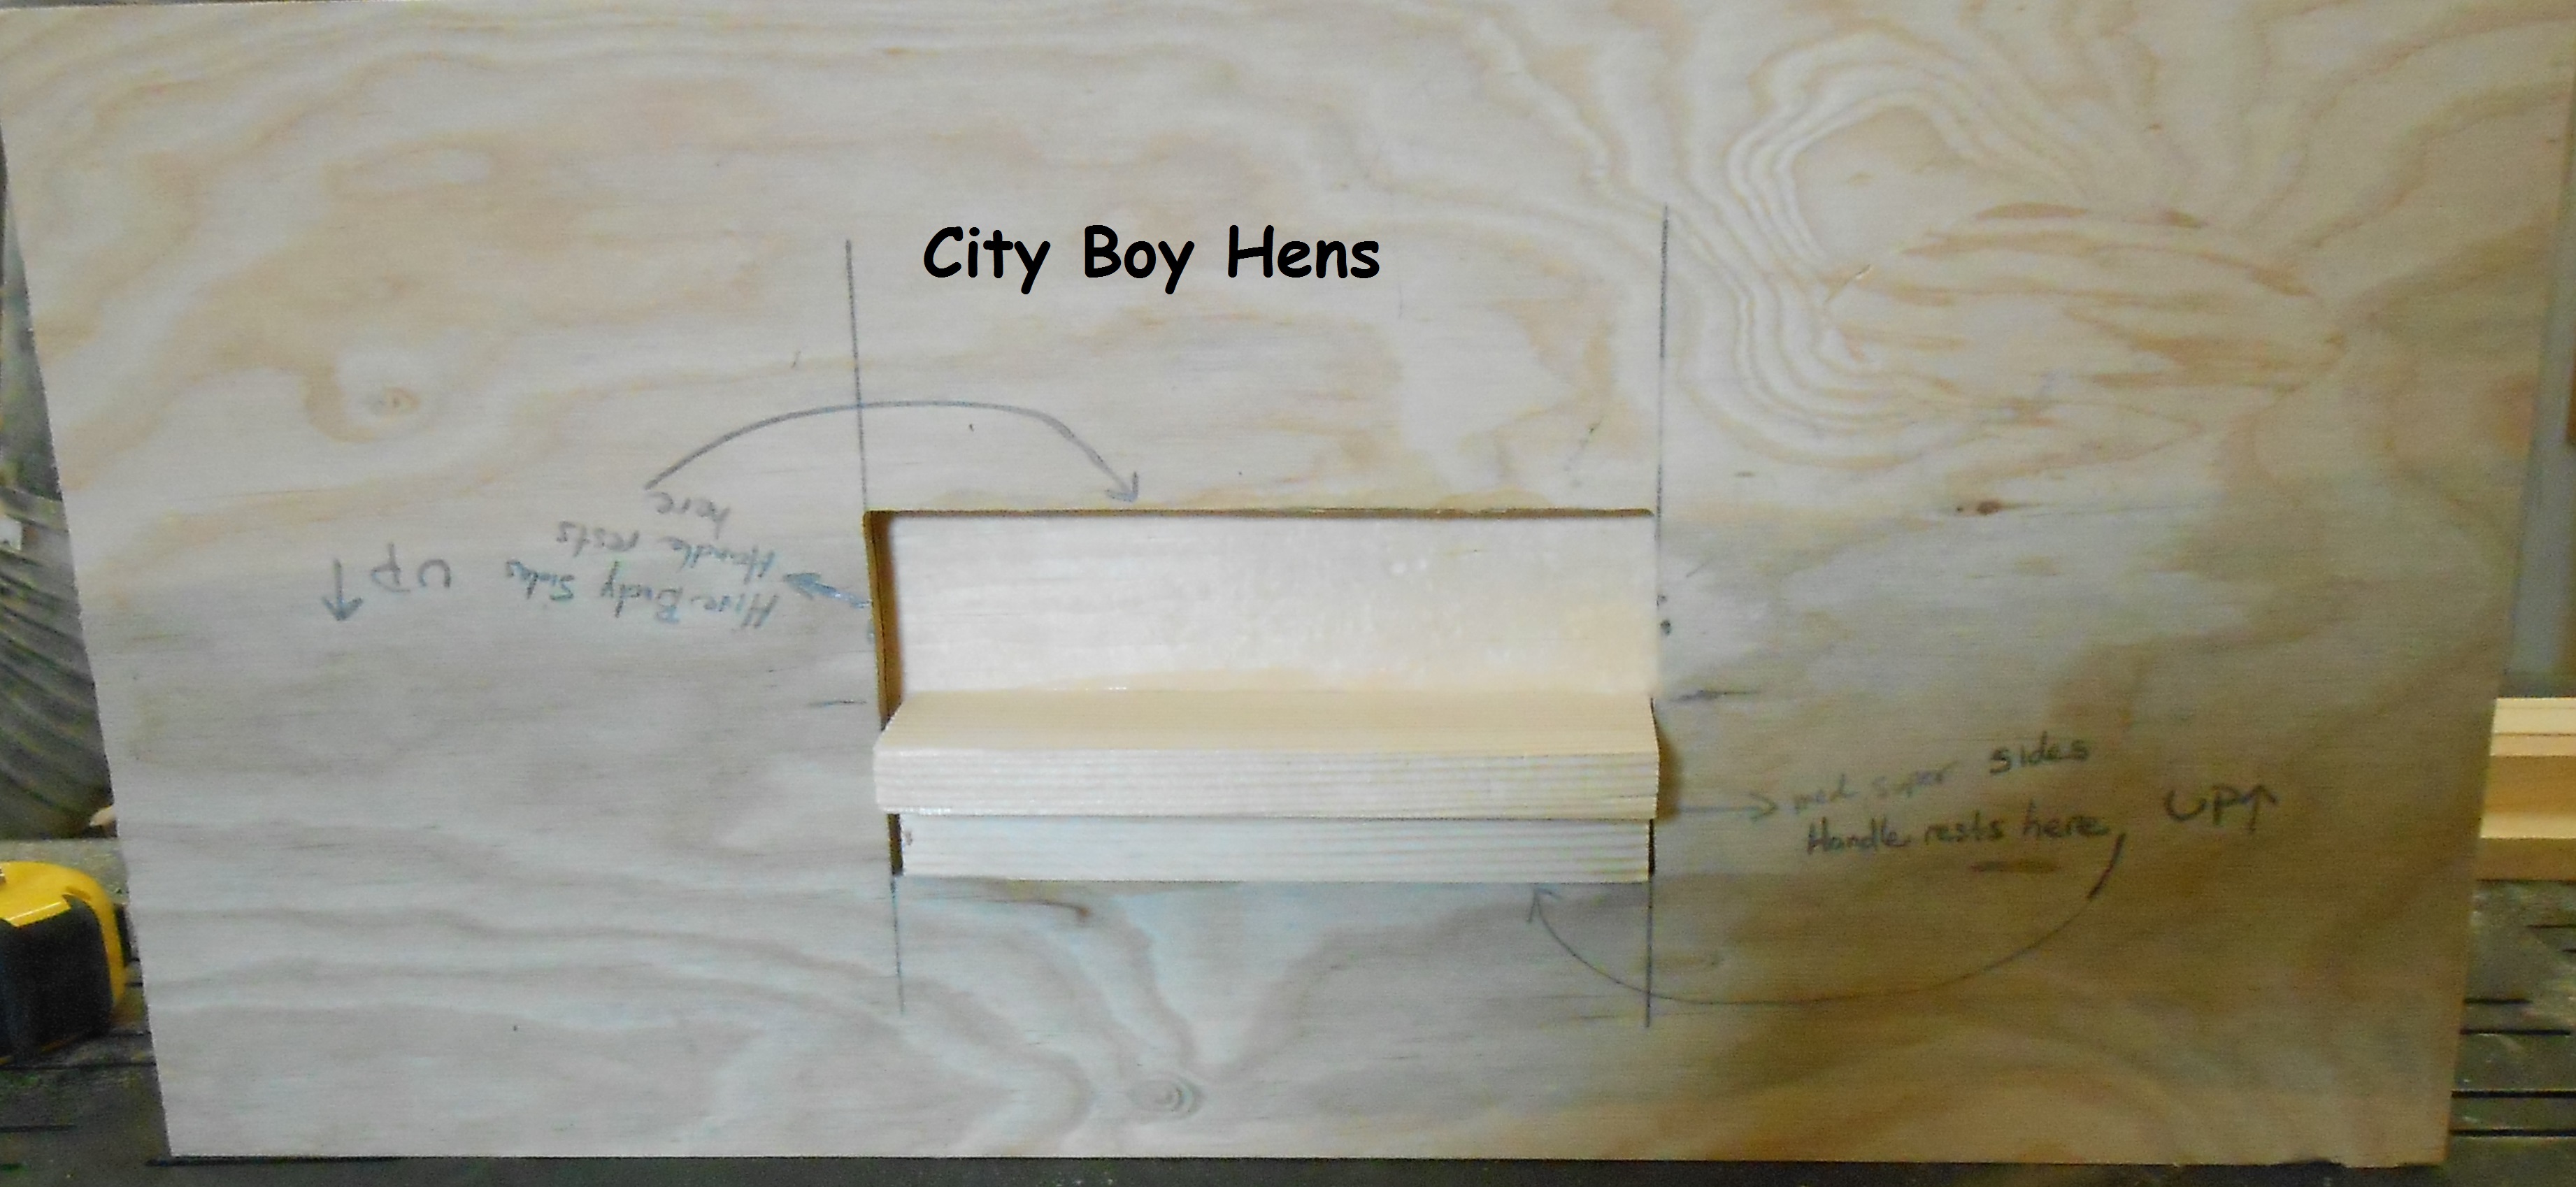
Now, assemble each box using 1-1/2″ deck screws and exterior glue.049

Finally, carefully rip a few strips of that “waste” from the handles to 3/8″ x 3/8″.  Fill the 3/8″ spaces at the ends of the rabbets on the inside of the front and back pieces.  I used a Japanese flush cutting hand saw for trimming the “filler” piece.050

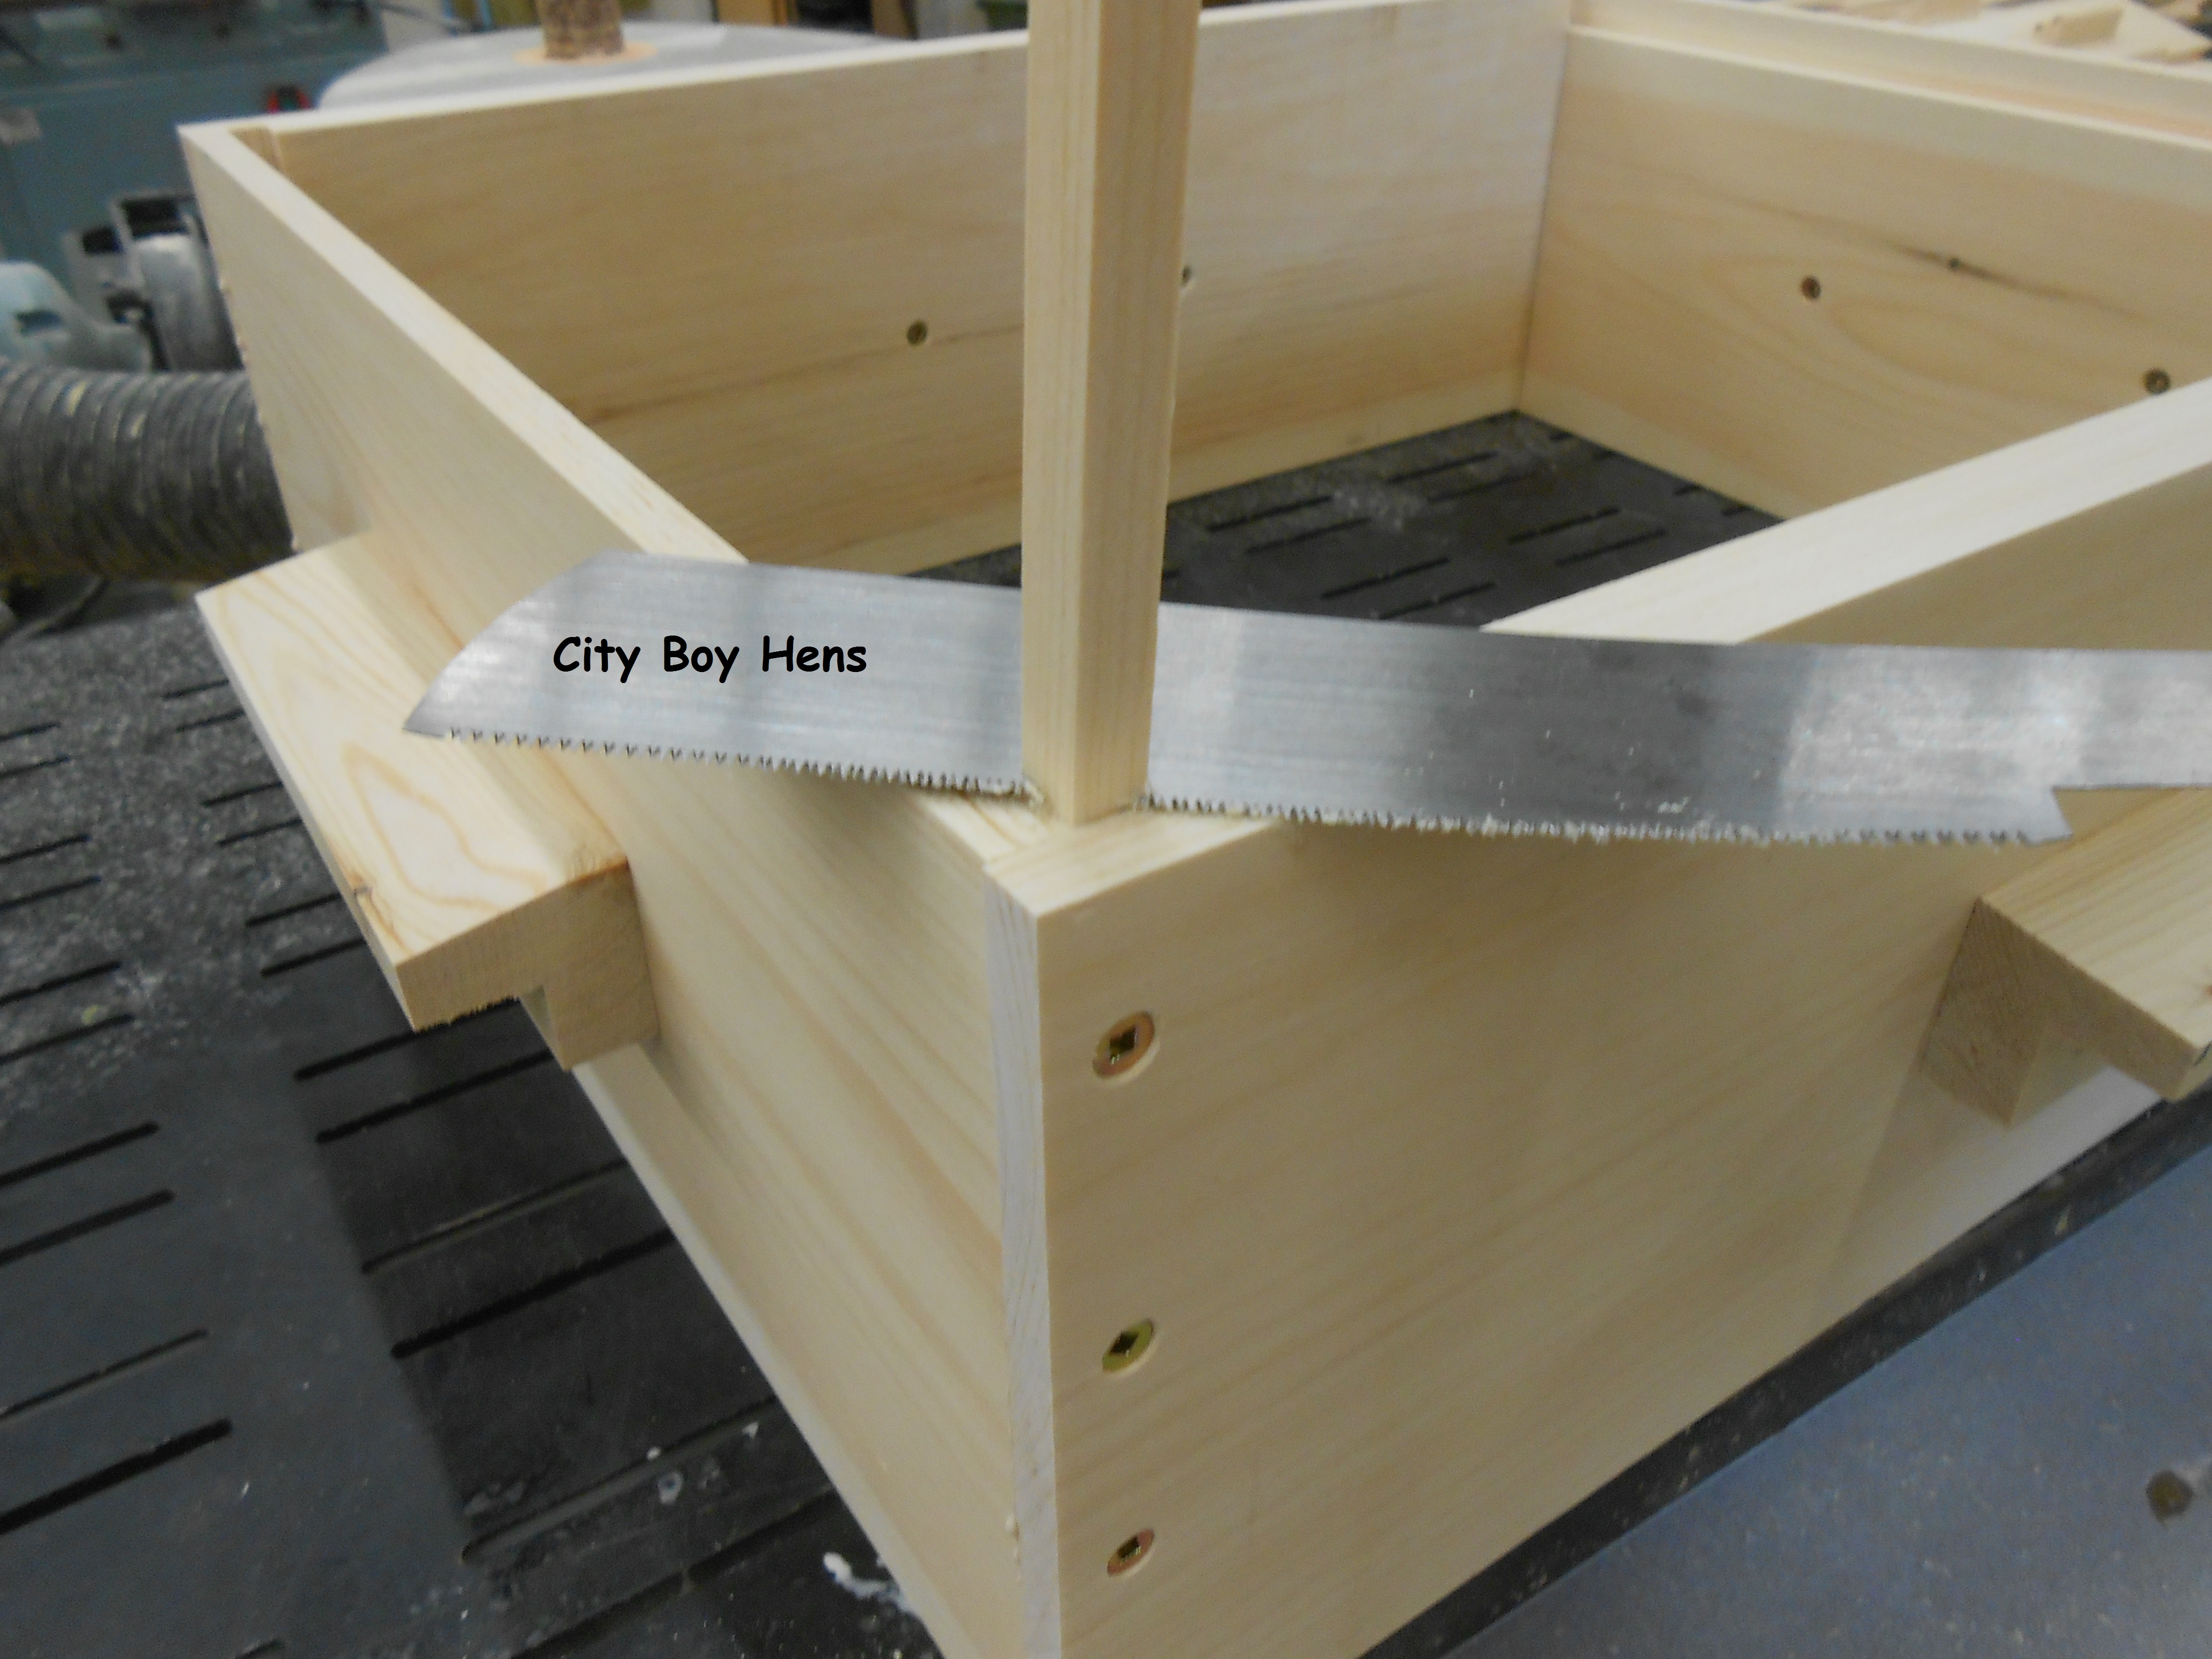
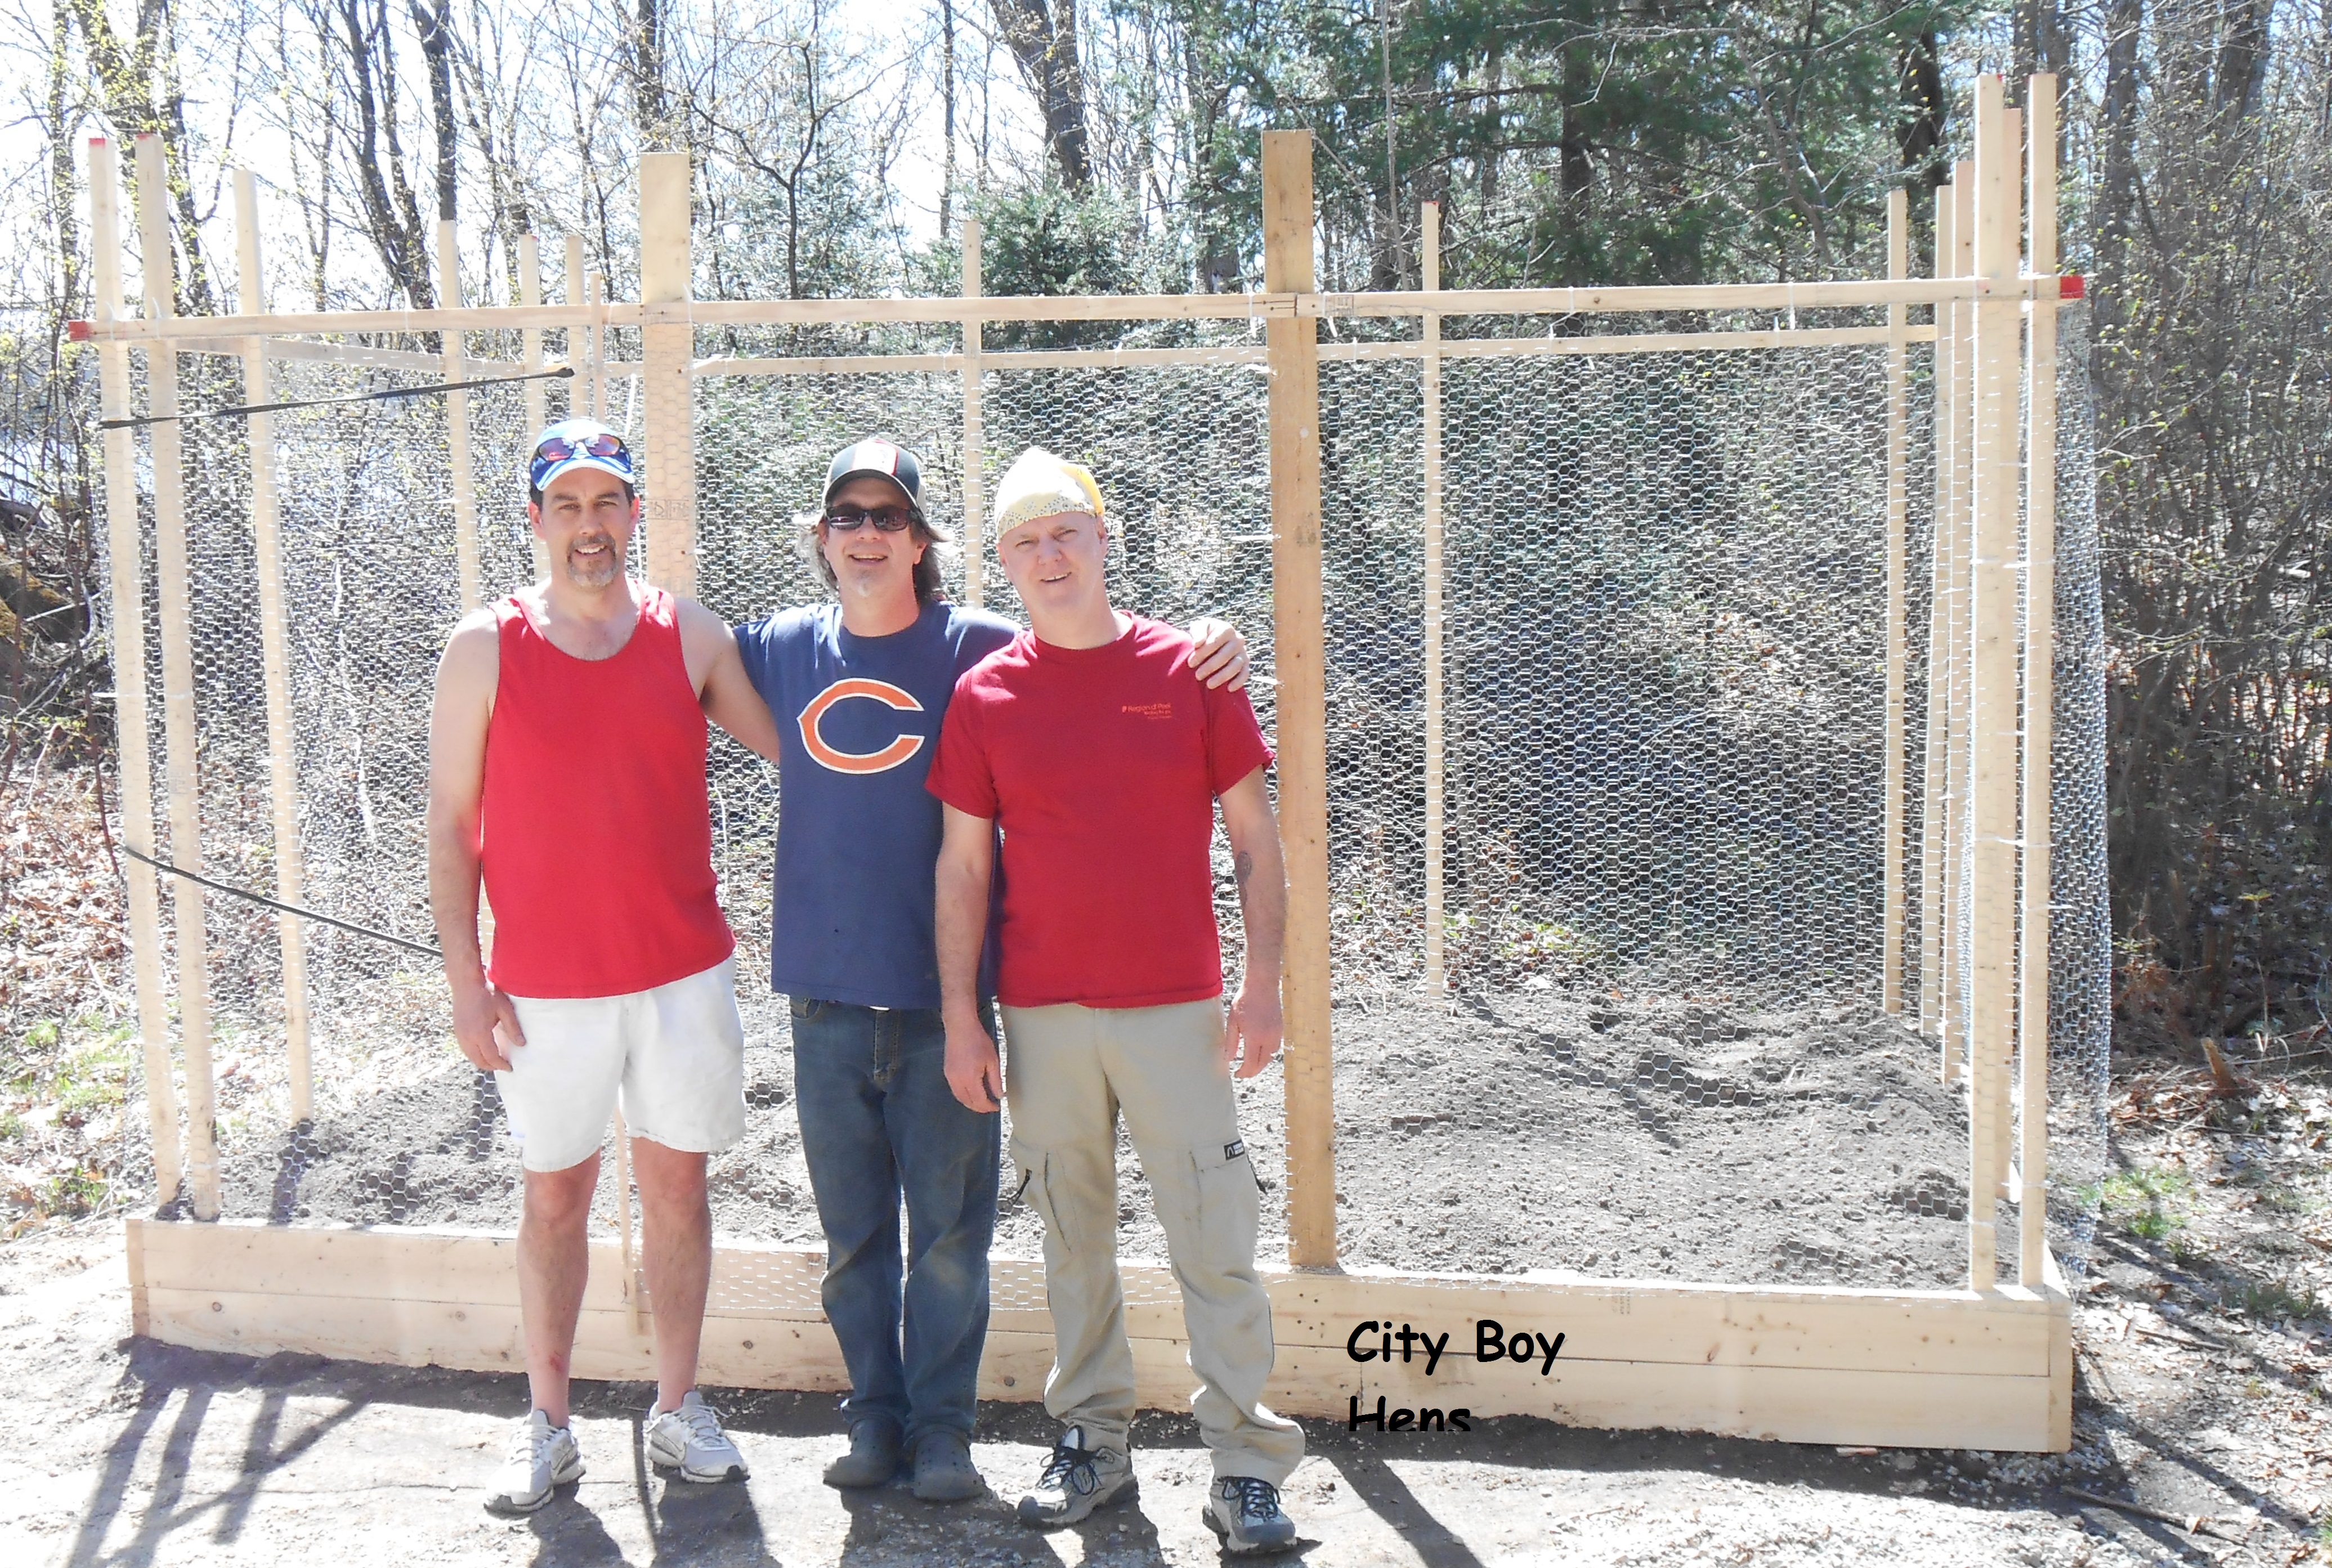
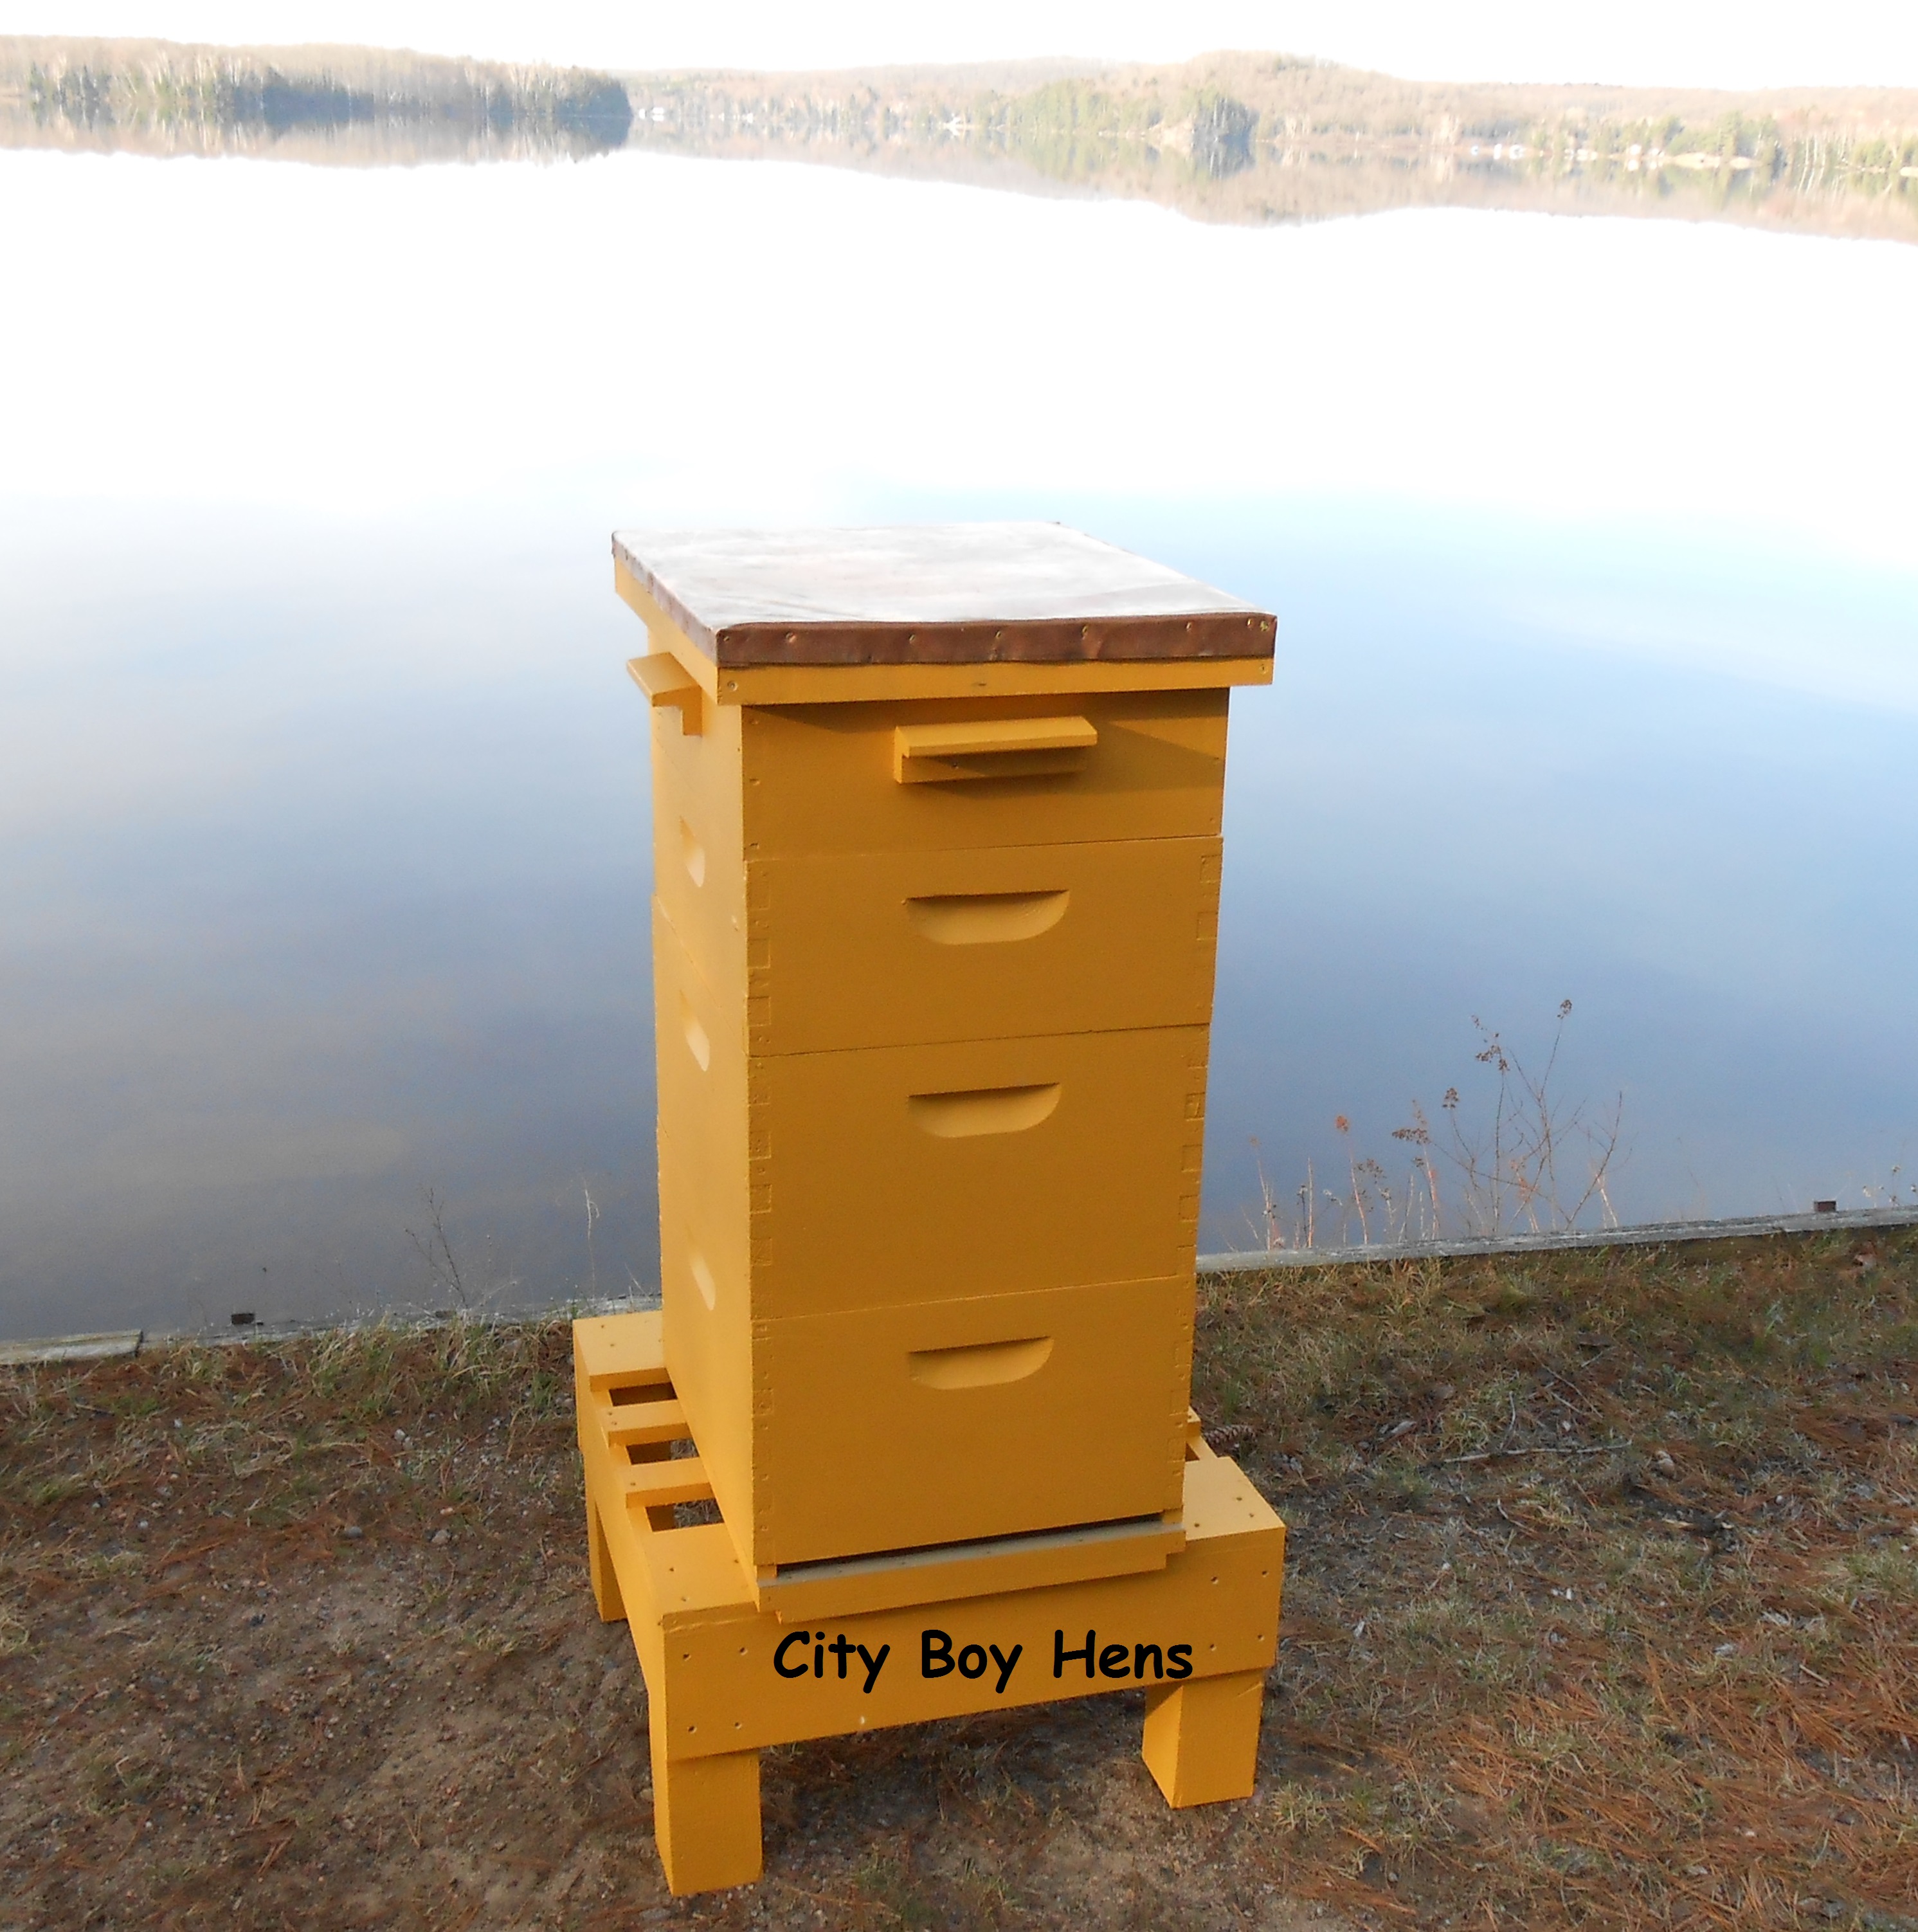
And…Volah!  You’re on your way to making your own  beehive(s).  To see how I built my hive stands CLICK HERE.  To see how I built my ventilated gabled roof, CLICK HERE.  To see how I built my ventilated bottom board CLICK HERE.053

Advertisement

My Honey Bee Queen is………. DEAD!

014I should have heard them screaming that the Queen was Dead.  I should have seen that the flag was at half mast beside the hive.  I should have been there as the funeral procession  exited the hive and their little bee heads hung in grief when they carried their beloved Queen to her final resting place.  I should have noticed, but…………… I wasn’t there.  Maybe I was back at home in the City.  Maybe I was up at the cottage sitting on the dock sipping beer from a local micro-brewery.  Either way, it didn’t matter.  I wasn’t at the hive.  Not that I really could have done much. It’s not like I could have saved her.   I don’t even know why she died or how she died……….  I just know she’s………. dead……(A momentary  pause for dramatic effect!)

So….maybe you’re asking yourself how I knew for certain that the hive was queenless?  I knew I was in trouble yesterday afternoon as soon as I took the first frame out of the hive.  There was no brood to be found anywhere in the comb.  There were plenty of bees, lots of pollen and even some honey, but no brood to be found.  Considering that a Queen can lay upwards of 1000 eggs each day, you’d think that I’d find some brood tucked away in that comb. Take a look at the picture below.  It is from my hive in July.  If you look carefully at the yellow circled frames, you will see brood tucked into the comb.  They look like fat white grubs.

Drawn out comb filled with nectar or brood.

Drawn out comb filled with nectar or brood.

Anyways, I continued to inspect each frame with the same dismal results.  Zilch, Nadda, Niente!  I couldn’t believe my luck.  First, I couldn’t get a mated Queen until early July because there was such a shortage this year in Northern Ontario.  Now, she up and died, leaving thousands of bees without a Queen.  But worst of all, Fall has begun and the hive Will Not survive without a Queen to produce the Winter Bees who will carry the hive through the  cold months ahead.    So…..if I don’t do something soon, I’ll be starting again from square one next Spring.   But, it isn’t not only for me that I must find a solution…….it is also for the remaining bees that will need my help.

It turns out that one of Dan’s hives (my mentor) has been suffering this year and it is having trouble building up to a strong colony.  It too, would not survive the harsh Northern Ontaio Winter.  After sitting down in the apiary together and discussing our individual delemas, we decided to combine our hives in order to make one strong hive that still had time to learn to get along and become one happy colony.  After taking a quick look through Bee Keeping For Dummies, we confirmed our plan of attack and thus was born our attempt at the newspaper method.

According to Howland Blackiston “ you can’t just dump the bees from one hive into another. If you do, all hell will break loose. Two colonies must be combined slowly and systematically so that the hive odors merge gradually. This is best done late in the summer or early in the autumn”.

Well……I guess are timing was good because we got the early autumn part right.  Now, we just had to move my hive into Dan’s weaker, but Queen maintained, hive.  So I took the cover off of my hive and began shaking  the bees off of the honey bee frames that were in the top hive body (the upper box).  In doing so, my bees would drop down into the lower hive body which was the one that would be placed on Dan’s hive..  Believe it or not, we did this process without even using the smoker to help keep the bees calm.

Next, the hive cover was taken off of Dan’s hive and a single sheet of newspaper was placed on top of his top hive body.  I then cut a few slits in the newspaper which would act as the innitial passageway between the 2 hives.  In doing so,the hive odors from each hive would  “slowly and systematically” begin to merge together.033

Once this was done, the hive cover was then placed on top of the new combined hive.

According to Blackiston, , the bees should chew through the newspaper in about a week and Dan & I should have a ” happily joined into one whacking strong colony”.

Well……“whacking strong” seems pretty impressive from where I stand.  I’ll shoot for strong and hope for the best.  “Hey Dan………..what part of the newspaper did we put on the hive?   I hope it was something interesting because them there bees are gonna’ be doing some recreational reading for the next 7 days.  I just hope it wasn’t the obituary section”036

How Do Bees Make Honey?

063Have you ever thought about how bees make honey?  The thought crossed my mind a while back and I didn’t have an accurate answer.   I figured that since I was going to become a beekeeper, than I’d better become educated in this process.

Step #1 The Need For Pollen and Nectar

Bees and blossoming plants need each other in order to survive.  Bees seek out flowers for their nectar and pollen and in return end up pollinating (fertilizing)  the flower as they transfer pollen grains from within each flower or from one flower to another.

In order for pollination to occur, pollen must be transferred from the stamen (male part of a plant) to the stigma (female part of the plant). When pollen from a plant’s stamen is transferred to that same plant’s stigma, it is called self-pollination. When pollen from a plant’s stamen is transferred to a different plant’s stigma, it is called cross-pollination. Anybody else feel like they just got teleported back to grade 5 science class?

But, this doesn’t tell us how the bees actually transfer the pollen grains from one part of the plant to the other?  Well…bees are pretty hairy and the pollen grains stick to the 100s of hairs on their bodies.  Some have even argued that bees actually carry an electrostatic charge which helps the pollen grains to stick to the hairs on their bodies. These grains attach and then come loose as the bee moves within each flower or from flower to flower. Thus, pollination  (reproduction) is completed.

But,  the bees also intentionally collect pollen from flowering plants.  It is this protein packed food which is used to nourish their larvae.  Believe it or not, they actually transport the pollen back to the hive by way of tiny baskets (scopas) that are attached to their rear legs.  No…I’m not joking!  Take a look at the picture below from one of my bees.  Do you see the yellow stuff on her back legs?  That’s pollen!  It’s a great sign for beekeepers because it signifies that the Queen is laying eggs which are developing into larvae who need to be fed. 055 - Copy

So, how do the bees get the nectar back to the hive?  Well, first they have to draw it up into their body by way of a giant tongue (proboscis) which remains rolled up (kinda like one of those party favors that you blew on as a kid) until it is need to extract nectar.  This tongue, when fully extended, is around 1/4″ long.  Considering that a honey bee is between 1/2″- 3/4″ long that makes for a freakishly long longue!  To make a comparison, a 6 foot human would have to have a tongue somewhere in the 2-3ft. range .  These bees make Gene Simmons trade mark tongue look like a joke!

Below is a picture of my bees drawing up some honey that I accidentally spilt while inspecting my hive.  Check out the length of the tongue on the bee who is hanging upside down in the rear of the picture.  And still, that tongue is not fully extended!078 - Copy

Once the bee begins drawing up nectar via its tongue, it is deposited into her “honey stomach”.  In fact, bees have two stomachs; their honey stomach which is like a nectar backpack and their regular stomach.  The honey stomach holds almost 70 mg of nectar.  When it is full, it weighs almost as much as the bee, herself. Now……That’s impressive!   Imagine picking up and carrying a load which is equal to your body weight?  But to make it even more outstanding……..we want you to fly to between 100 and 1500 flowers in order to gather that weight.       I don’t know about you, but I am TOTALLY impressed.

Step 2: Back At The Hive

Once the honeybees return to the hive, they  pass the nectar on to other worker bees.  These bees actually suck the nectar from the foraging bee’s honey stomach! This is definitely one bit of info. I’m not sharing with my kids.  If they ever found this one out, our honey consumption would drop to near zero!

The “transfer” bees then “chew” on the nectar which helps to break down the complex sugars into a digestible food source which can be stored indefinitely within the hive.  Incidentally, did you know that the honey which was found in King Tut’s tomb is still considered edible after 2000 years. Talk about a natural preservative!

The bees then deposit the nectar into the honeycombs where it continues to evaporates into a thicker syrup.  The bees make the nectar dry even faster by fanning it with their wings.  Once the honey reaches a moisture content of around 18%, the bees seal off each cell of the honeycomb with some wax.  The honey is then stored until it is consumed by the colony.  Incidentally, did you know that honey bees need to store around 100 pounds of honey in order to survive the winter?  Talk about the ultimate Prepper! As for the honey that you and I eat?????  Well….that will have to wait for another post when I will show you how I took off some honey from my own hive.056 - Copy

Honey Bee Trivia: 

Did you know that one honey bee will only make about 1/12  teaspoon of honey in her entire six weeks of life?  Maybe I’ve been taking that teaspoon of honey for granted that goes into my tea each morning.  Considering the above calculation, I consume the entire life’s work of 12 bees in a few gulps of tea.

Cited Work:

1) http://www.mbgnet.net/bioplants/pollination.html

2) http://www.pa.msu.edu/sciencet/ask_st/073097.html

3) http://animal.discovery.com/insects/question300.htm

City Boy Honey Update

“Ladies and Gentlemen………I give you…THE QUEEN!”…………068“Alright….Who said where?????”.  Okay…once more from the top.  “Ladies and Gentlemen….it is with great pleasure that I give you….THE QUEEN!”069“Okay….. you win.  There…I circled her!  She’s the one that is much larger, darker and has the shortest wings. She’s a looker ain’t she!   Now…let’s  get on with the post.”069

It’s been a while since I wrote about City Boy Honey.  In my last honey post (click here), my hive was built and I was just waiting for Dan (my bee mentor) to order my Queen.  For those of you who are familiar with bee keeping, you are definitely thinking that we are really late in the season to introduce a queen.  In fact, we are now in the midst of the Honey Flow as many wildflowers are  in bloom in Northern Ontario.  This is the time when the bees are really bringing in the honey. Unfortunately, Mother Nature was not too interested in giving up her arsenal of frost and cold temperatures in May and many professional beekeepers beat us to the Queen supply due to their devastating hive losses this past Winter.  As a result, local Queens were hard to come by this Spring.

With that said, the Queen arrived last week and she was placed into my hive body (bottom box) along with 100s of bees and 9 frames that were taken from one of Dan’s really strong hives. 058 These frames are made up of a combination of comb that is already made and filled with nectar or brood (baby bees).  This will really help to give the hive a jump-start because a lot of work has already been done from the bees in Dan’s strong hive.

Drawn out comb filled with nectar or brood.

Drawn out comb filled with nectar (red circles) or brood (yellow circles).

Is it wrong to take from Dan’s strong hive?  The answer is no.  In fact it is good because Dan’s strong hive could potentially swarm because it was running out of room.

So…today we put a second hive body on my hive which contained 9 frames.  7 of those already have built up comb.  The built up comb will really help the bees because they will be able to concentrate on bringing in honey and tending to the brood rather than also having to make the honey comb.  The second hive body will also give the Queen more room to lay her eggs which will continue to increase the population of the hive.

In two weeks, I’ll get back to you on the bees.  The hope is that the bees have filled the frames in the second hive body with honey and brood.  The tell-tale sign for this will be to open the hive and see if the bees are “working” on all the frames just as they are doing in the first hive body.063  If all goes well,  a medium super (smaller box) will then be put on top of the hive body which will be strictly used for the bees to deposit  CITY BOY HONEY! In the mean time……we’ll just wait it out…….. sipping some honey cream ale from a local Northern brewery and trying to beat the heat!070Queen Honey Bee Trivia:

Did you know that one Queen can lay between 1000-2000 eggs per day?

I thought of telling my wife this when she speaks about the delivery of our kids.   On second thought, maybe I’ll keep this one between you & me!

Making Some Honey Bee Frames

My assignment this week from Dan was to assemble some honey bee frames for my hive.  The frames consist of a top bar, 2 end bars, one end bar and a sheet of 100% beeswax foundation.  The beeswax foundation has hundreds of tiny hexagons which the bees will build up to make comb.  It is in this comb that they will put eggs, pollen (protein) and HONEY.  The process was quite simple and my pneumatic brad nailer made for quick work.003004

011

You will notice that there are 2 different sizes of frames.  This is because there are 2 different depths to the supers (boxes) that we will use for the hive. 013 The larger frames will go into the 2 bottom supers.  This will be where the queen will lay her eggs (up to 1000 in a single day) and her workers will deposit nectar for the brood and winter feed for the entire colony.

The upper supers will be strictly for our honey consumption.  There will be a screen below these 2 supers which will prevent the queen from laying brood amidst our honey. Since the queen is much larger than her workers, she will not be able to fit through this screen, though her workers will be able to move up and deposit honey into these frames.

So……..why are these supers smaller than the ones below?  Common sense would dictate that large supers would be the best choice for harvesting honey. Remember last week’s post about more is not always better???????  The only reason that these supers are smaller is because honey is heavy! A medium super – filled and capped with honey will weigh in at around 45 pounds.  Now take into account that there are around 40,000 bees(that’s the average) who are really ticked off that you are stealing their honey.  The last think you are going to want is more weight!   Dan informed me that last year he harvested around 100 pounds of honey from each of his 4 hives!

002

003

So for now……I just have to wait for my Queen to arrive.   Dan told me that she will be coming near the end of the month. She, and a bunch of bees from one of Dan’s strong hives, will be brought together in order to start my hive!

A Bit of Trivia:

Did you know that honey bees are not indigenous to North America?  Apis mellifera (Western Honey Bee) was first introduced in 1622 on the coast of Virginia.  It was famously called “white man’s fly” by Native Americans.

My daughter with Dan's pig "Larry".

My daughter with Dan’s pig “Larry”.

There’s NEVER enough time!

Part 1

Last week was a busy week at City Boy Hens and I have no one to blame but myself.  Dan the beekeeper gave me my first assignment and I was instructed to put together 2 hive bodies or “supers” as they are referred to by beekeepers.  It really was an easy job because most hive parts are sold pre cut and ready for assembly. 006 So off I went back down to the city and assembled my two supers in an about an hour. 010 Then I got to thinking……….I could make some supers from scratch and, while I’m at it, I’d  better make  a base and a hive cover as well…….And I still have a couple of  days before I have to go back up to the cottage……… so I might as well paint them all as well.  And before I knew it….I made my very first hive!  My wife often reminds me that I “sometimes” try to accomplish too much in too little time, but I reminded her that there is no way that my hive was going to fit into the van with the family, dog and chickens when we all go up to the cottage in a few weeks time. Well… I’m sticking to that story, though I don’t think she believes me!017
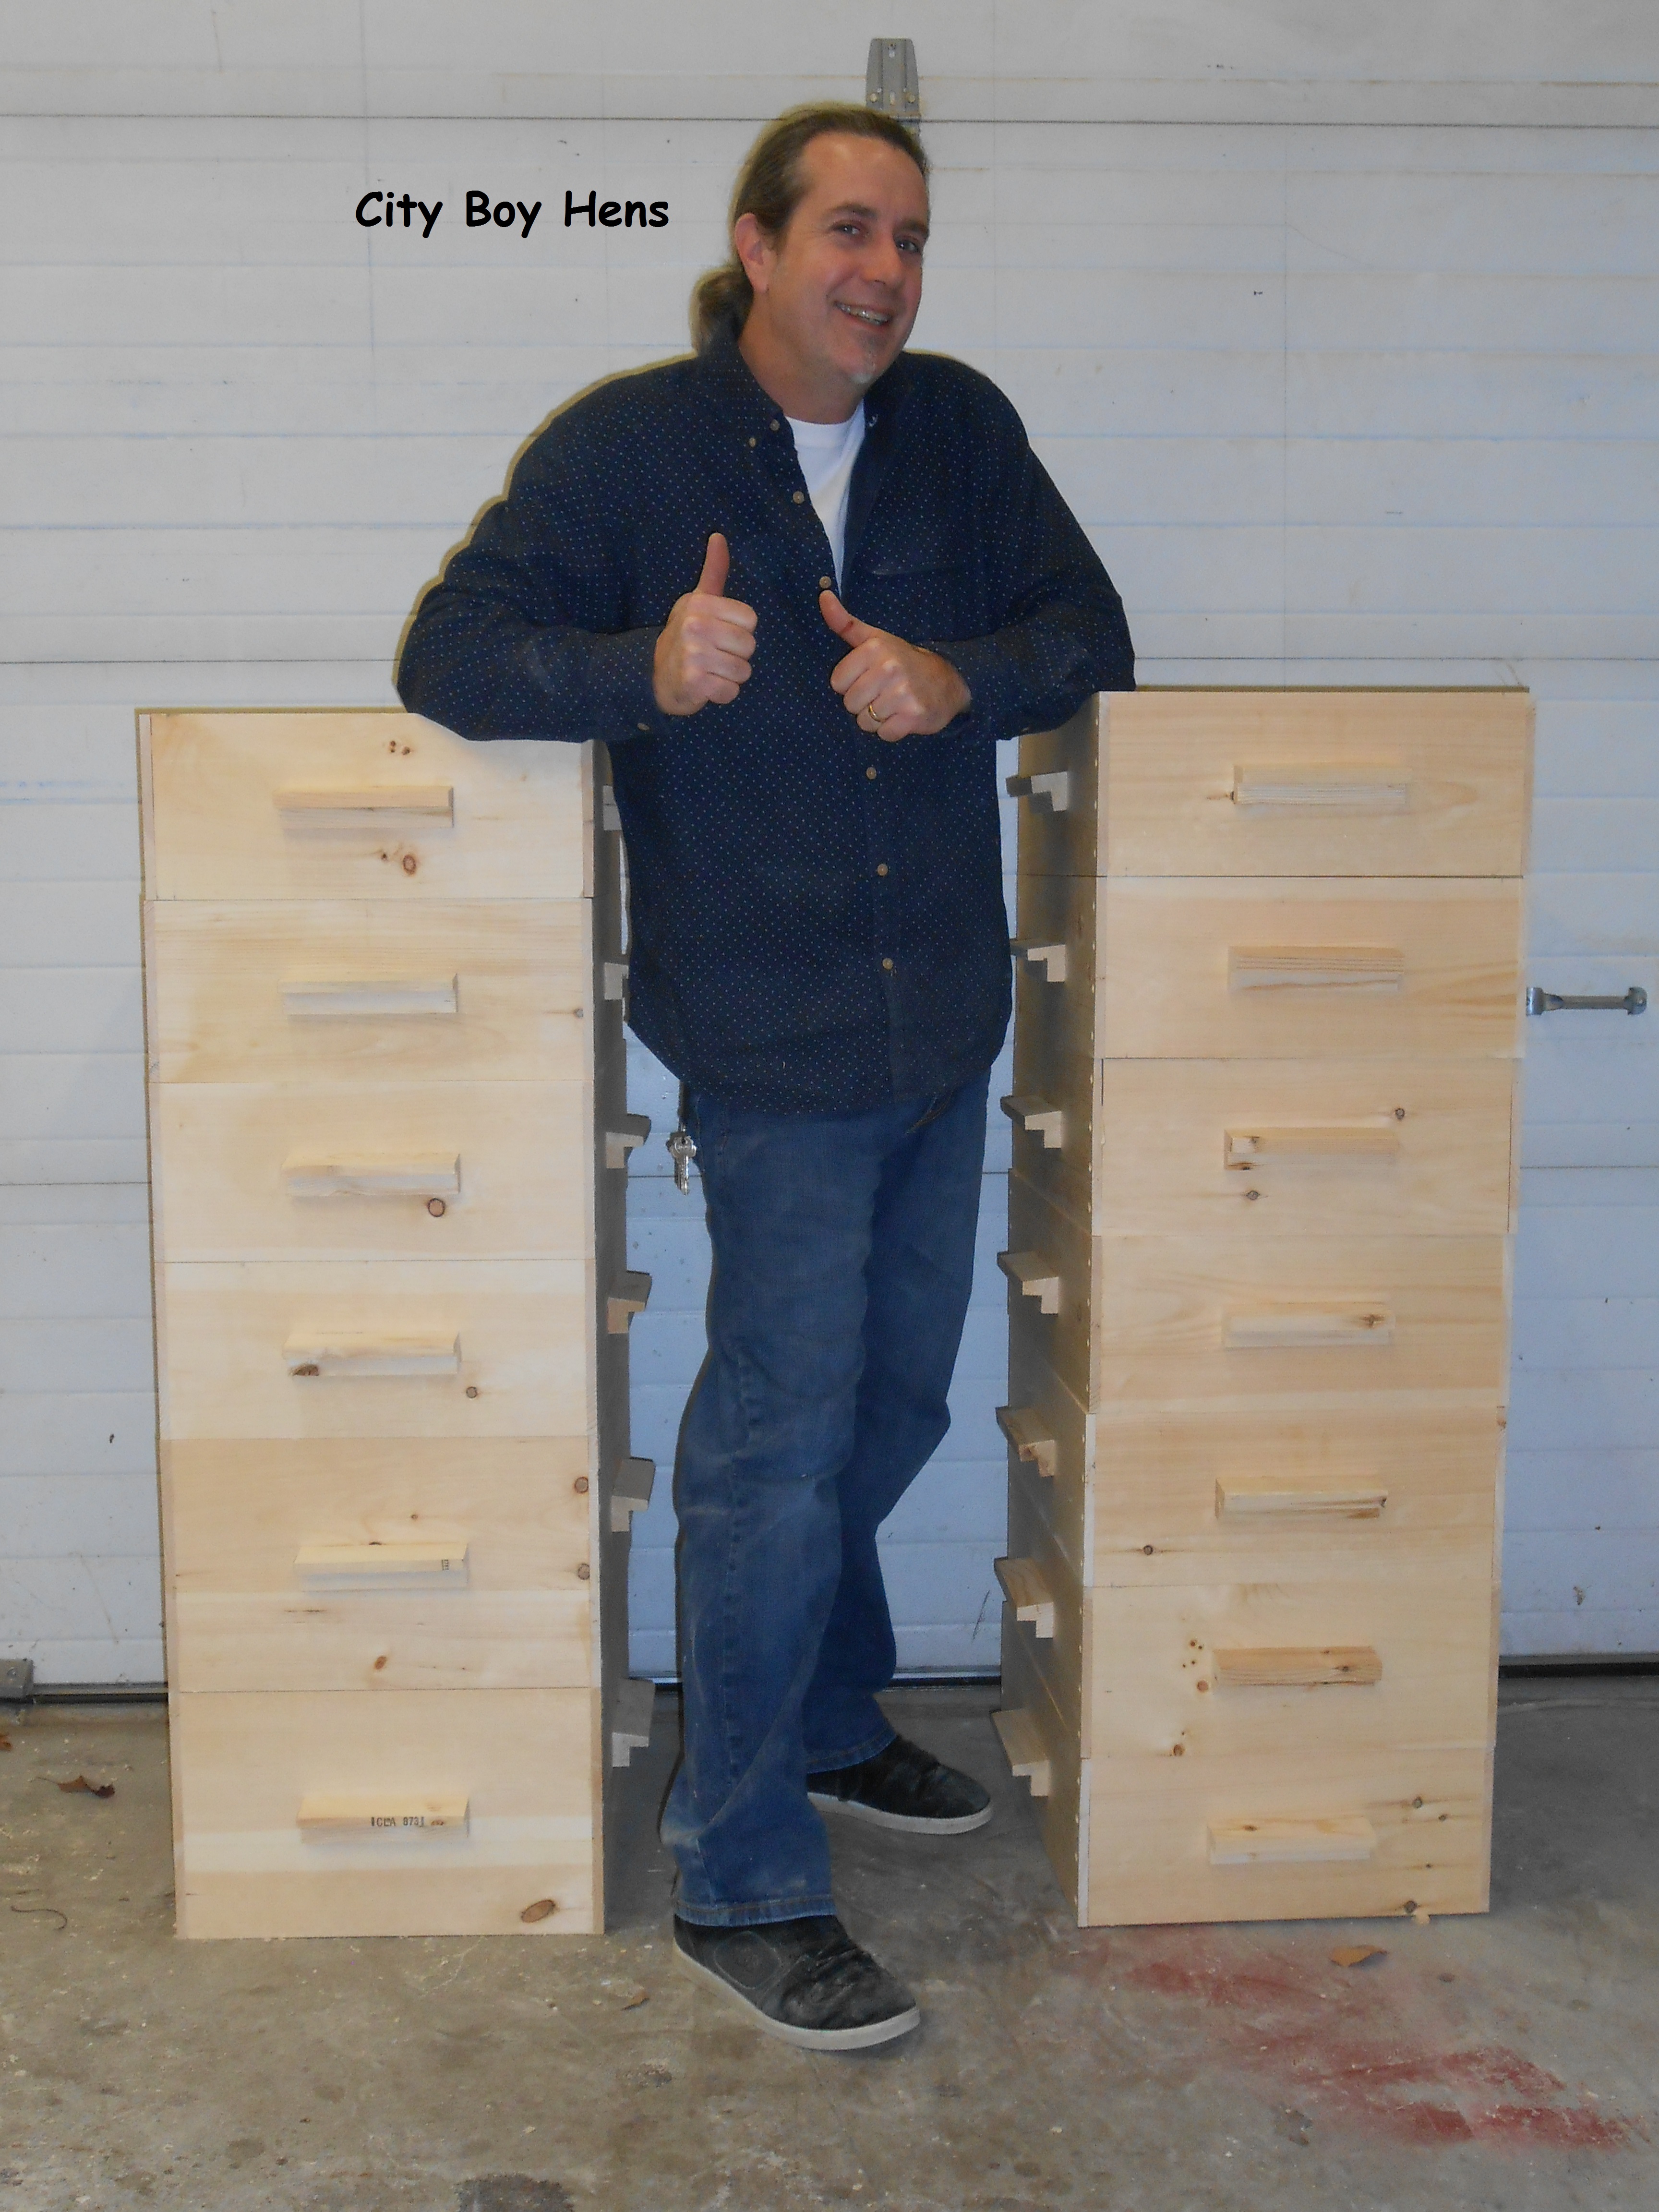
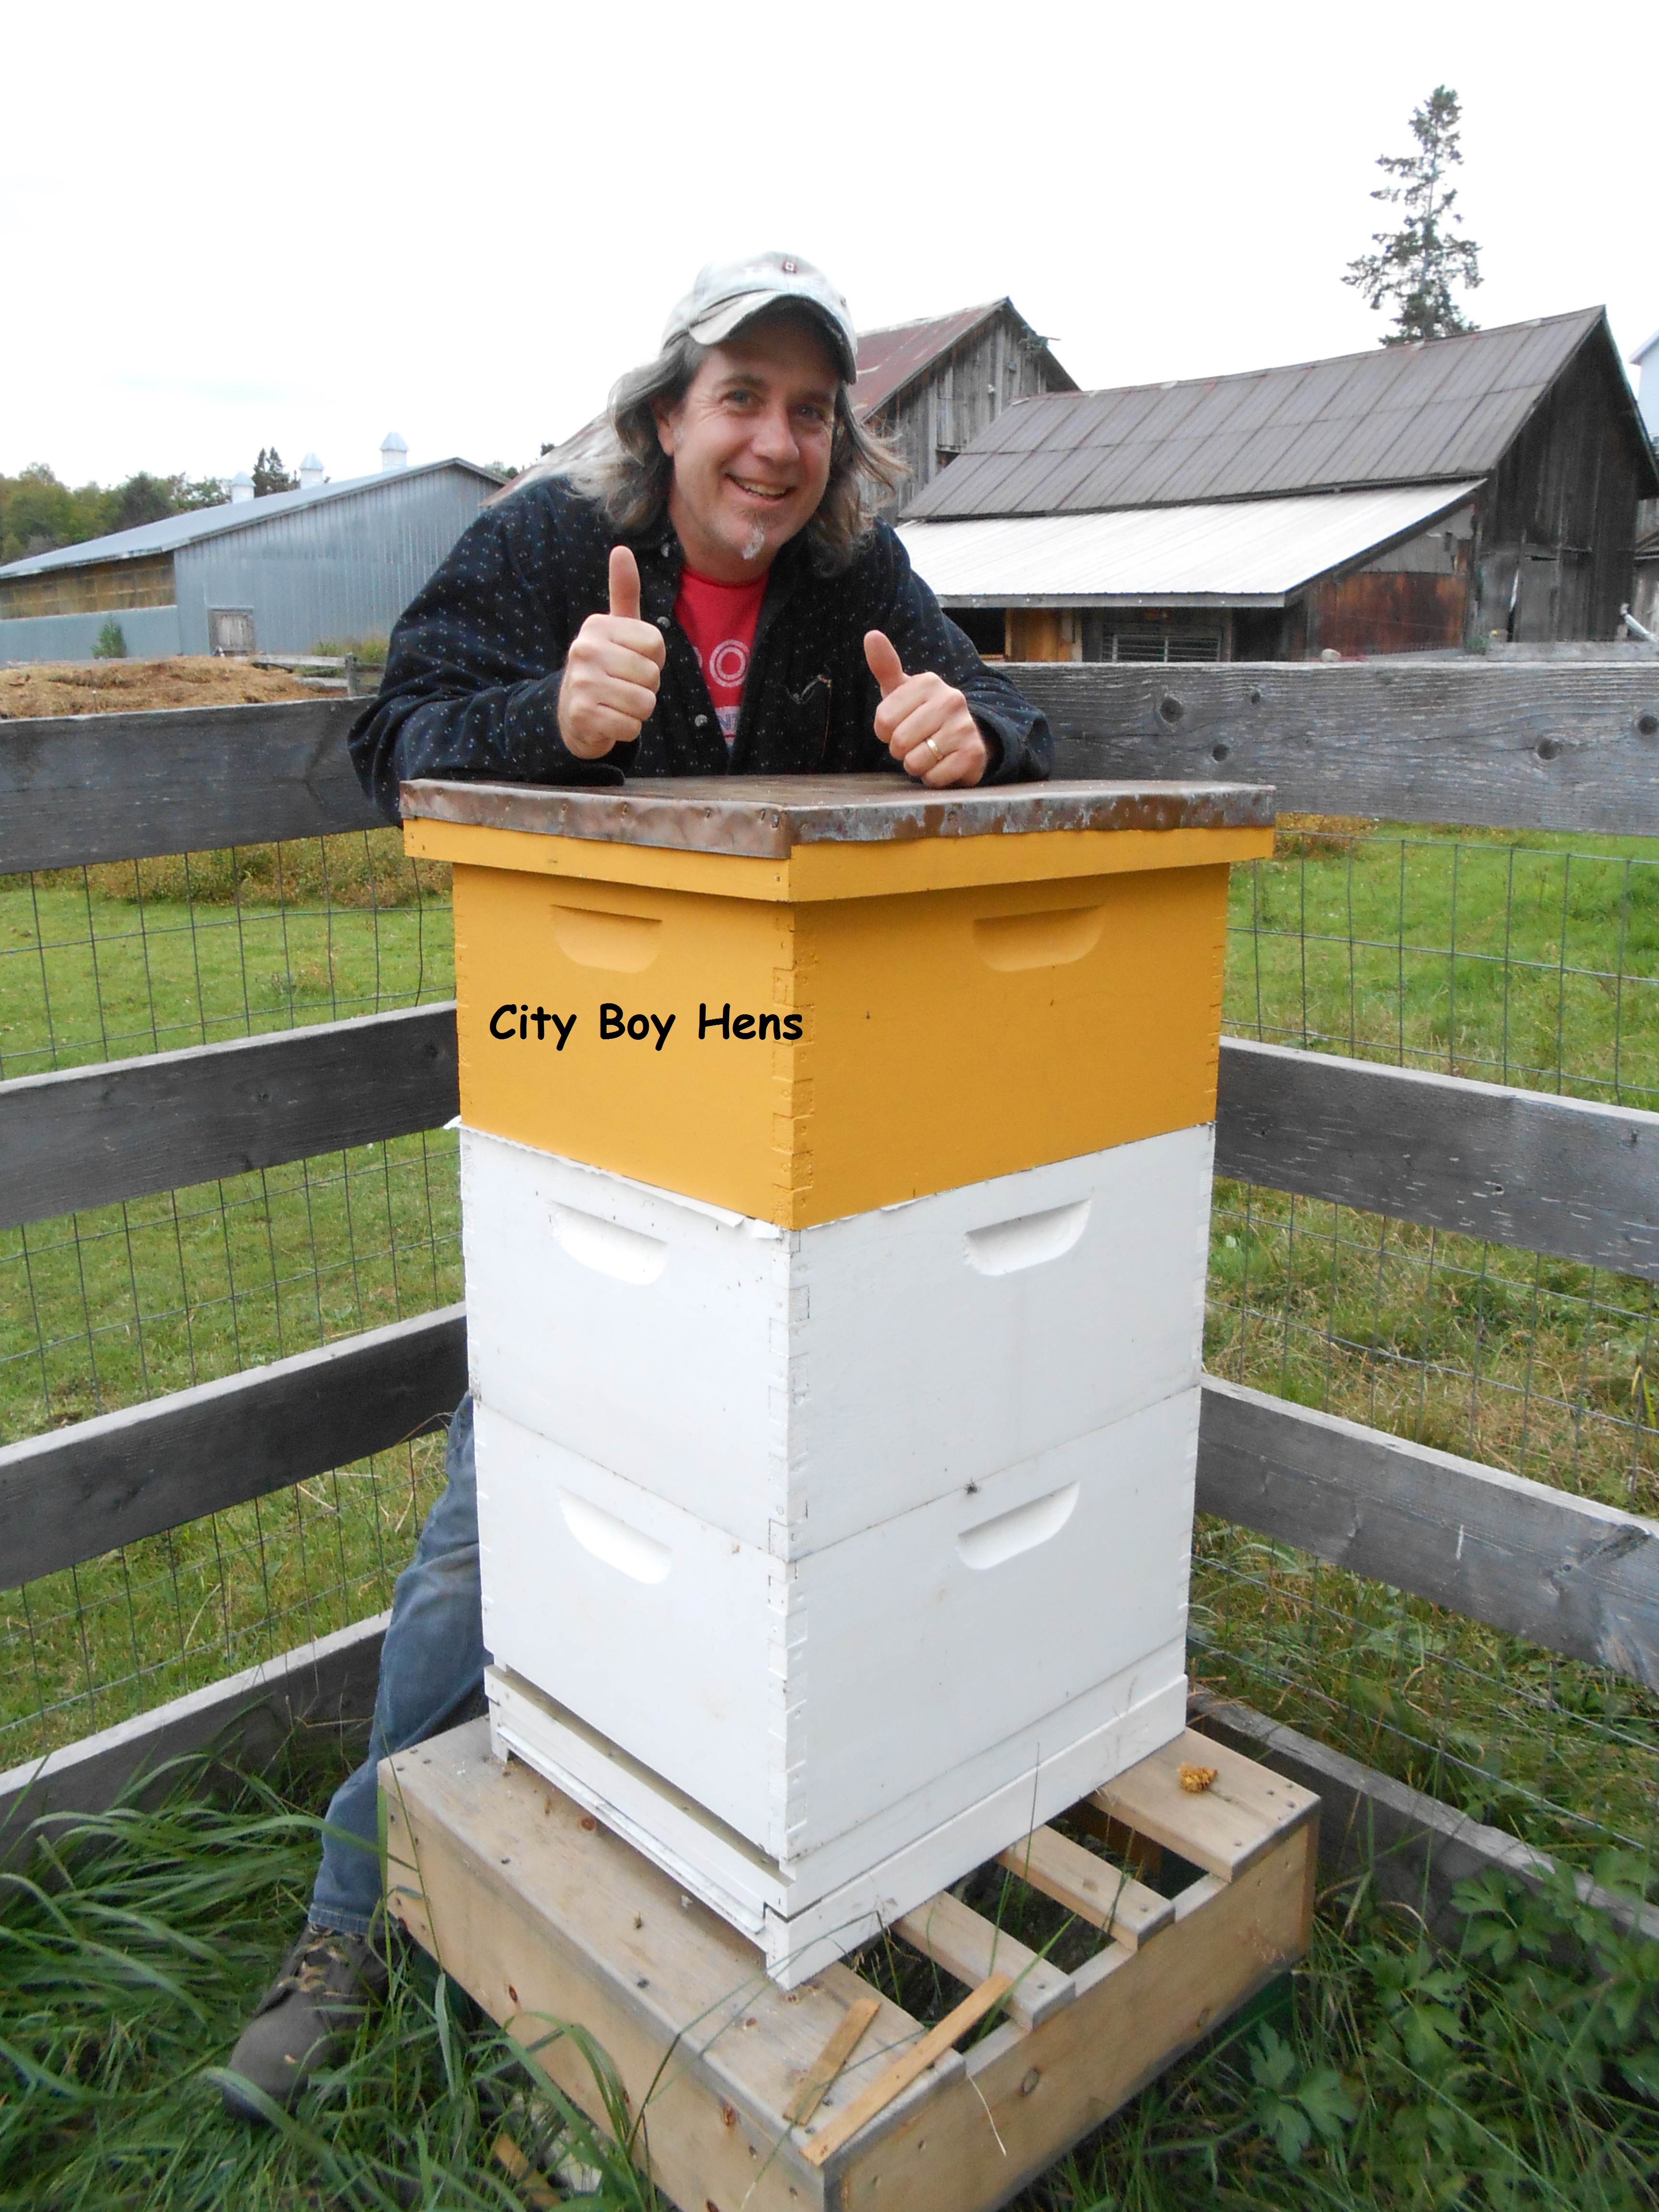
On Sunday morning, I met up with Dan and brought my hive to its new home.  It will sit in his barn for a few weeks until we can purchase a few more queens and re-start the 2 other hives.

Dan’s two surviving hives are doing well and the bees are starting to bring in some pollen.  You can see the yellow pollen that is attached to the legs of the bee in the picture below.  This is a great sign that all is well with the bees.027

Part 2

This past weekend also presented itself with the opportunity to build our raised bed vegetable garden at the cottage.  It was also the annual Spring weekend with my two great friends from my high school days.  It was great to have their help, laughter and practical jokes for an entire weekend.  Thanks guys!  Your sweat was greatly appreciated!011

018

032

So…the week is over and a lot was accomplished in those blurry seven days.  Sometimes everything comes at once, but I know I’ll look back in the summer when the honey is a flowin’ and the garden is a growin’ and know that it was all worth while.  In the mean time, sleep is looking pretty darn good!