How To Build A 5 Frame Nuc Beehive


010 - Copy

Building a nuc box is really no different from building  the boxes for a standard Langstroth hive.  It’s really just a smaller version.  It’s also not a complicated project and is fairly easy for the DIY guy or gal.  I chose to make my own nuc boxes for the following reasons:  First,  I didn’t want to buy a cardboard nuc box from my bee supplier and end up tossing it into the recycle box.  Second, I’ve built everything else for my hives, so why stop at this.  Third, I’m planning on either using these boxes for future swarm traps or creating additional colonies by “splitting” my original colonies in the future.

So…..lets get started.  But first, lets talk about safety.  Make sure that you read and understand how to SAFELY operate your power equipment.  In  some of the pictures below, the safety guard has been removed so that you can get a better understanding of the photo.  NEVER operate your equipment without a guard in place!

Nuc Box

In order to begin, you are going to need some 1×12 lumber or some glued up  1×6.  I choose the second option because it was what I had available in the shop.

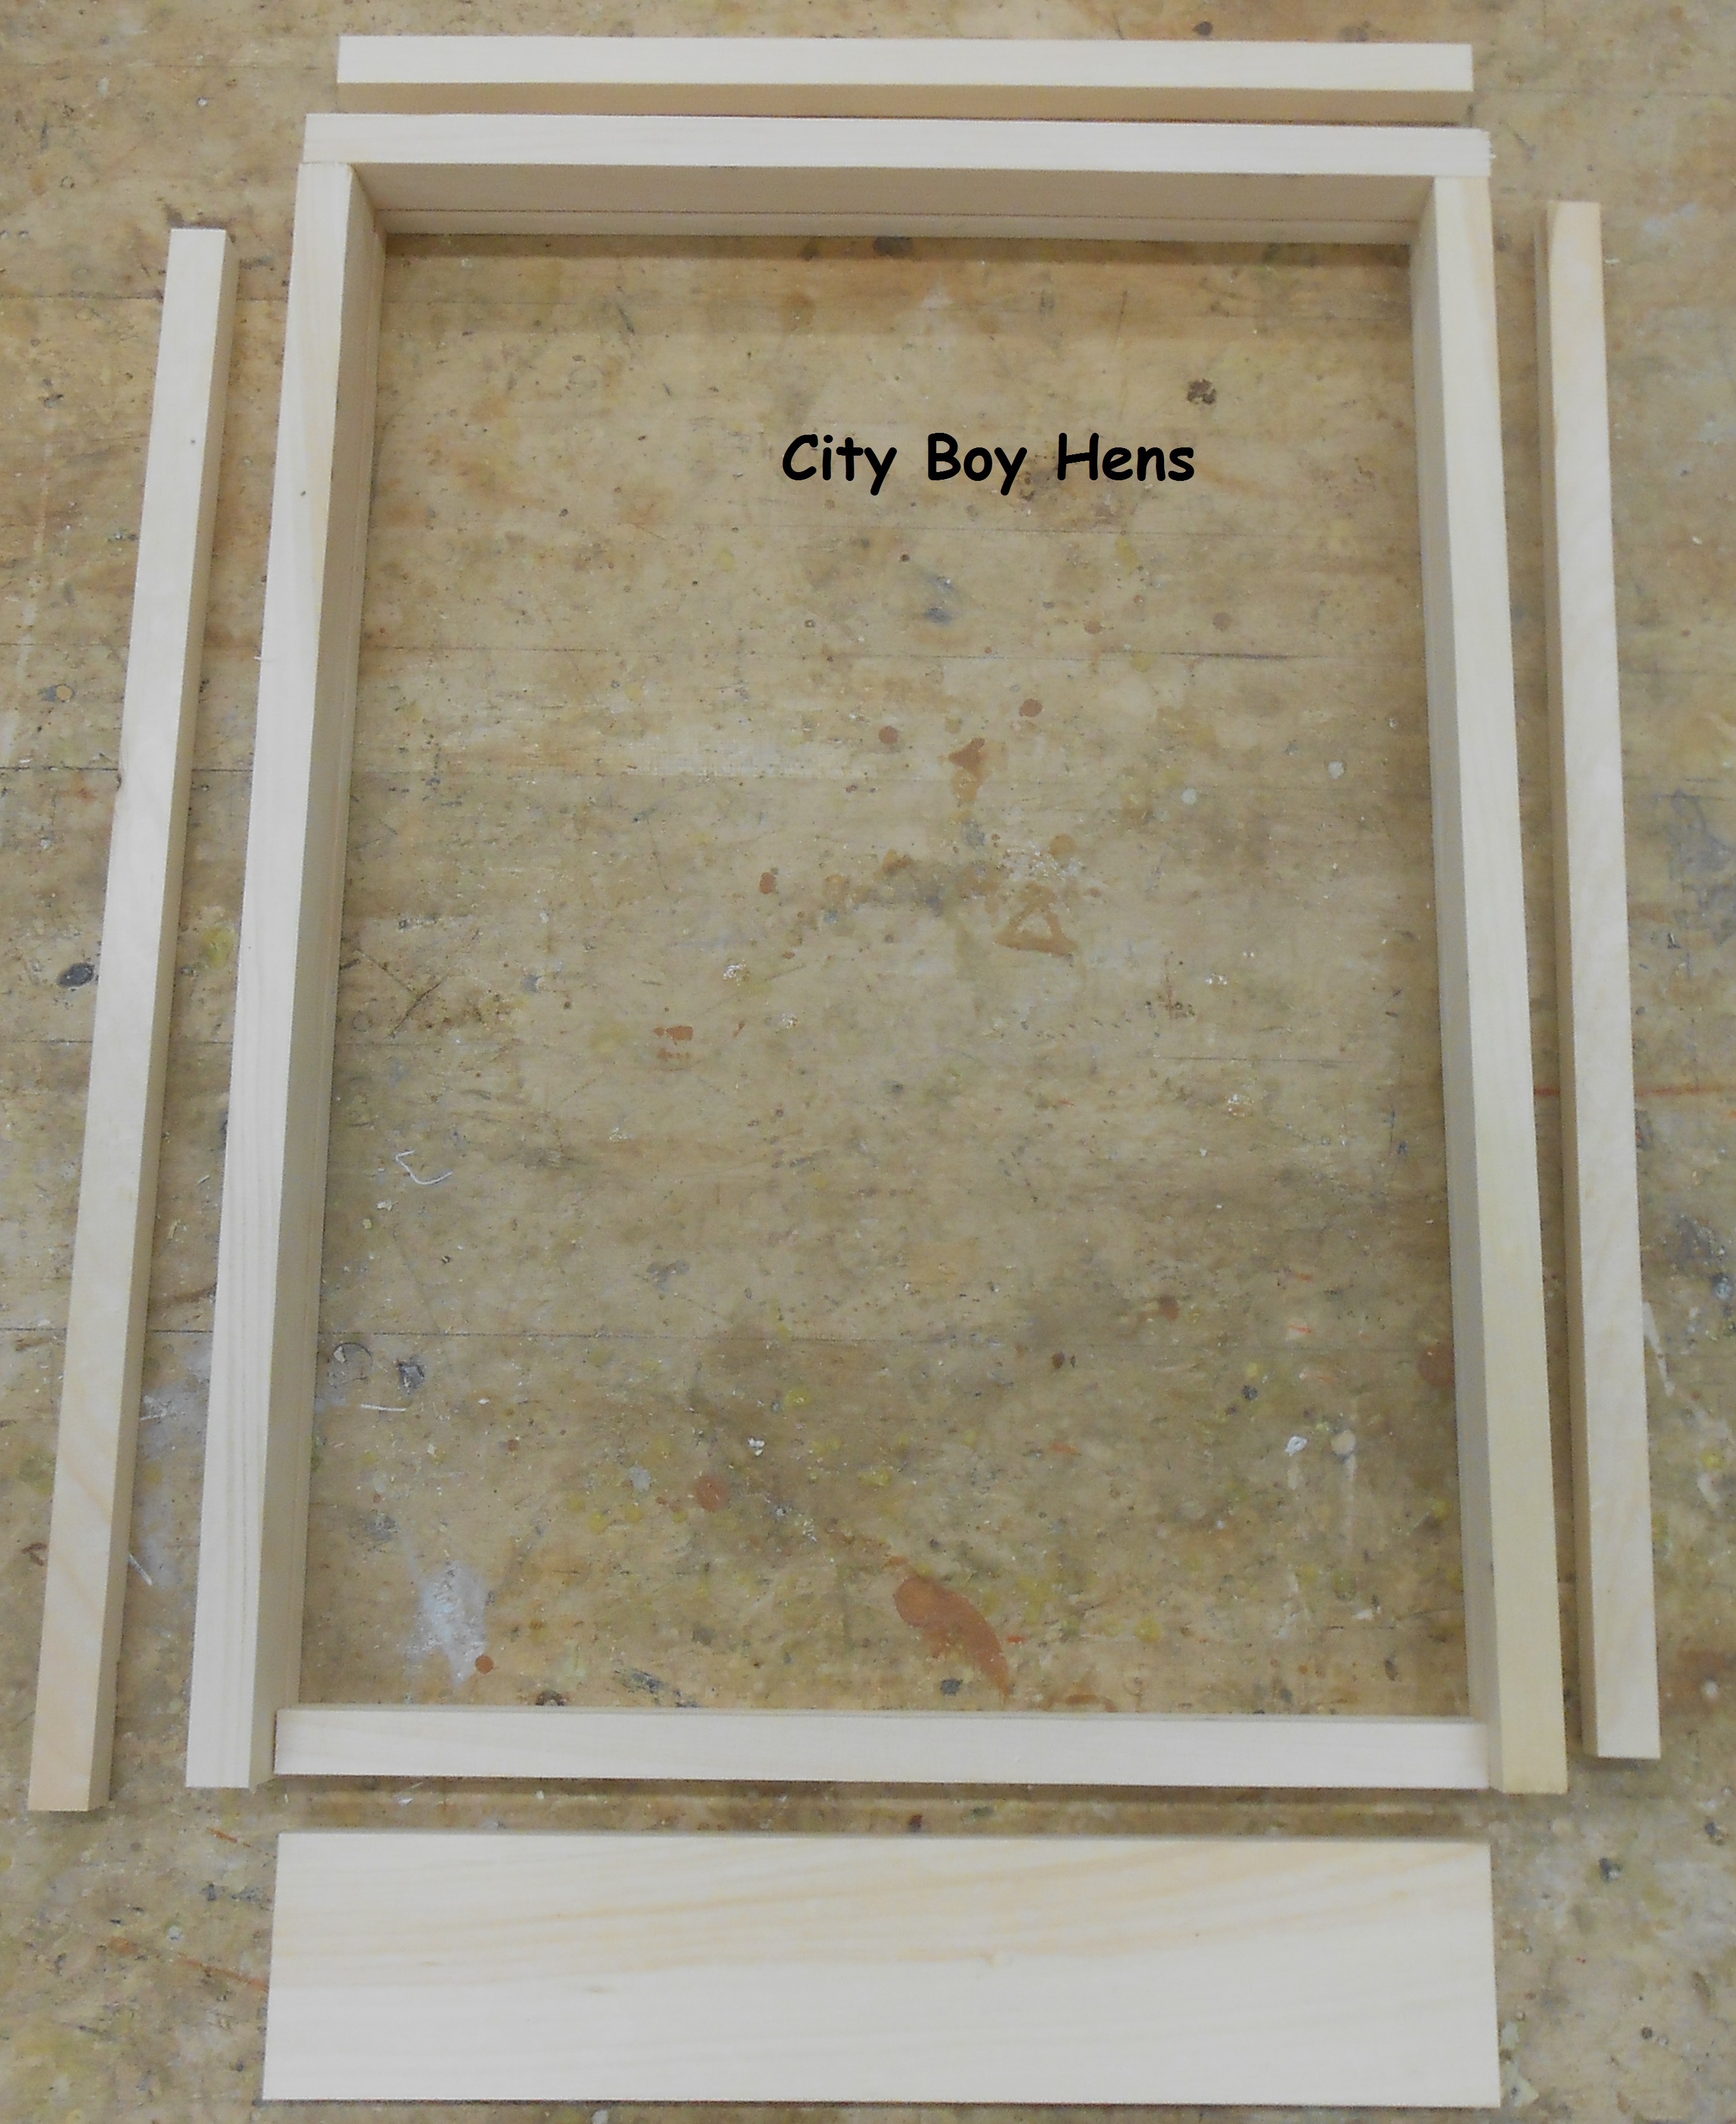
Begin by cutting the pieces of the box to the required length and width.005

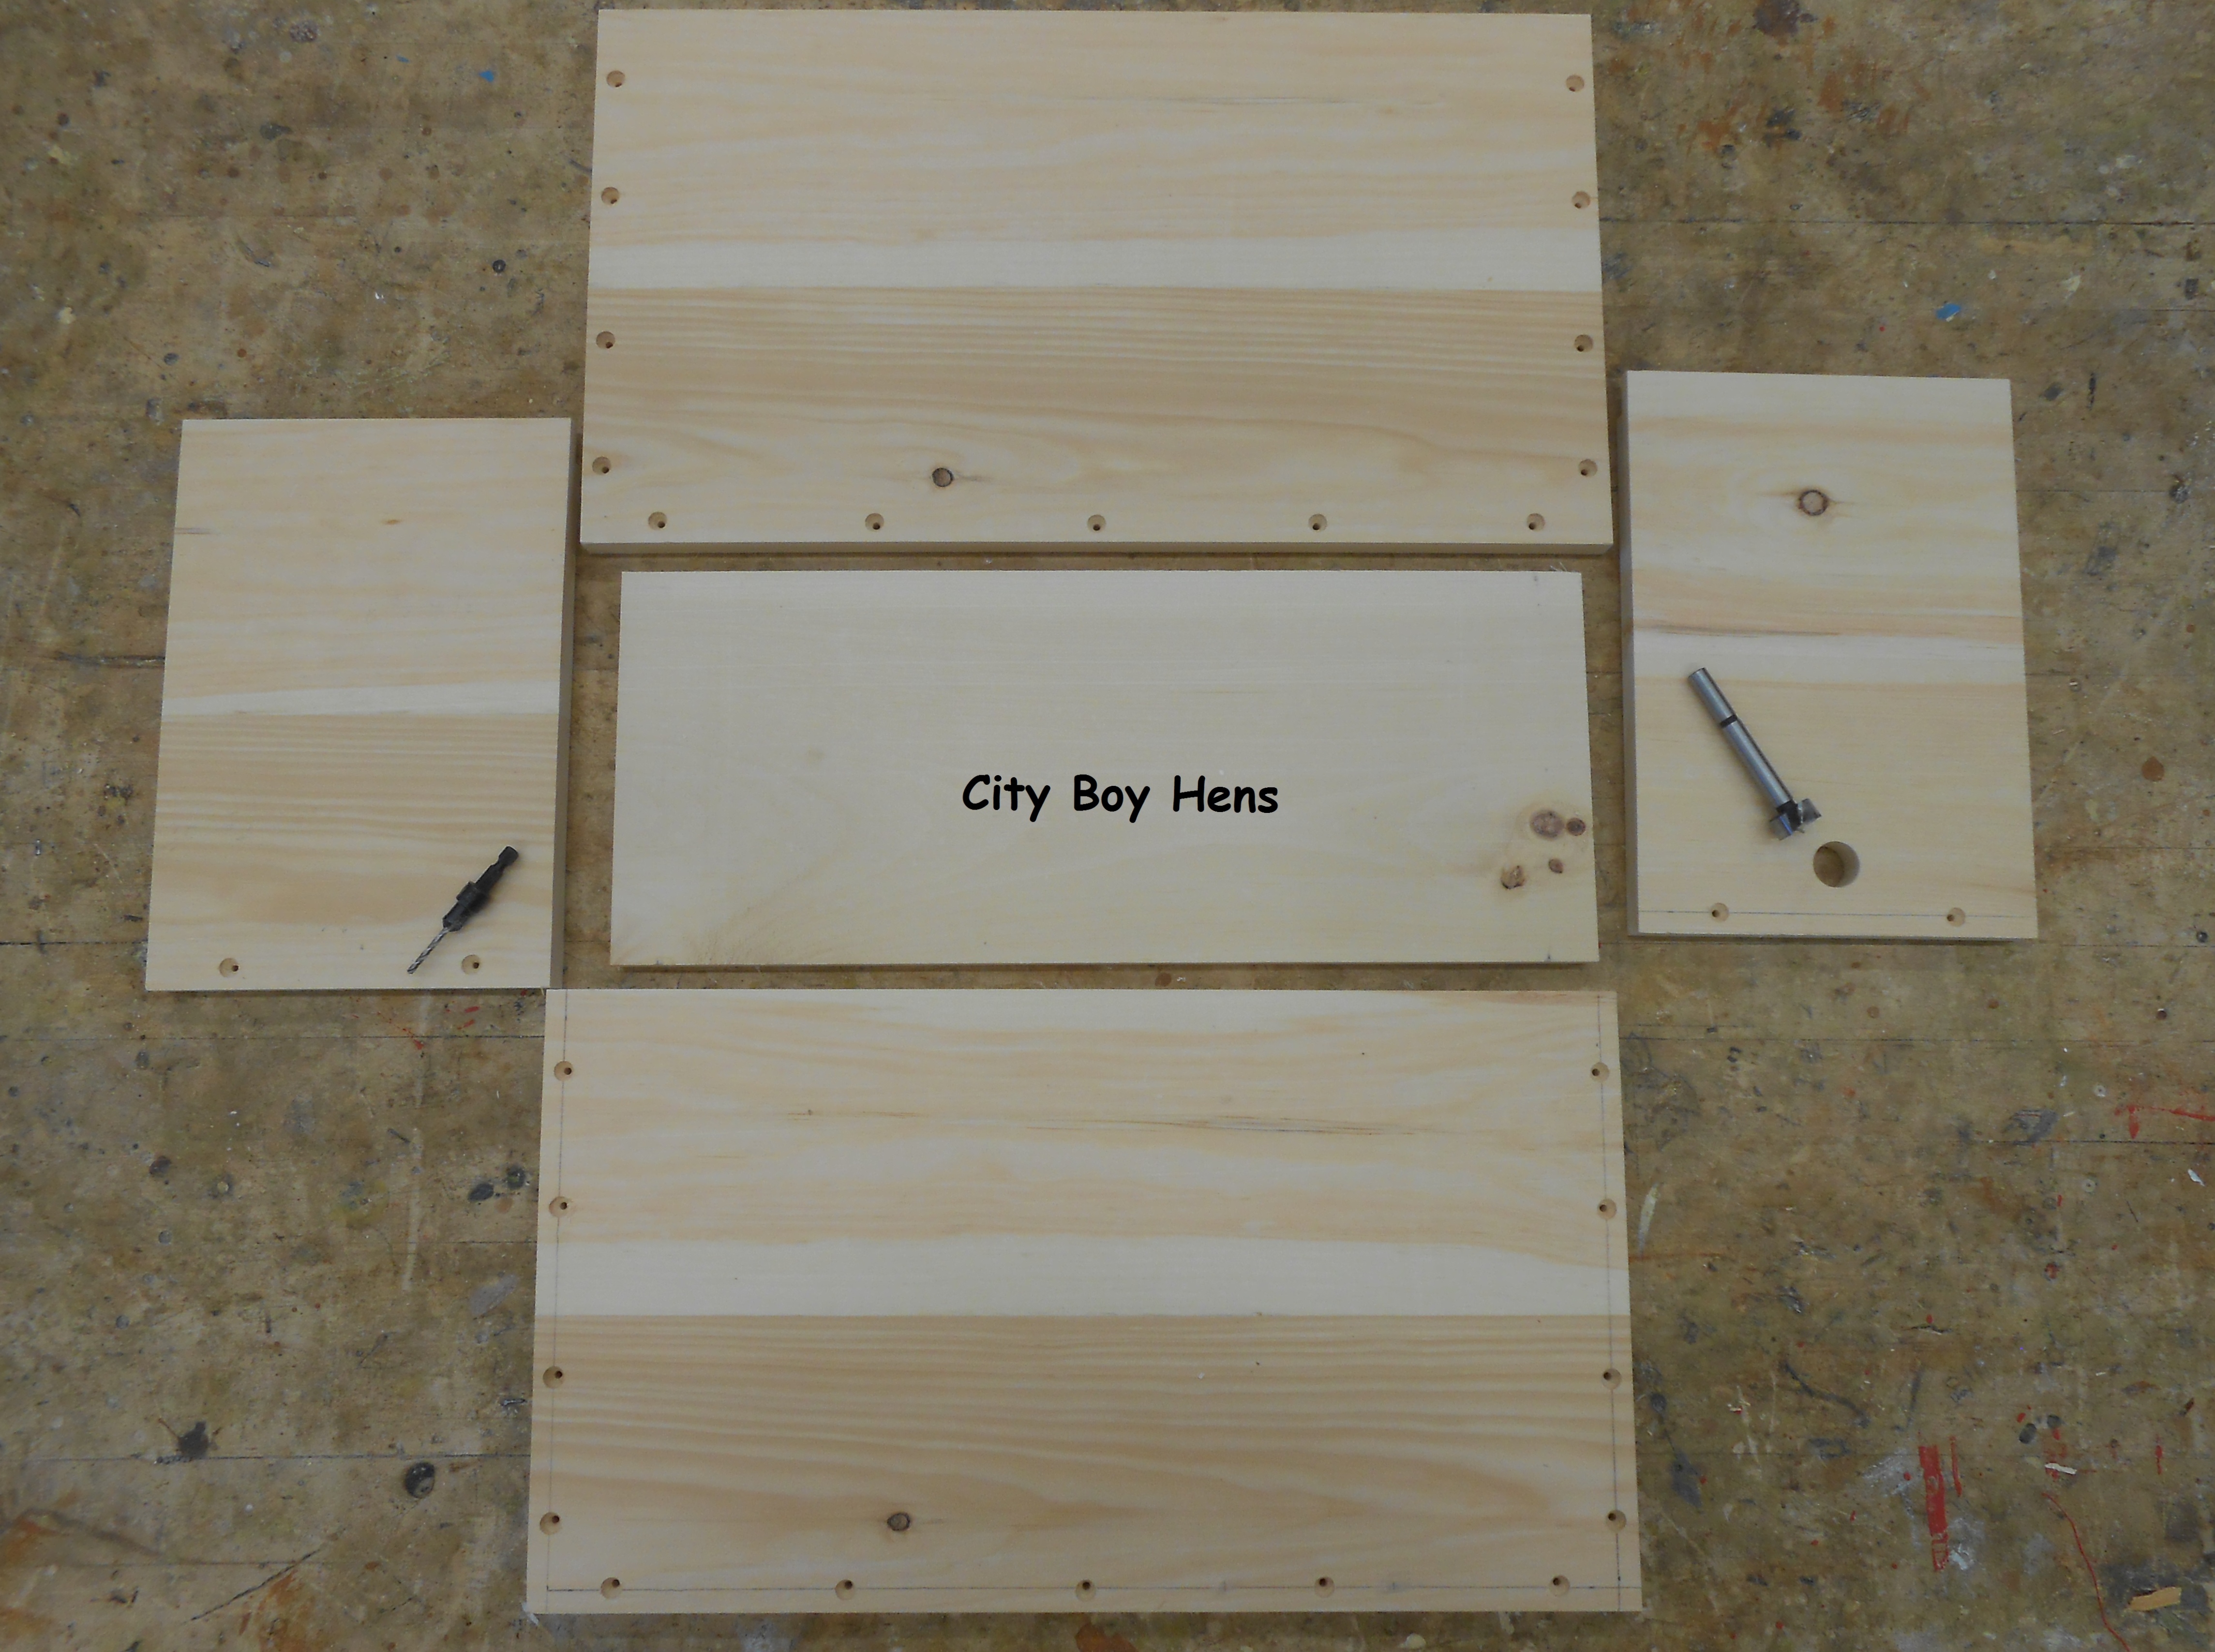
The front & back are 3/4″ x 7- 1/2″ x 11″.

The sides are 3/4″ x  19- 7/8″ x 11″ .

The bottom is 3/4″ x 7- 1/2″ x 18- 3/8″.

Using a 3/8″ countersink bit, drill the holes for the screw locations on each piece to a depth of 3/8″.

Using a 7/8″ forstner bit, drill the hole for the entrance.  The center point for this hole should be 1-1/4″ from the bottom of the front.

Now, cut the rabbet joint on the inside of the front & back.  This joint will support the frames..  This joint can be made in two passes on the table saw.  First, set the rip fence to 3/8″ and the blade height to 3/4″.  Use a feather board clamped to the table saw top in order to help stabilize the stock as it passes over the blade.


002

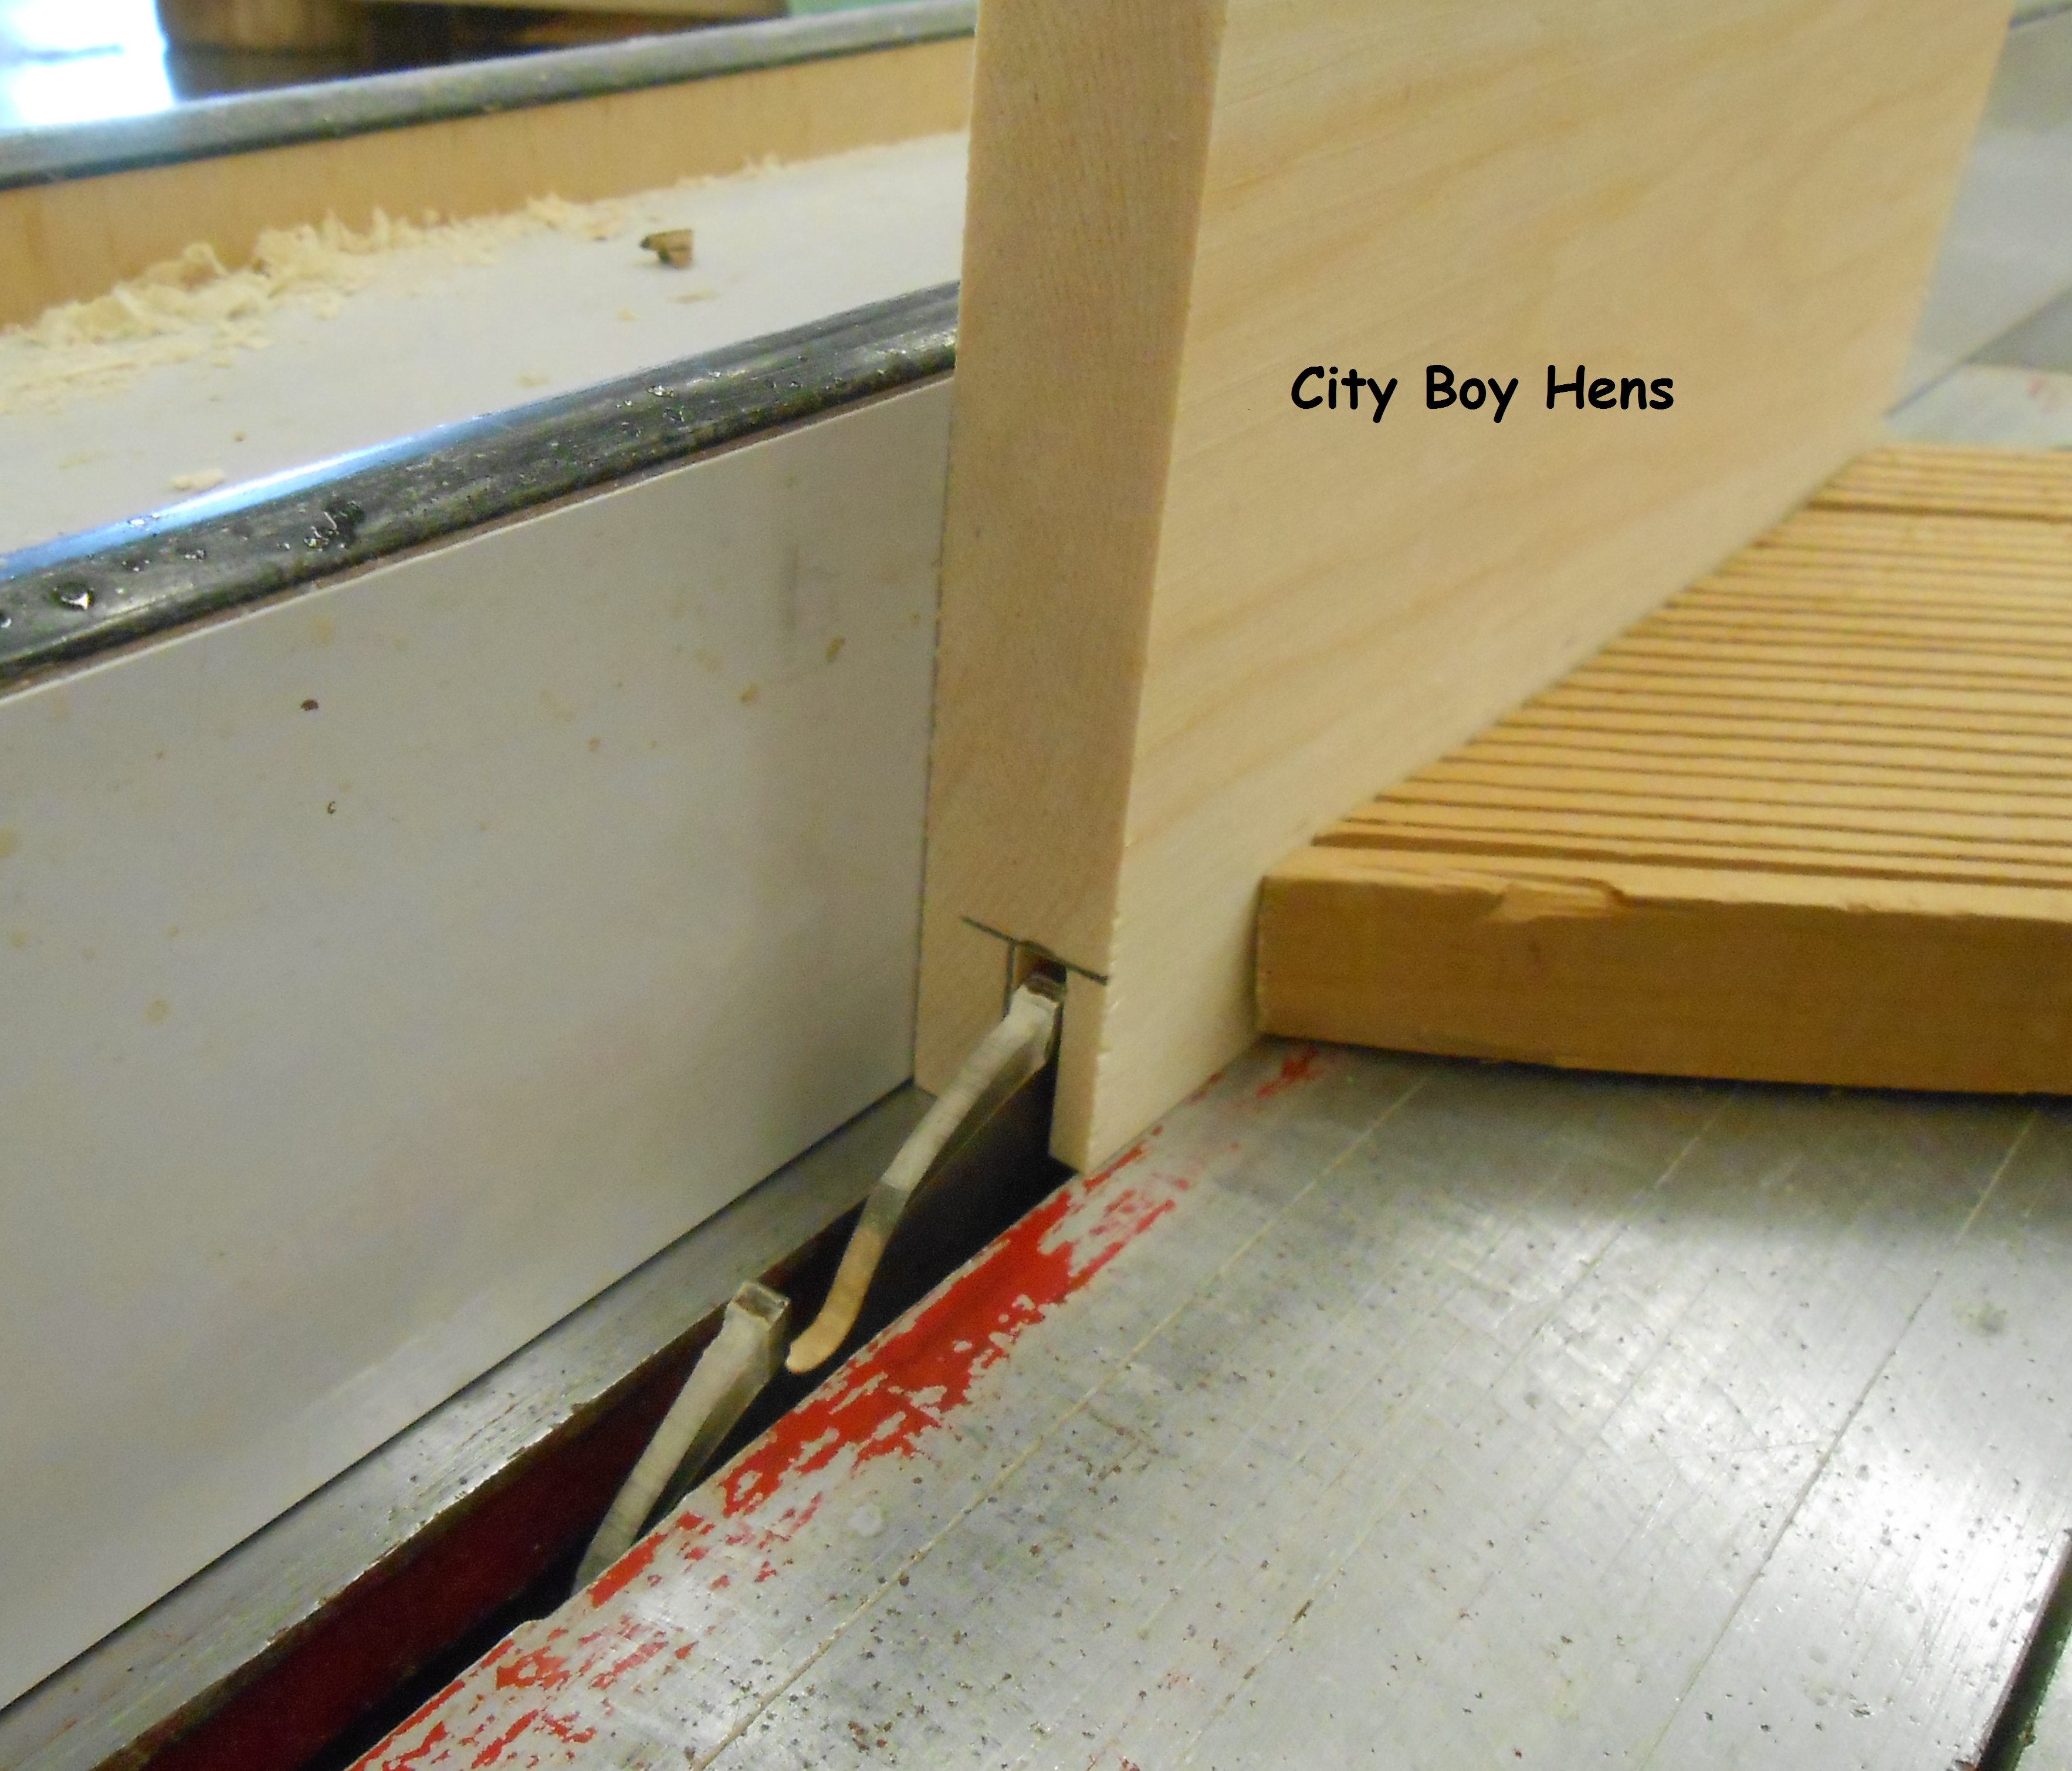
Next, lower the blade to 3/8″ and adjust the rip fence so that there is 3/4″ from the left side of the blade to the fence.


003

004

Now assemble the box using 1- 1/2″ galvanized screws and glue.

Fill the screw holes with wooden plugs, trim to flush and sand the box.

009

If you would like to make handles for your nuc box, CLICK HERE to see how I made them for my standard hives.

Top

008

Material List:

Plywood – 3/4″ x 9-1/2″x 20-1/2″.

Front & back strips –  3/4″ x 2″ x 9-1/2″.

Side strips –  3/4″ x 2″ x 22″.

Metal covering – 14-1/2″ x 25-1/2″.

Begin by cutting these pieces to the required width & length and countersinking screw locations in the front, back & side strips.

Just like the nuc box, glue, screw, plug and sand the assemble top.

003

Next,  paint the top before securing the metal “roof”.

Once the paint is dry, evenly position the and trace the circumference of the roof on the metal sheet.  These pencil lines will become the 90 degree edges that must be bent for the top.  Using metal shears, cut a 45 degree angle from each edge of the metal sheet to the outline edge of the top.001

Using a 90 degree edge (like the end of your table saw) begin bending the metal along the two sides.  Take your time and only exert a bit of pressure as you move down the line.  Continue repeating this process until you have a nice crisp edge.

Now screw those edges to the sides of the top with #6 x 1/2″ pan head metal screws.

Next, fold the 45 degree edge (from the side) on to the front/back and begin bending the edge for the front/back. 004Fold the 45 degree edge (from the front/back) to the side and secure these areas with screws.
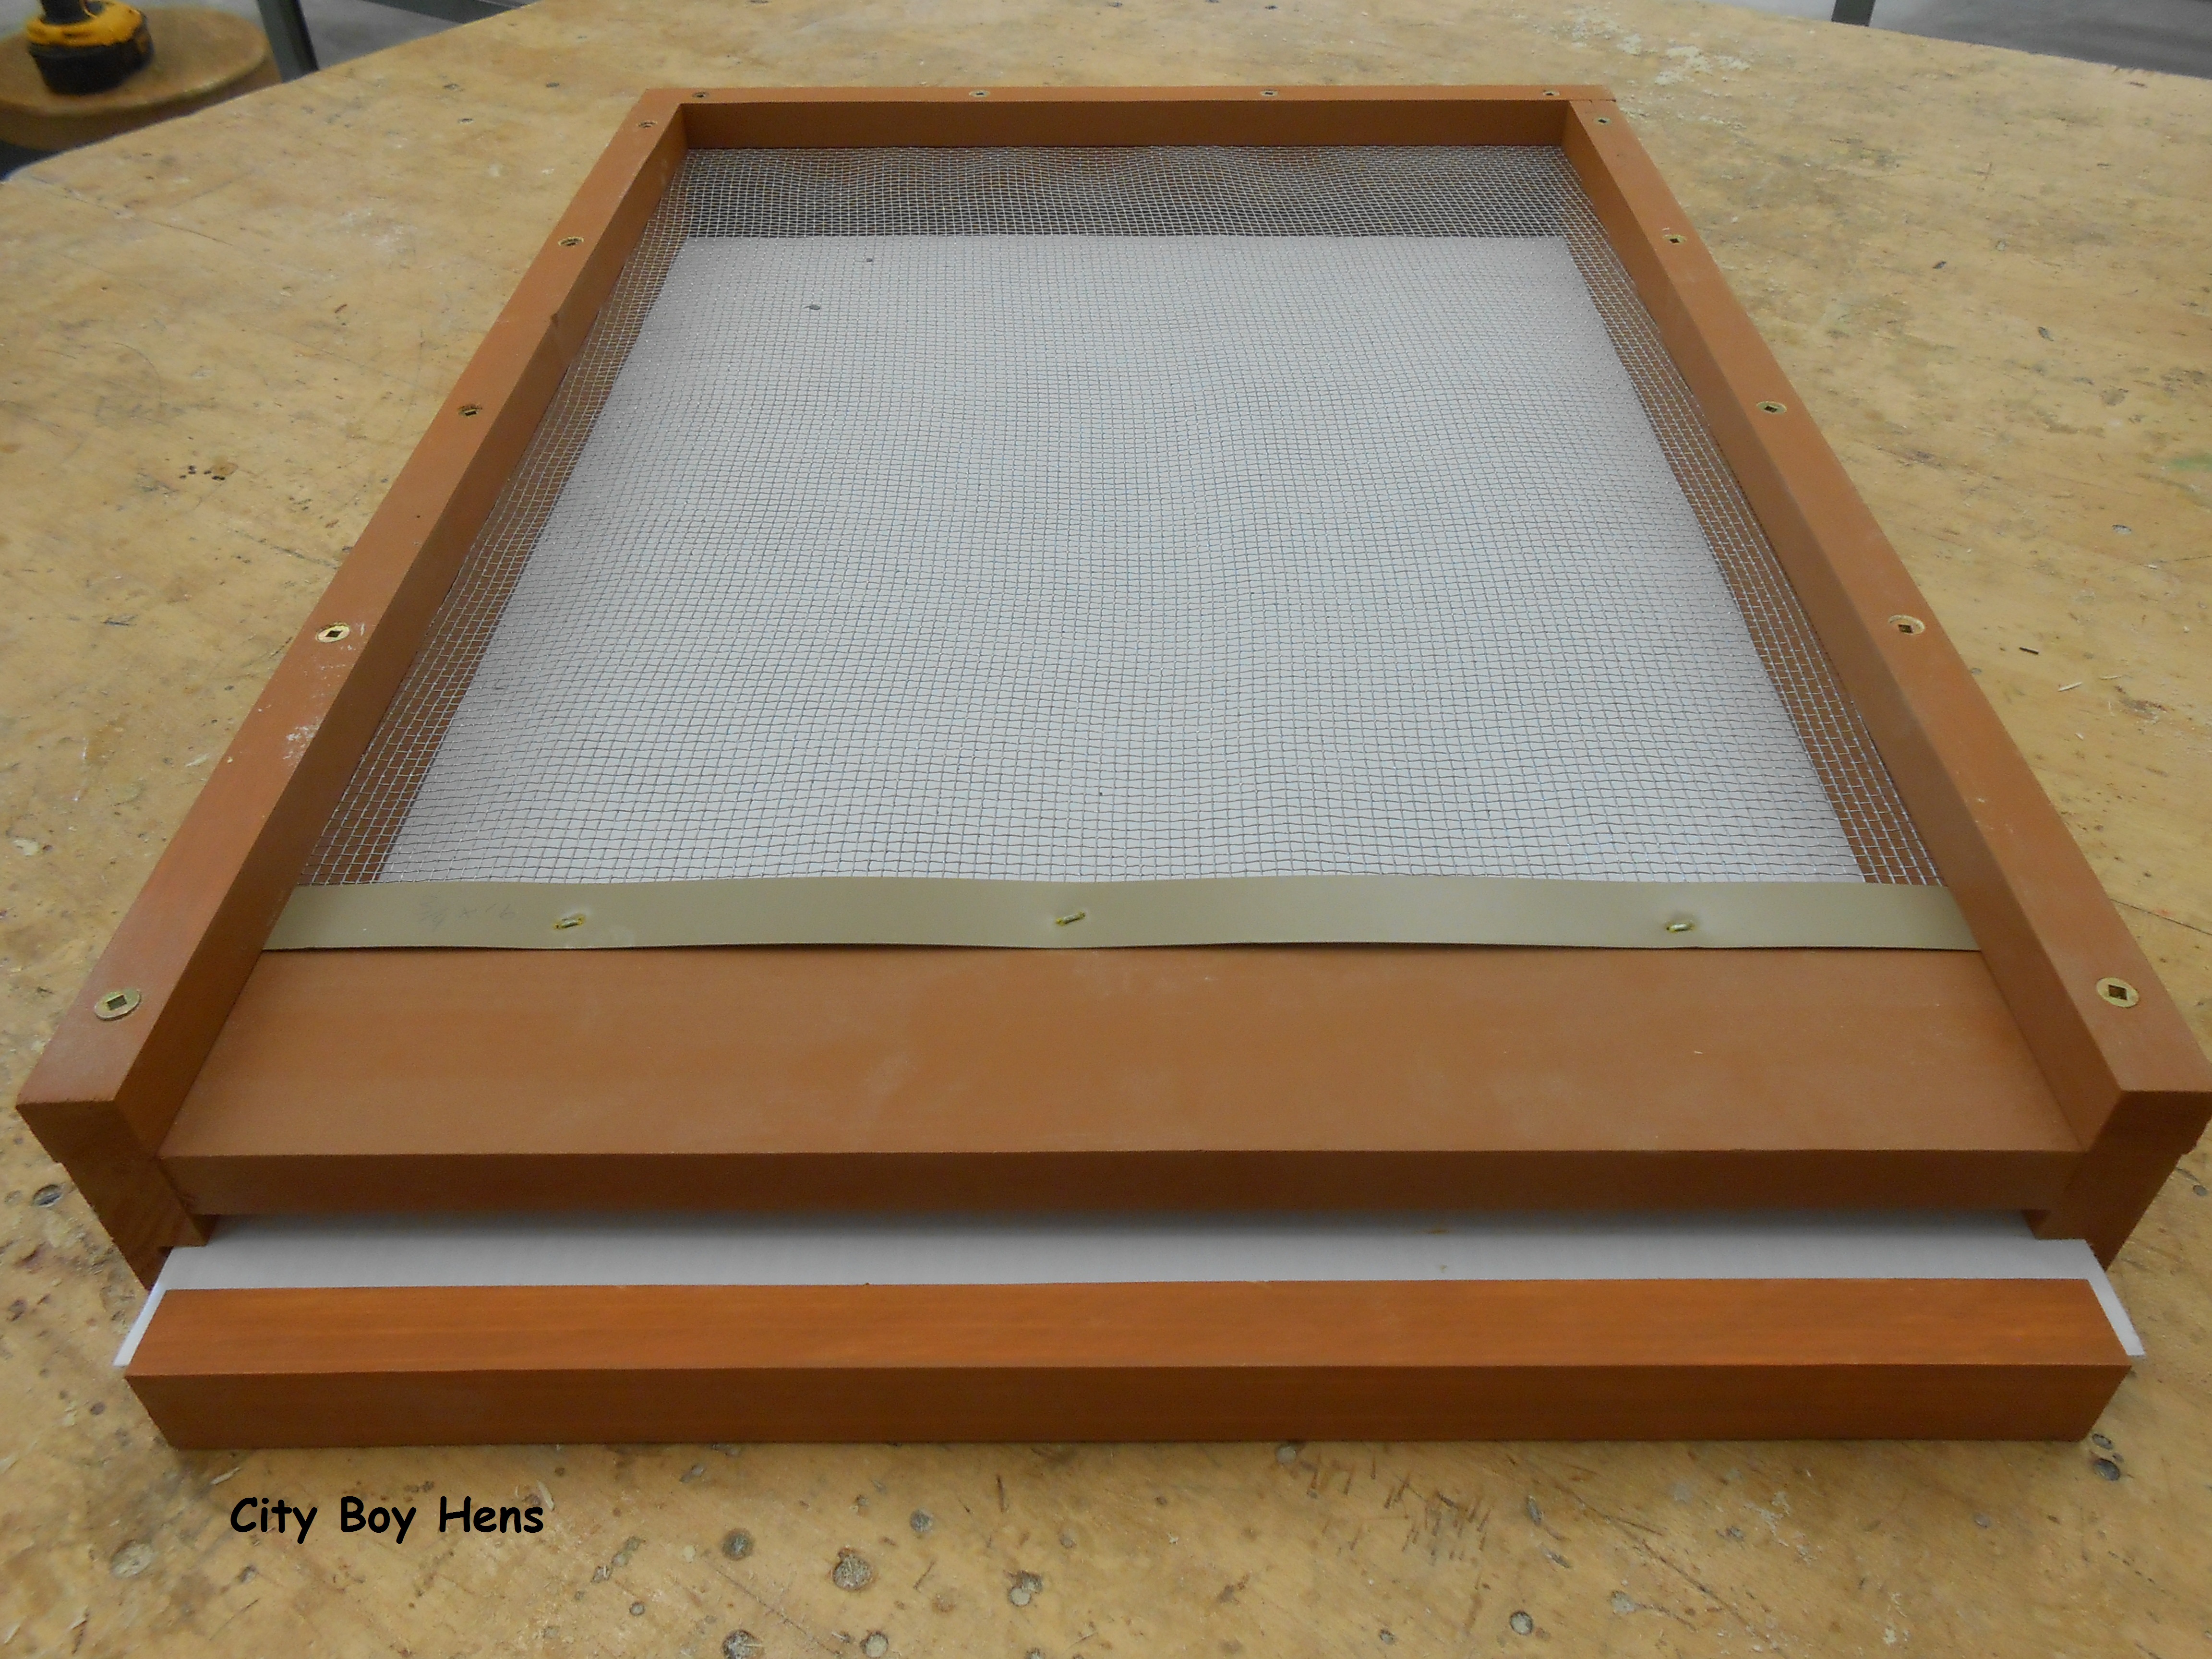
005

Inner Cover

Material List:

Plywood – 1/4″ x 7-1/4″ x 18-1/8″

Front & Back Strips – 3/4″ x 1 – 1/4″ x 9″

Side Strips- 3/4″ x 1-1/4″ x 19-7/8″

Using a 7/8″Forstner bit, drill two holes in the center of the plywood so that the distance is 3 – 3/4″ in length from the outside of each circle.  Cut out the rest of the shape using a scroll saw, jig saw or coping saw.

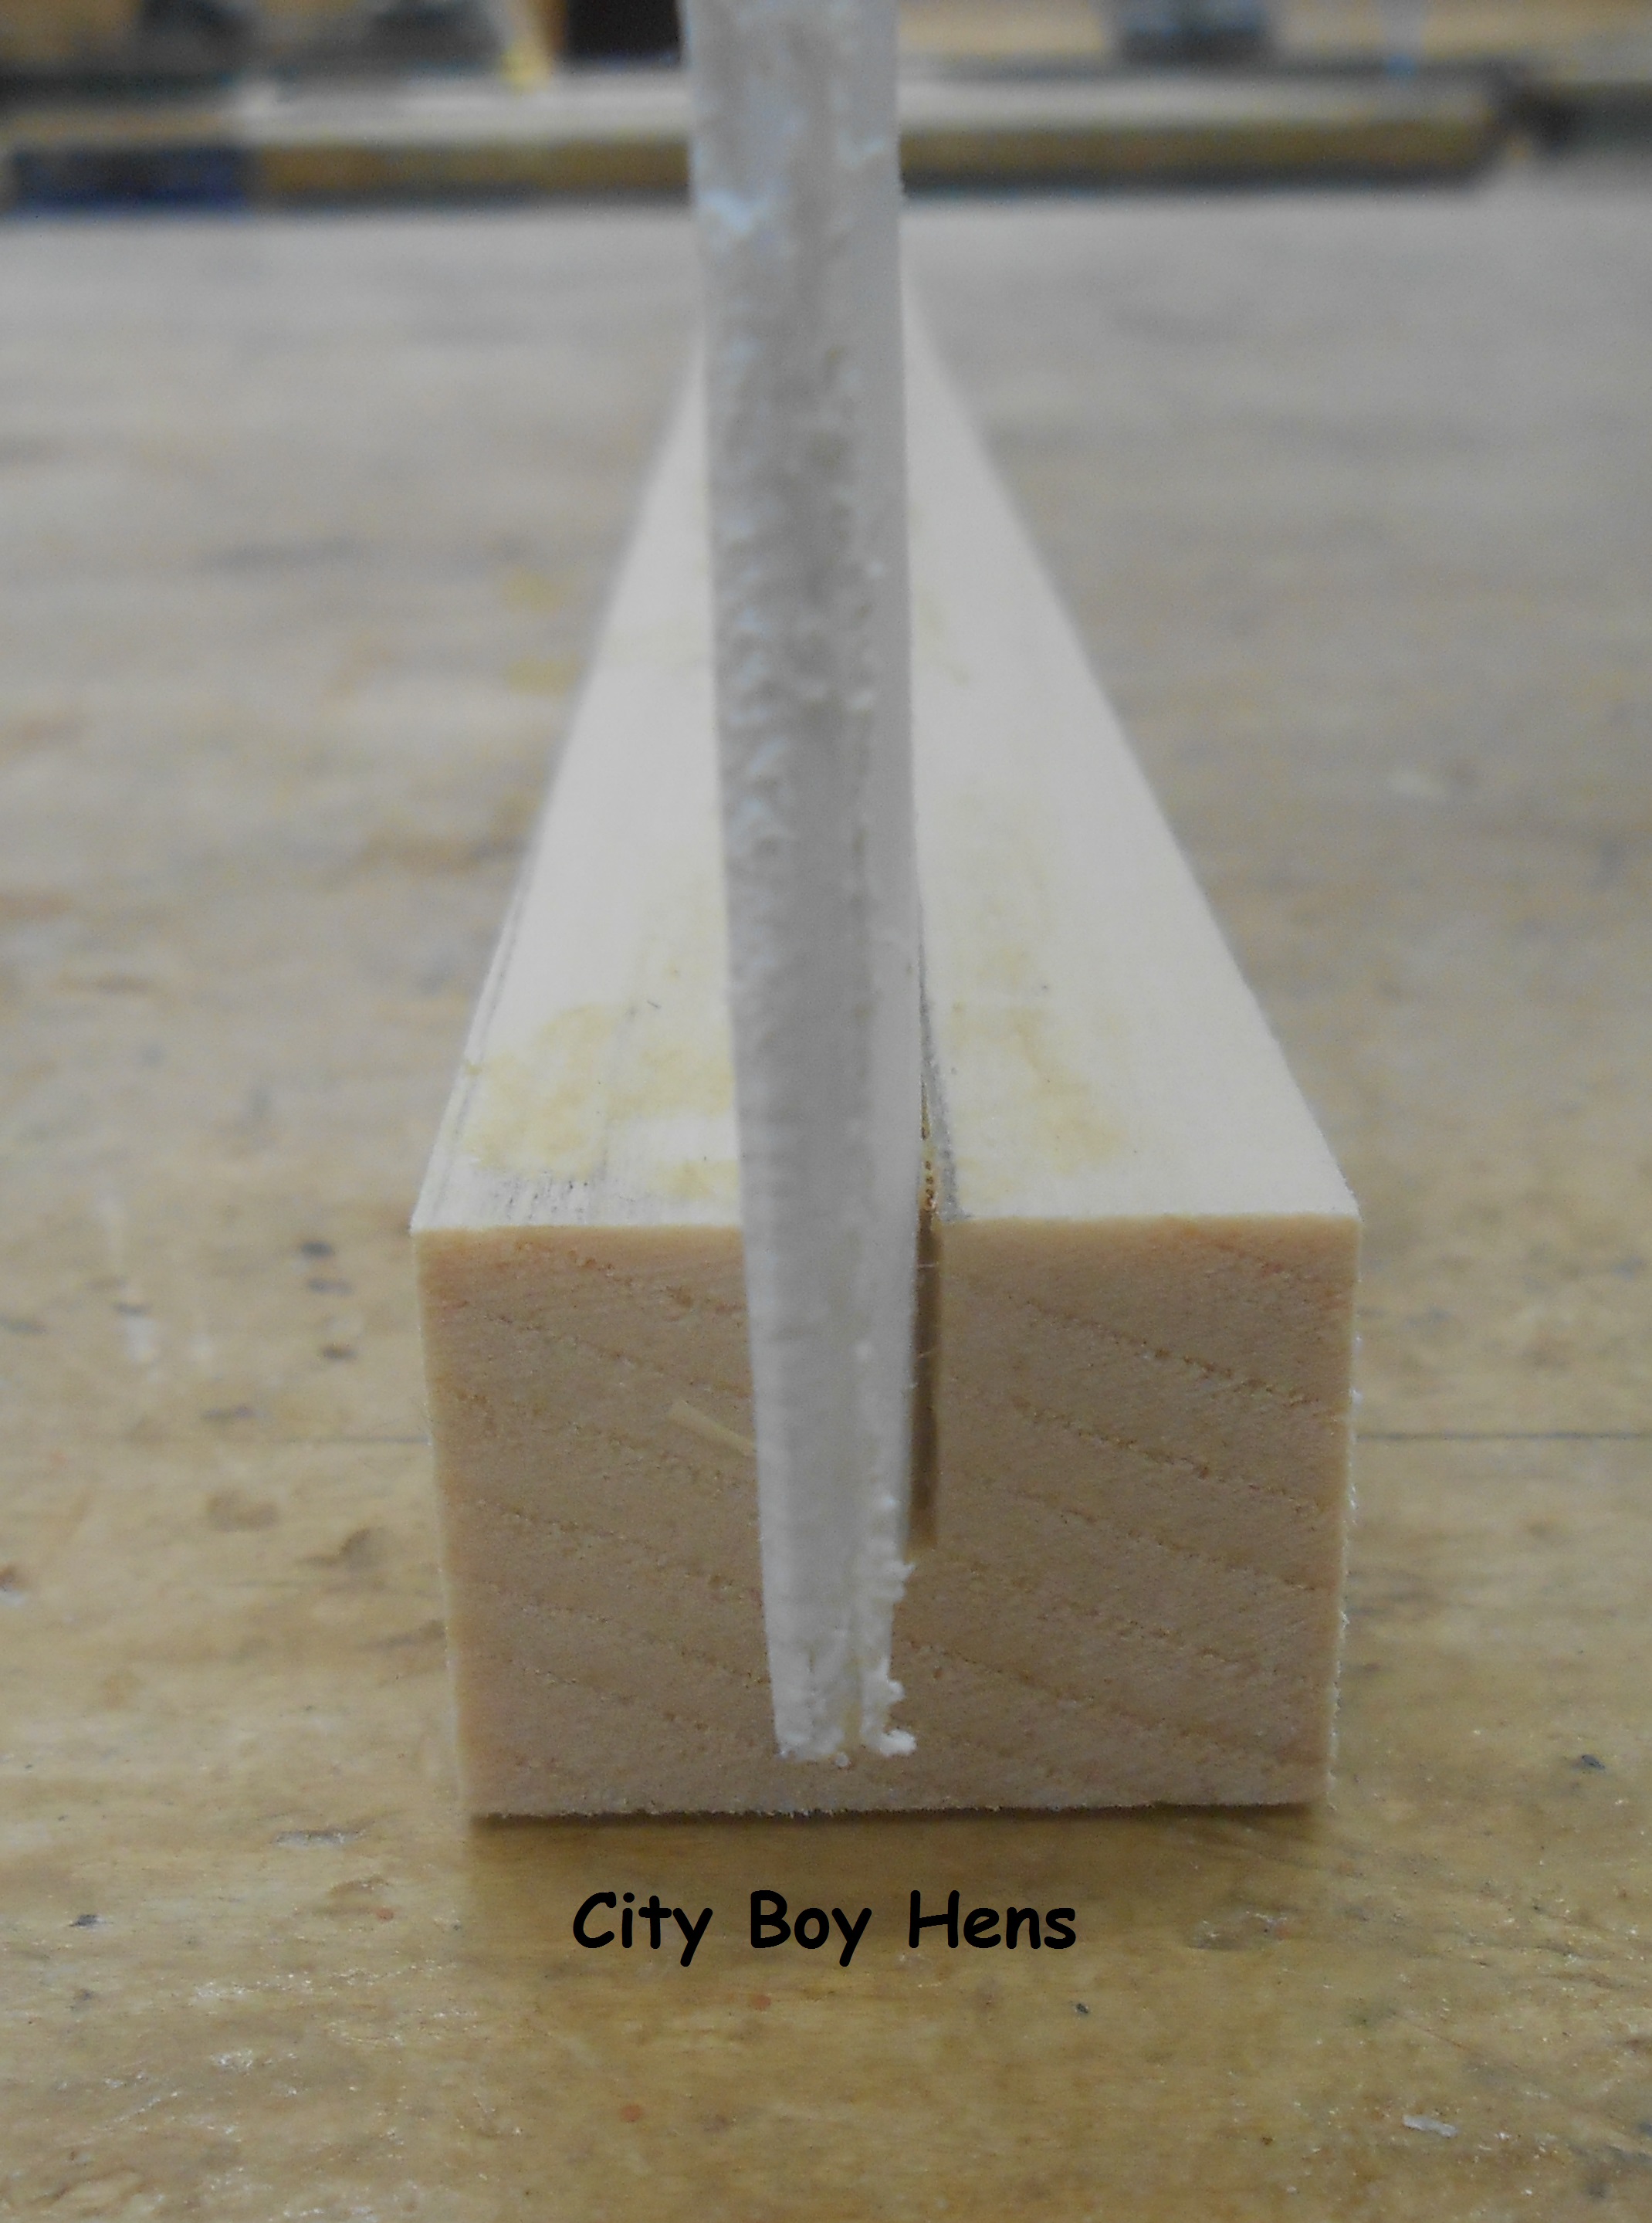
The front & back strips of the inner cover are connected together by creating a lap joint.  It’s a fairly easy joint to make and consists of removing half of the thickness of stock on the opposing face of each piece.  In order to make this joint, set the table saw blade to 3/8″ and remove 1-1/4″ from the opposite ends of each strip.  This will be done in several passes if a dado blade is not used.  Never cross-cut stock with a miter gauge when it is butted up to the rip fence.  This could potentially bind the stock and cause kick-back.  Instead, use an auxiliary fence for this procedure.006 007

Using the table saw, cut the 1/4″ slot in the front, back & side strips which will receive the plywood.  Set the table saw blade to 3/8″ for height and the fence to 3/8″ from the left side of the blade.  Using a feather board for additional support, rip this slot in the above mentioned pieces.  Adjust the rip fence (depending on the thickness of your blade) to make a second pass in order to complete the 1/4″ slot.  Don’t forget to alternate your strips for this step!

009 011

Next, cut the entrance in the inner cover.  I made mine 3/8″ x 3/4″.016

Finally, glue the pieces together and sand after the glue has completely cured.

If you would like to learn how to build your own 10 frame Langstroth hive CLICK HERE.

Best of success.

Regards,

CB

006


Crescia: The Easter Bread From Le Marche Italy

Crescia Bread

Crescia Bread

With the celebration of Easter just around the corner, it’s time to make Crescia.  If you love cheesy egg-rich bread, I urge you to give this traditional bread a try. If you grew up eating this bread at Easter, I’m certain that the aroma of it baking will bring you back to those memories of your youth!

CLICK HERE for my easy to follow recipe.

Happy Easter

Buona Pasqua

CB

A Quarter MILLION Views and Counting!

cropped-badgercity-boy-hens.jpg

Wow!  250,000 + views since I started this blog a few years back.  I am happy to see that I am working towards the goal that I had hoped for in this blog’s beginning.

A few years back, I wanted to chronicle some of the “stuff” that I do in my spare time.  At first, I wanted this to be a “record” for my kids, but then I thought that other folks may also find it useful.  It turns out that there are some folks our there in “Cyber World” who think that some of this “stuff” is of interest.  It always makes me happy to receive a comment from someone who has informed me that my post helped them discover a new interest/hobby. It is great to share information, techniques and insight into many of the “things” which we choose to do in order to satisfy the cravings of our creative side.

So….with that said, I want to say thanks and share the top 5 posts that “Cyber World” continues to click on City Boy Hens.

Best Regards,

CB

1)  How To Make Salami

2)  How To Make A Beehive

3)  How To Make Italian Sausage

4) How To Make Drunken Cherries In Vodka

5)  Making A Dust Bath For Your Chickens


How To Make A Screened Bottom Board For Your Beehive


010A screened bottom board is a great addition to any beehive.  It not only provides great ventilation for the hive, but can also be used in your IPM (Integrated Pest Management) practices to help determine the number of Varroa mites that are in your colony.  The premise of this theory works like this:  Count the number of mites that have fallen off the hive and have adhered to the “sticky board” over a 24 hour period.  Compare this number to the “threshold numbers” that are recommended by your local beekeeping agency.  For example: where I live, the governing agency recommends that a treatment be considered  when 9 mites are found on the sticky board in a 24 hour “drop” during the month of May.

Initially, I thought that this would be a great way to determine if I would have a future mite problem (levels above a particular threshold).  But then I came across a different theory which argued that the number of mites found on the sticky board may not be an accurate way to determine if your hive is infested with  mites.  The rational for this was that hygienic bees may be better at removing mites from each other and, therefore, you may not have an infestation, but rather, bees that are very good at removing these beasties from the hive.  GGGGGGGRRRRRRRRRRRRR!  Beekeeping………….Nobody ever seems to be on the same page!

Anyways, the screened bottom board is still a great addition to the hive because:

A)  The mites that do drop off will fall through the mesh and (from what I’ve read) not be able to crawl back up into the hive.

B)  The sticky board will allow you to monitor how many mites will drop in a 24 hour period.

C)  The screened bottom board ( without the sticky board is place) provides great ventilation for the hive.  This will be extremely useful through the entire year to help rid the hive of excess moisture.  This is just as important in the Winter as the Summer.

So…I decided to make a screened bottom board that would have a sticky board that could easily slide within the bottom board.  The entire “unit” will be made up of 2 sections that, when combined will become the final bottom board.


Material List

009 - Copy

Section #1

Sides: 3/4″ x 1- 3/4″ x  21 -1/4″

Back:  3/4″ x 1 -3/4″ x 16- 1/4″

Front: 3/4″ x 3″ x 14- 3/4″ (This will be the “landing pad”)

Sticky Board Front: 3/4″ x 7/8″ x 14-1/2″

030

Section #2

Sides: 3/4″ x 3/4″ x 21-1/4″

Back: 3/4″x 3/4″ x 16-1/4″

031 - Copy


Directions

Cut all pieces to the above measurements.

Using a table saw, rip a 3/16″ wide x 1/4″ deep channel through the inside of the sides, back and the sticky board front.  This channel will allow for the sticky board to be positioned in the bottom board when in use.  I set the table saw fence to 7/16″ and made sure to put the bottom of each board against the fence.

004 - Copy

029 - Copy

Next, counter sink the screw locations to put this section together.  (Note: Set the sticky board front aside for now.  It’s not getting assembled with these pieces.)  I used 1-1/2″ deck screws for this job.

019 - Copy

Now screw these pieces together using a good exterior glue.

022 - Copy

I used coroplast for my sticky bottom board.  You can get it at a sign shop or, better still, re-purpose an old real estate or election sign if one is available.  I cut it to 15- 1/8″ wide x 20-7/8″ long and glued the end (using construction adhesive or silicone) to the sticky bottom board piece that you previously put aside.

023

025 - Copy

Now, fill all screw locations with wooden plugs, flush cut each plug and sand the frame.  Now is a good time to paint all the parts of the bottom board.

Cut a piece of #8 hardware cloth for the size of the bottom board.  Use must use #8 because it is small enough to prevent your bees from going through these holes.  Staple it to your frame.


010Next, staple a thin piece of metal or wood to the front of the screen and screw the 3 pieces of wood from section #2 to the frame.  I used a counter-sink bit to ensure that I did not split these pieces.

037 - Copy

And…there you have it.  A home-made screened bottom board.  Your bees will be delighted with all the ventilation for your hive.  As well, you’ll be able to begin monitoring for mite levels as well.

Please CLICK HERE if you would like to view my other posts on making your own beehive.

039 - Copy


Liquefying Granulated Honey

I love honey!  I love it sooooooo much that I can easily consume a couple of pounds each month just in my tea.  I not only love it, but I’ve begun to acquire a taste for different flavors.  Whether it is buckwheat, blueberry blossom, linden, clover or wildflower…….I love them all!  The only trouble is some granulate a lot faster than others. 002 Granulating is no big deal.  In fact, there’s too many folks who think that granulated honey is honey gone bad.  There’s nothing bad about it.  In fact, granulating is a good indication that your honey is pure and minimally filtered because it is those minute bits of propolis, pollen and wax (the good stuff) which act as bonding agents for this crystallization to begin .  It’s this “stuff” that you want in your honey as opposed to the pasteurized honey  which kills a lot of the enzymes with high temperature and takes out so much of the good stuff with over-filtration.

But, if you’re like me, and want your honey to remain in its liquid state then you’ll need to warm it back up to around the same temperature that it was when it was still in the hive.    Believe it or not, the optimum temperature in a beehive is around 95 F (35 C).  The key to properly liquefying honey is a balance between warm and slow.  Too hot or too fast and you’ll kill all the “good stuff” in your unpasteurized honey.  That’s why I am not a fan of using the microwave for this process.

Instead, fill a sauce pan with warm water and place it on your stove burner.  Turn your burner on low and put your jar of crystalized honey into the sauce pan.  Monitor the temperature of the water with a thermometer and adjust accordingly in order to keep the temperature below 100 F. 005 With the honey partially dissolved (15-20 minutes), stir the contents with a knife in order to allow the heat to work its way up to the upper portion of the jar. Before you know it, your honey will be completely liquified and   you’ll be spilling it once again on the table or  counter as you race with that spoon from the honey jar to your mug of tea.KODAK Digital Still Camera Regards, CB

How To Make Italian Sausage


Hot & Sweet sausage.

Hot & Sweet sausage.

Yesterday afternoon I had a hankering for chicken & sausage cacciatorie.  My vitamin E deprived body was growing tired of sparring with Old Man winter and some good ol’ comfort food was gonna’ be the trick to fix those winter blahs.  The only trouble was……..I was out of homemade Italian sausage.

Making sausage is easy.  The financial investment is minimal, the cost is way cheaper than those store-bought links, but best of all……….THEY TASTE GREAT!  I need to give my good friend Mike a call and get busy making some homemade Italian sausage.

You should give it a try.  I promise you’ll never go back to those store-bought links once you & your family feast on this delicious treat!

CLICK HERE for an easy lesson on sausage making.

Regards,

CB

Making Salami

018

With the Holiday Season now in the past and Winter boredom  beginning to grow, I think it’s time to get off the couch and make some salami.  If you love the taste of salami and are always looking to try your hand at a new food adventure, then I urge you to give this a try.  It’s really not that complicated.  I’ve taken a lot of the “guess-work” out in the link below.  If you want to give it a try CLICK HERE.

Regards,

CB


“I Love…. I Love…My Calendar Girls…”

In 1960, Neil Sedaka released Calendar Girl.  The song was about the love for his girlfriend and corresponding events each month which illustrated this love.  Though I am no Neil Sedaka, I must confess that there were a few Charlie’s Angels posters which hung in my room as a teen.  But,  I am here to tell you that this City Boy has cleaned up his act.

“Ladies and gentlemen……….It gives me great pleasure to inform you of a three-way tie for Miss January 2015…………  Drum roll please………….  All the way from Ontario, Canada, please give a big round of applause for this year’s winner of the prestigious title for Miss January 2015.  Ladies and Gentlemen, please give it up for…….. Honda, Swifer & Rosie”.  

005 

That’s right folks.  Your eyes and ears have not deceived you.  My three chickens were selected to be the January “girls” for Backyard Poultry Magazine’s 2015 calendar.   I am  proud to say that the calendar is proudly displayed in our kitchen, and my prestigious honor” has sure given my friends a hearty laugh! “Hey Ted, ……you pulled yourself together yet?”

Happy New Year to All.  I hope your 2015 will be filled with many new discoveries and lots and lots of laughs!!

Regards,

CB

How To Make Panettone: The Italian Christmas Bread


036 - Copy

Well….with only 5 more sleeps till that Jolly Old Elf makes his appearance once again, I think it is time to make a panettone.  If you are a fan of candied citrus peel, raisins and yeasty egg rich bread, than I urge you to give this bread a try.  Oh…..and don’t get caught up in the fact that it has to rise a few times.  It’s really no big deal.  If this City Boy can bake it, than so can you!

If you want to give it a try, Click Here

Wishing you all a Merry Christmas and a peaceful New Year.

Warm Regards,

CB


How To Make Christmas Fruit Cake

021

It has definitely been a while since I have hit “publish”.  To my blogging friends, I say “hello again”.  To those that are “new followers”, I say “welcome”.  The blog has definitely been on the “back-burner” for the last 7 months and I have not given it the attention that I set out with a few years back.

Anyways, last weekend I decided to make Christmas fruit cake for the second year, but this Christmas I wanted to make some smaller cakes as gifts for family and friends who enjoy this yuletide treat.  So I tripled the recipe in the link below and adjusted the bake time for the smaller cakes.

If you like Christmas cake, I urge you to give this one a try.  It’s really easy and tastes just like those childhood memories.

Click here

Warm regards,

CB