How To Make Biscotti

009 - CopyBiscotti originates from the Latin word biscoctus, meaning “twice-baked”. Its origins date back to the Roman times when certain foods needed to be completely dried so that they could be stored for long periods of time.

Today, biscotti are made using many different ingredients. Almonds, pistachios, raisins, cranberries, and lemon & orange zest make for great flavors for this cookie. I really like this cookie because it is not terribly sweet, you won’t find an ingredient in this recipe that you can’t pronounce, and best of all………. it is sooooooooooo easy to make. Those 3 reasons are enough for me to make this my “sweet treat” of choice after our evening meal.  I hope you give it a try!

Ingredients

Chickens2 033

1/3 cup butter (room temp.)

2/3 cup sugar

2 tsp. baking powder

1/2 tsp. salt

2 farm fresh eggs

1 tsp. vanilla extract

2 cups All Purpose Flour

Zest of 1 orange

1 cup raisins

Directions:

Beat 1/3 cup of room temperature butter for 30 seconds.

Combine sugar, baking powder & salt with the butter.

Beat in 2 eggs and vanilla extract.

Chickens2 038

Stir in flour, 1/3 at a time until completely mixed.Chickens2 042

Add zest, raisins & form into a ball.Chickens2 040

Chickens2 043

Divide dough in half on lightly floured surface and flatten down into shape (about 1/2″ thick).Chickens2 045

Chickens2 049

Transfer on to cookie sheet and bake for 22 minutes at 375 F. or until golden brown.chickens2-051[1]

Cool on rack for 20 minutes and then cut into pieces using a serrated knife.Chickens2 055

Transfer back on to the cookie sheet and bake at 325 F for another 8 minutes/ side.Chickens2 056

* Substitute anise for vanilla, lemon for orange, cranberries or dried cherries for raisins or add 1 cup of chopped almonds or pistachios to make your own biscotti.  Better still…….drop me a line and share your favorite biscotti recipe.

Advertisement

Chicken And Sausage Cacciatore

028Don’t know about you, but I’ve had enough of Old Man Winter.  I’m tired of shoveling, snow blowing,  lacing up boots, wearing boots,  trying to exercise in temperatures that are way to cold and always wearing more than one layer of clothing.  I could go on and on and on, but what’s the point! Old Man Winter still has a tight grip on my vitamin D deprived body and it looks like he ain’t gonna let go for another 6 weeks.  So…..in times of adversity….there’s only one thing to do……..LET’S EAT!

I guess the best thing about Winter is comfort food and there’s no better comfort food for this City Boy than chicken & homemade sausage cacciatore.  Cacciatore means “hunter” in Italian. Traditionally, this was a “rustic” meal which included braised chicken or rabbit and the flavors of bell peppers, tomatoes, onions and wine.  Growing up, chicken cacciatore was always  one of my favorite meals to eat.  The aroma of homemade wine cooking in the sauce and the addition of rich egg noodles always made this dish unique.

I continued the “cacciatore” tradition when I began cooking and never deviated from the family recipe until I started making sausage a few years back.  Now…. no cacciatore in my house is complete without the addition of homemade sausage. If you’d like to learn how to make Italian sausage, CLICK HERE.

I hope that you will try this recipe.  I know it will be a hit.

Ingredients

6 pcs. of chicken(thighs or breast preferred with  skin removed

6 links of homemade sausage

3 tablespoons of extra virgin olive oil

1 large red bell pepper chopped

1 onion chopped

3 garlic cloves finely chopped

2 carrots cut into large pieces

1/2 cup red wine

2 24oz jars of pasatta (strained tomatoes)

1 teaspoon oregano

1 teaspoon basil

1/2 cup sliced mushrooms (optional)

Step 1

In a large pot, heat the olive oil over medium heat and saute the chicken until it begins to brown (about 5 min. per side).  Remove the chicken from the pot and set it aside. 001 Repeat this process for the sausage and set it aside as well.002

Step 2

Add the bell pepper, onion, carrots and garlic to the same pan and saute over medium heat until the onion is tender (about 5 minutes). Add basil, oregano, salt, pepper and red wine.  Simmer for about 5 minutes.003

Step 3

Add the pasatta to the pot and bring this to a simmer.  Once this is done, add the chicken and sausage to the pot and continue to gently simmer for at least 2 hours.  Slow and steady makes great sauce!004

Step 4

With about 20 minutes remaining until meal time, add the mushrooms.  Too early and they will all break down in the sauce.005

Step 5

As far as I’m concerned, broad egg noodles are a must with cacciatore.  Fresh is best, but packaged work fine as well.  Once done, lay the noodles on a large platter and add chicken and sausage.  Follow up with a generous coating of sauce and …..serve.    Bon appetit!009

How To Make Salami

018

Late Saturday afternoons in winter are a great time to put up your feet by the woodstove….have a glass of wine with a few homemade olives, a slice of cheese or two, and SOME HOMEMADE CITY BOY SALAMI.  I can’t think of a better past time on the weekend.  Well…I could, but I know that Beloved Wife would not like me gettin’ too personal on the blog.  Anyways…..If you’ve ever thought about making salami and were too intimidated by the process, than I hope you’ll continue to read on and see that it’s not that difficult to make great tasting salami.  If you’ve never thought about making salami before this post, than I hope I’ve “planted a seed” and you’ll take the plunge into the world of charcuterie.

So……….are you ready to learn how to make GREAT TASTING HOMEMADE SALAMI??????……………….IF YOU”RE READY………CLICK HERE!040

How To Make Panettone

036 - CopyMaking Panettone  has been on my “bucket list” for the last few years.  It is a rich Italian bread that is made with eggs, candied citrus peel, and butter and typically eaten at Christmas.  Dutiful-son always seems to devour the store-bought panettone, so this year I thought I’d’ make this delicious Italian Christmas bread for him.

Now before you scroll down and “exit” because this bread looks too difficult…..just hear me out.  Listen……..you can make this bread.  Don’t get intimidated because the dough has to rise a few times.  As well, don’t call it quits because the bread  seems like an  “all day affair”.  It really isn’t.  It’s just that the dough needs to rise a few times and that takes a few hours each time.  You don’t have to do anything during these “rise” times so go put your feet up and have a cup of tea or coffee and read a book.  Better still, go for a walk,  call a friend or whatever.  The point that I’m trying to make is that you don’t need to be intimidated by these “specialty breads” because they need “rise time”.  They just require “pockets” of attention throughout your day.  They do not require your day!  So……………………lets get started!

Ingredients:

Sponge:

1/4 cup warm water

1 teaspoon sugar

1 teaspoon salt

2 -1/4  teaspoon active dry yeast ( 1 package)

1/2 cup all-purpose flour

Dough:

3/4 cup butter, room temperature

1/3 cup sugar

2 large eggs, room temperature

4 large egg yolks, room temperature

1/2 cup warm milk

1 tablespoon vanilla extract

3-3/4 cups all-purpose flour

Fruit:

2/3 cup raisins

2 tablespoons Amaretto liqueur

1/4 cup candied lemon peel

1/4 cup candied orange peel

zest of 1 orange

zest of 1 lemon

Directions:

Sponge:

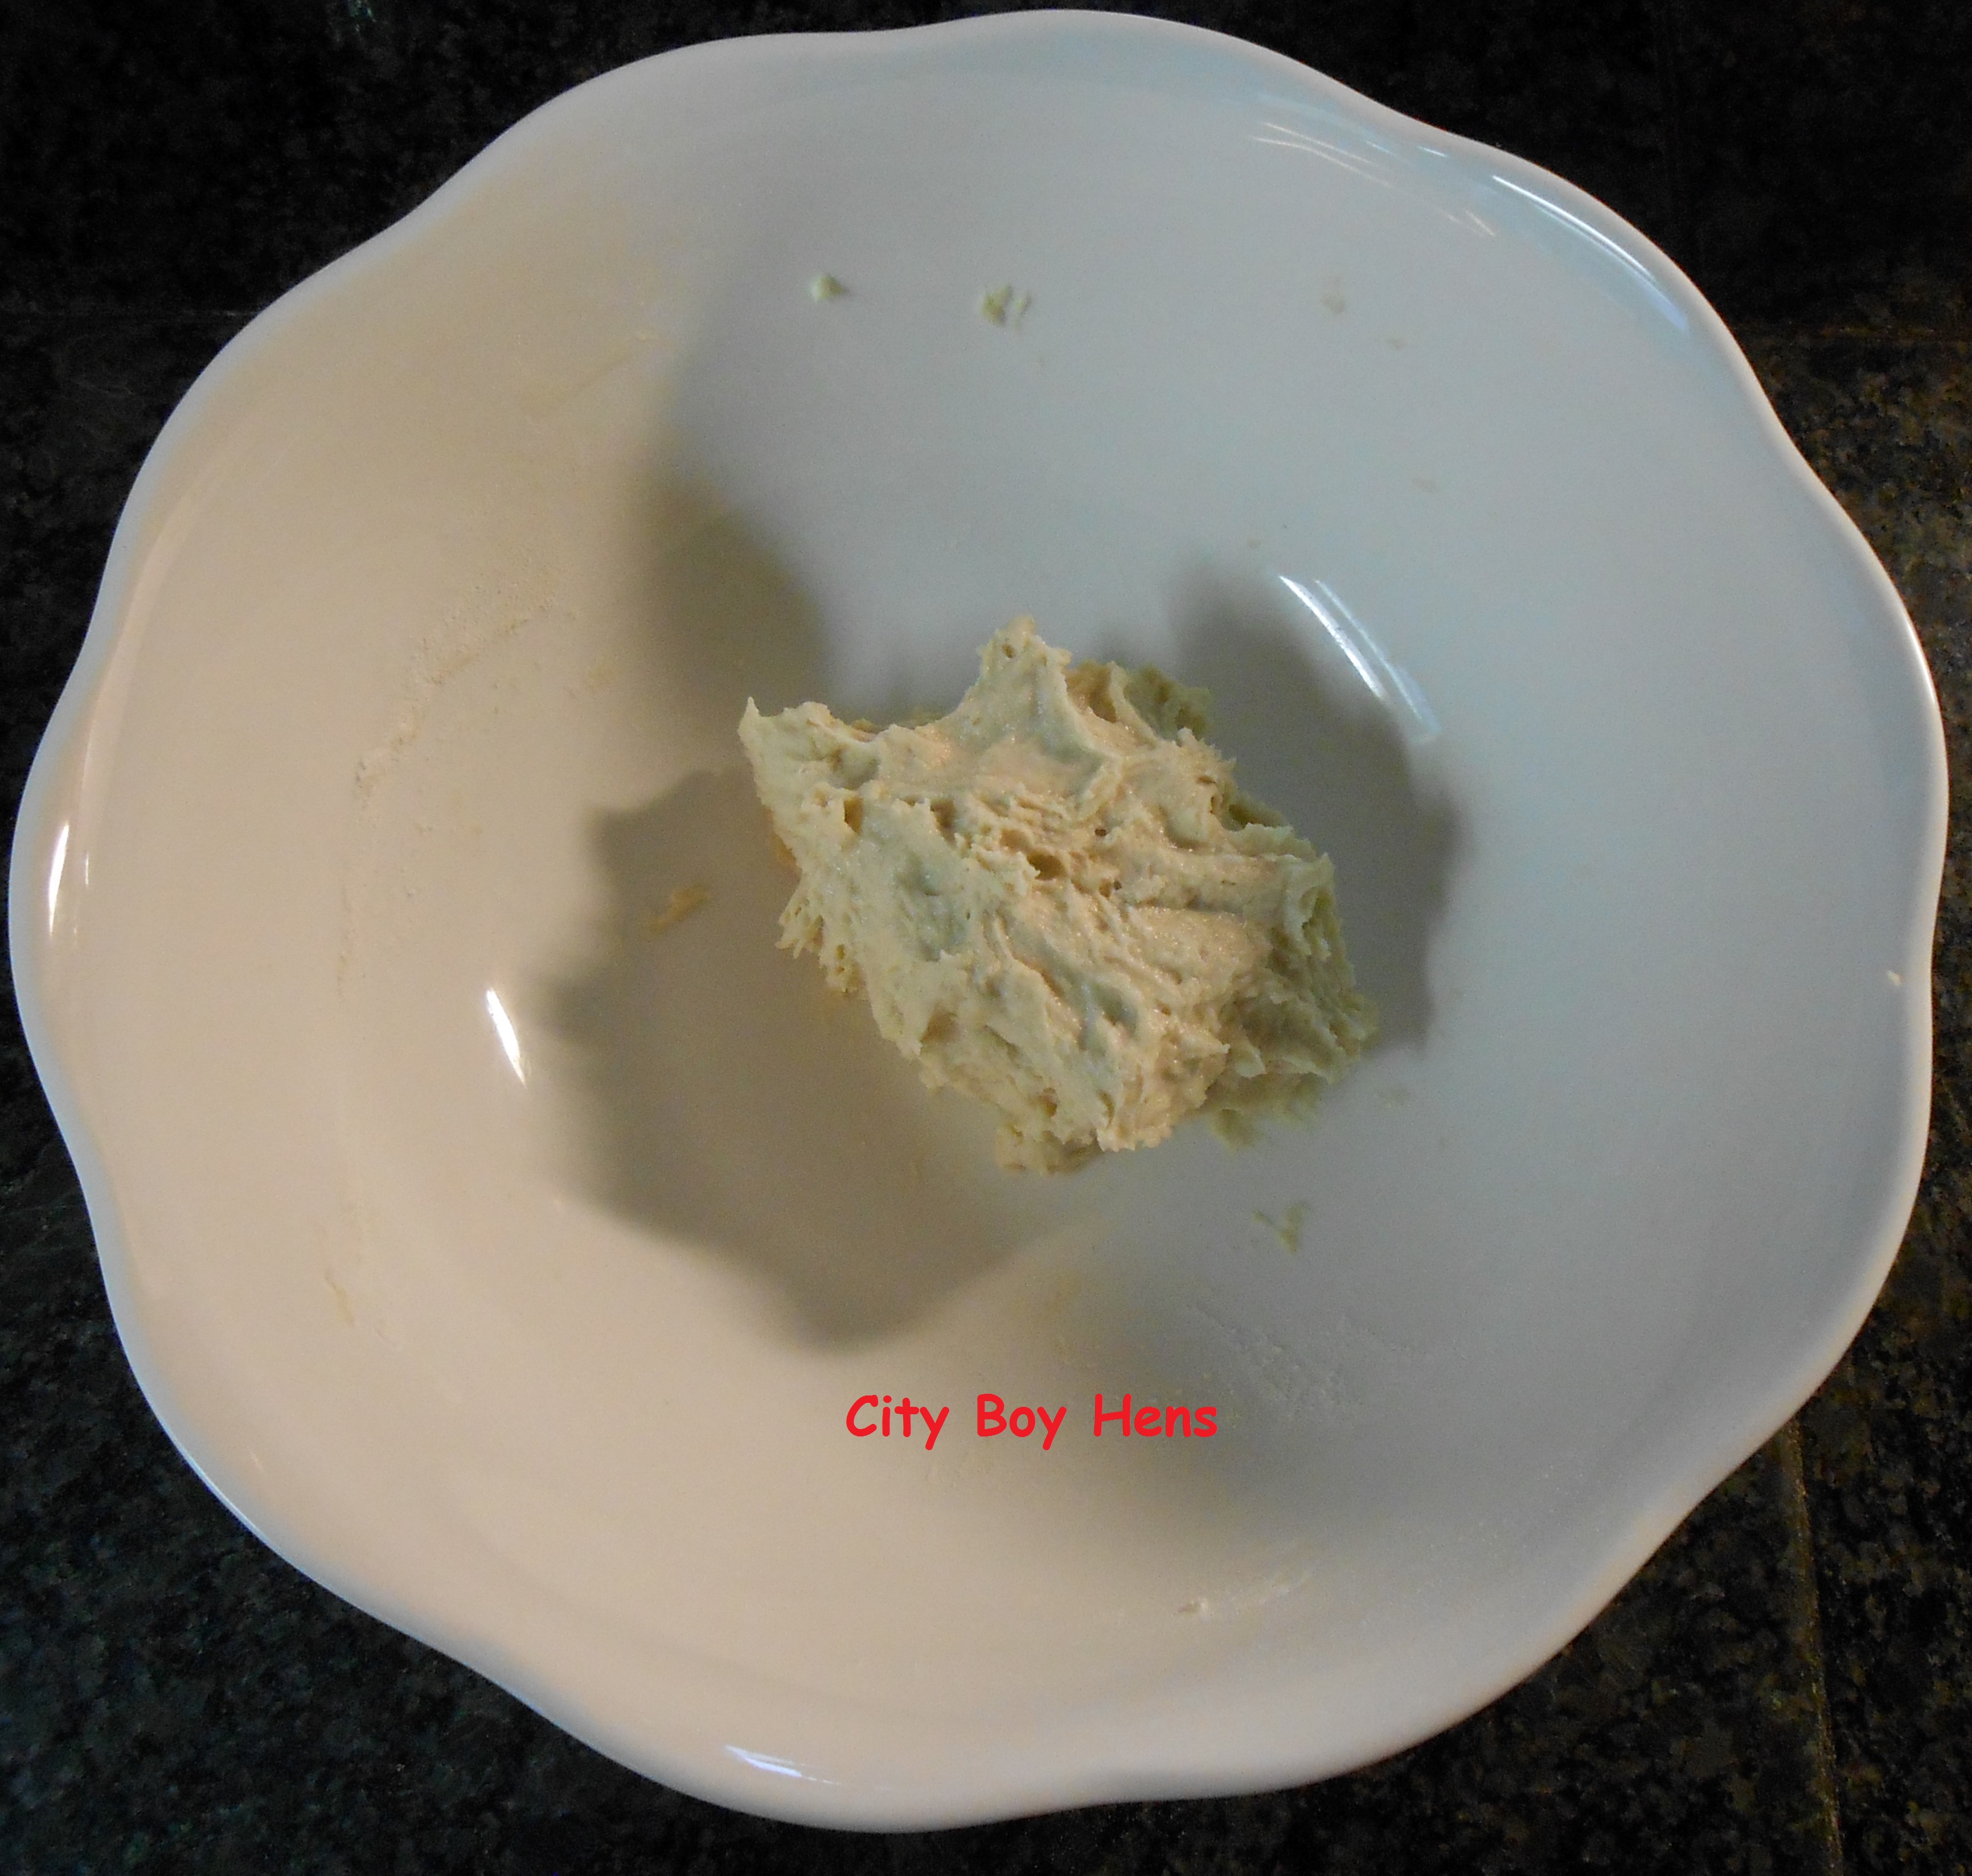
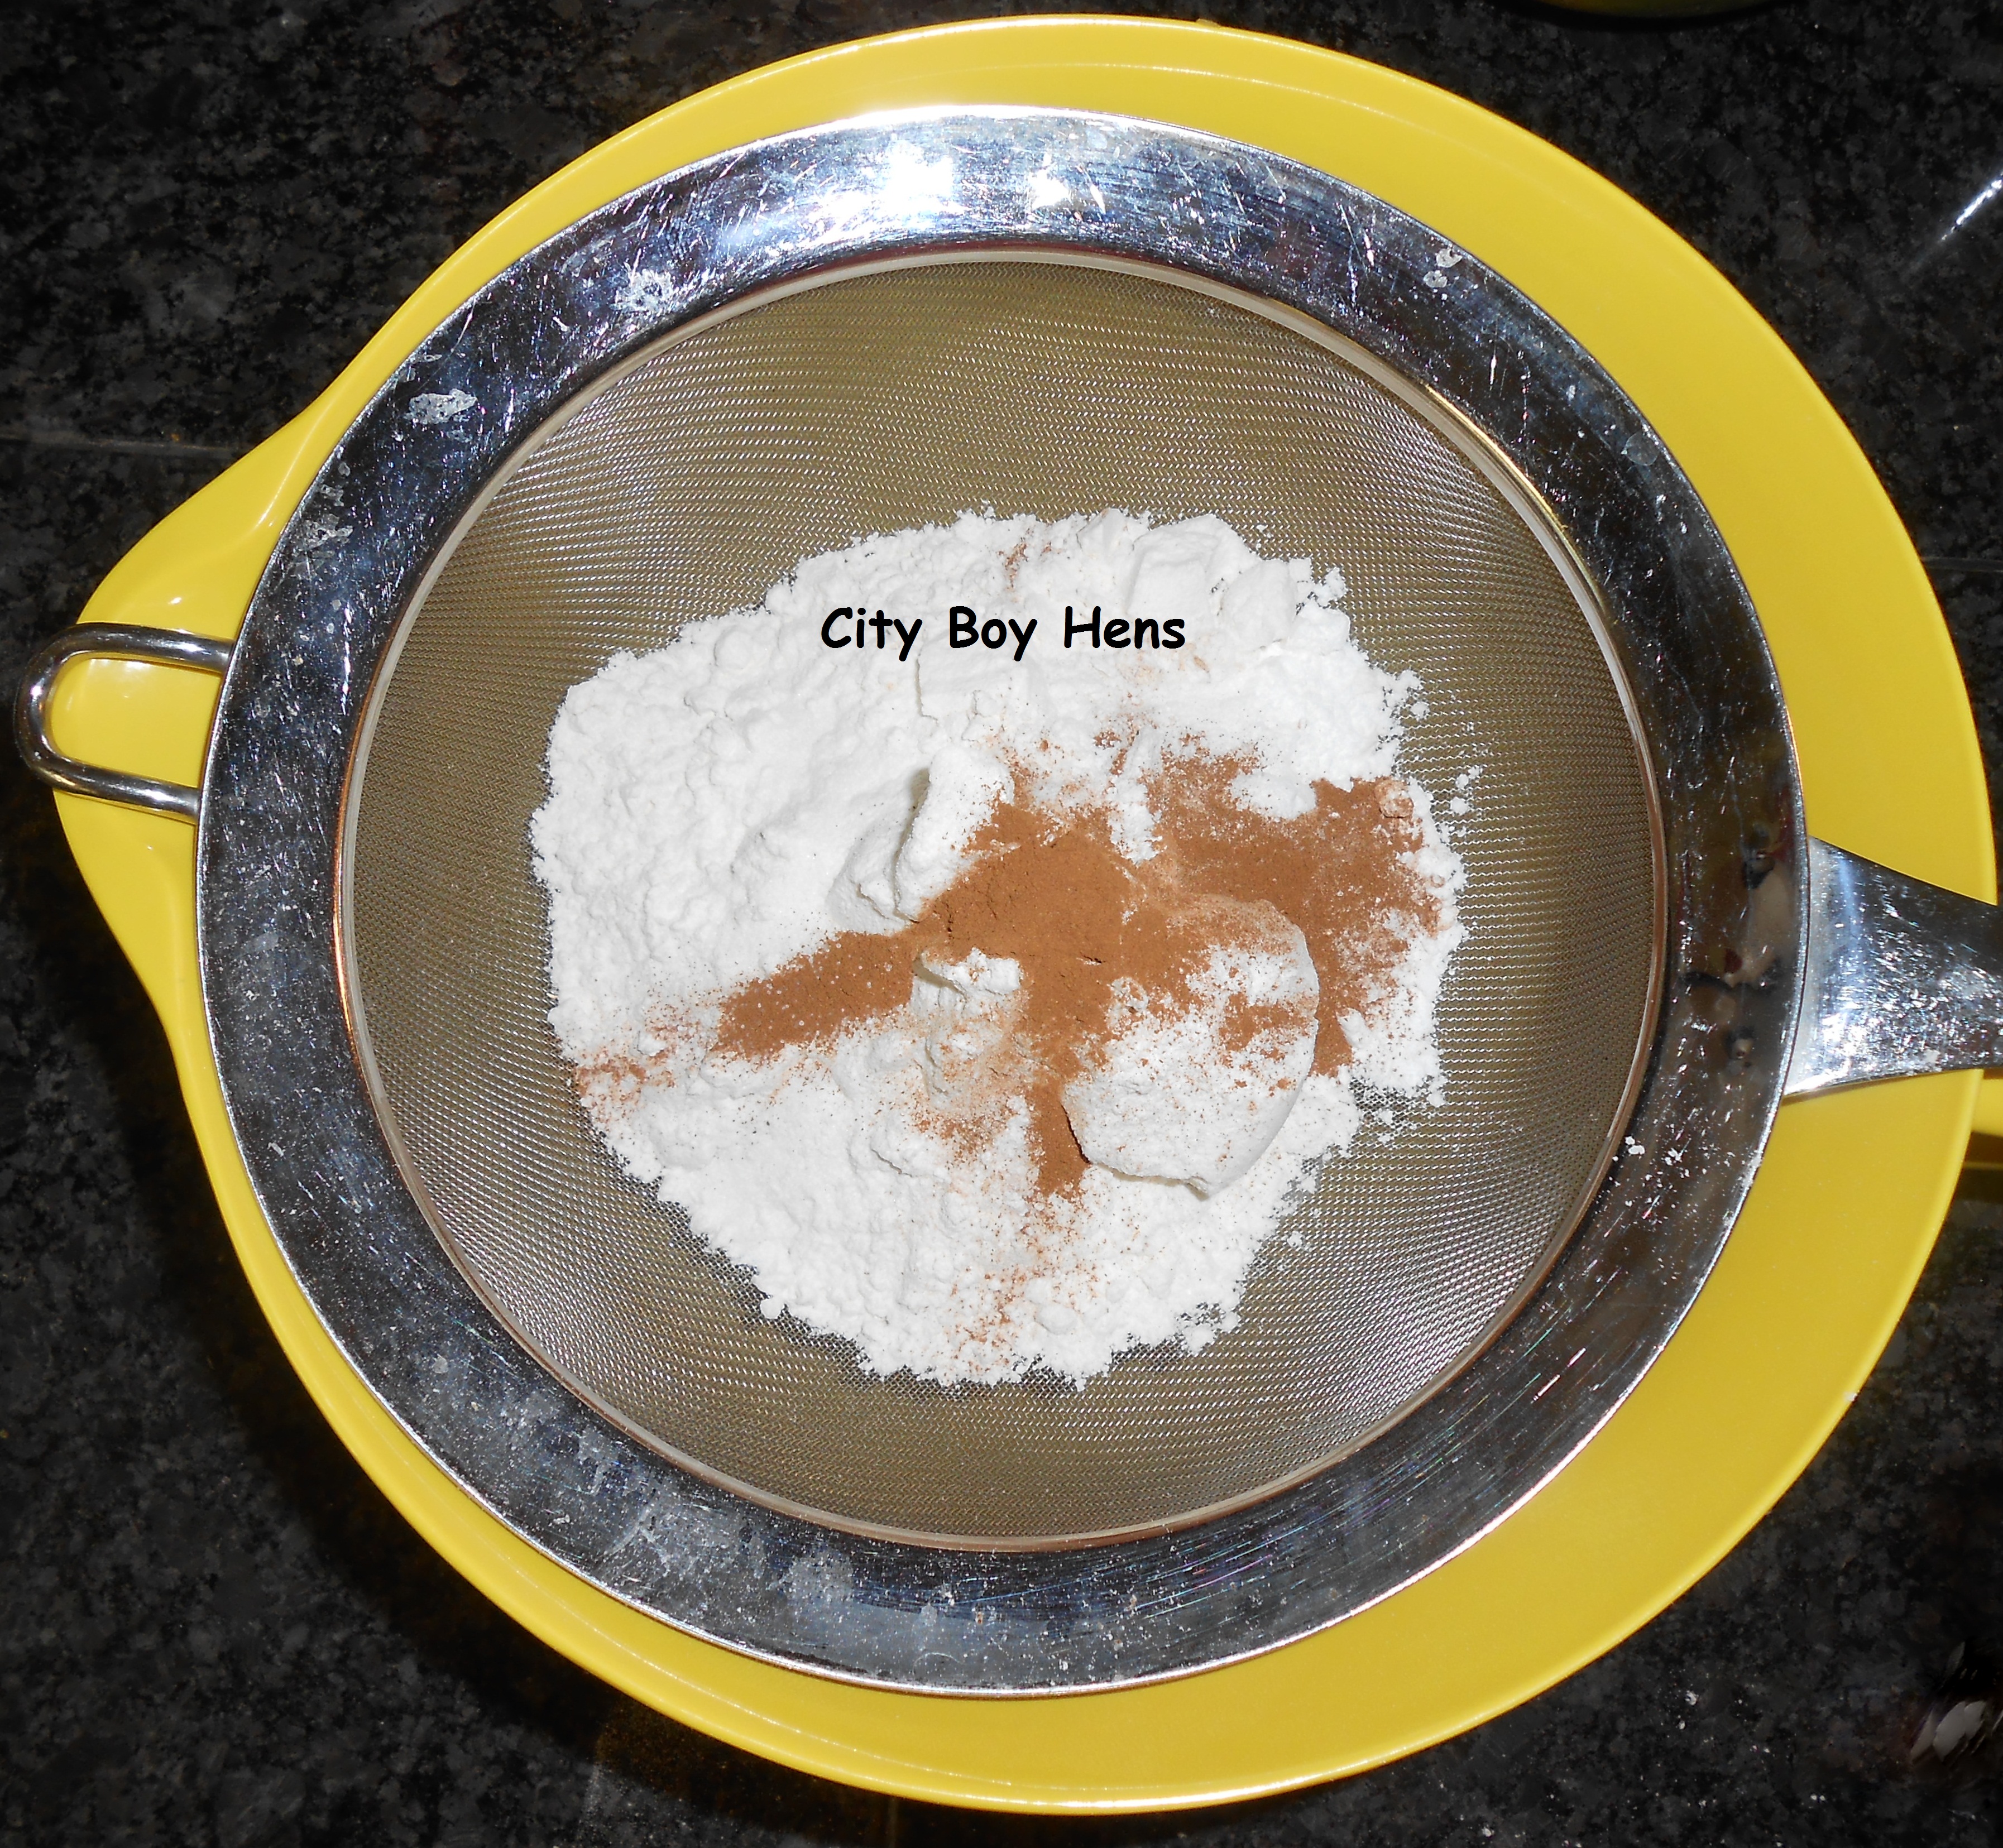
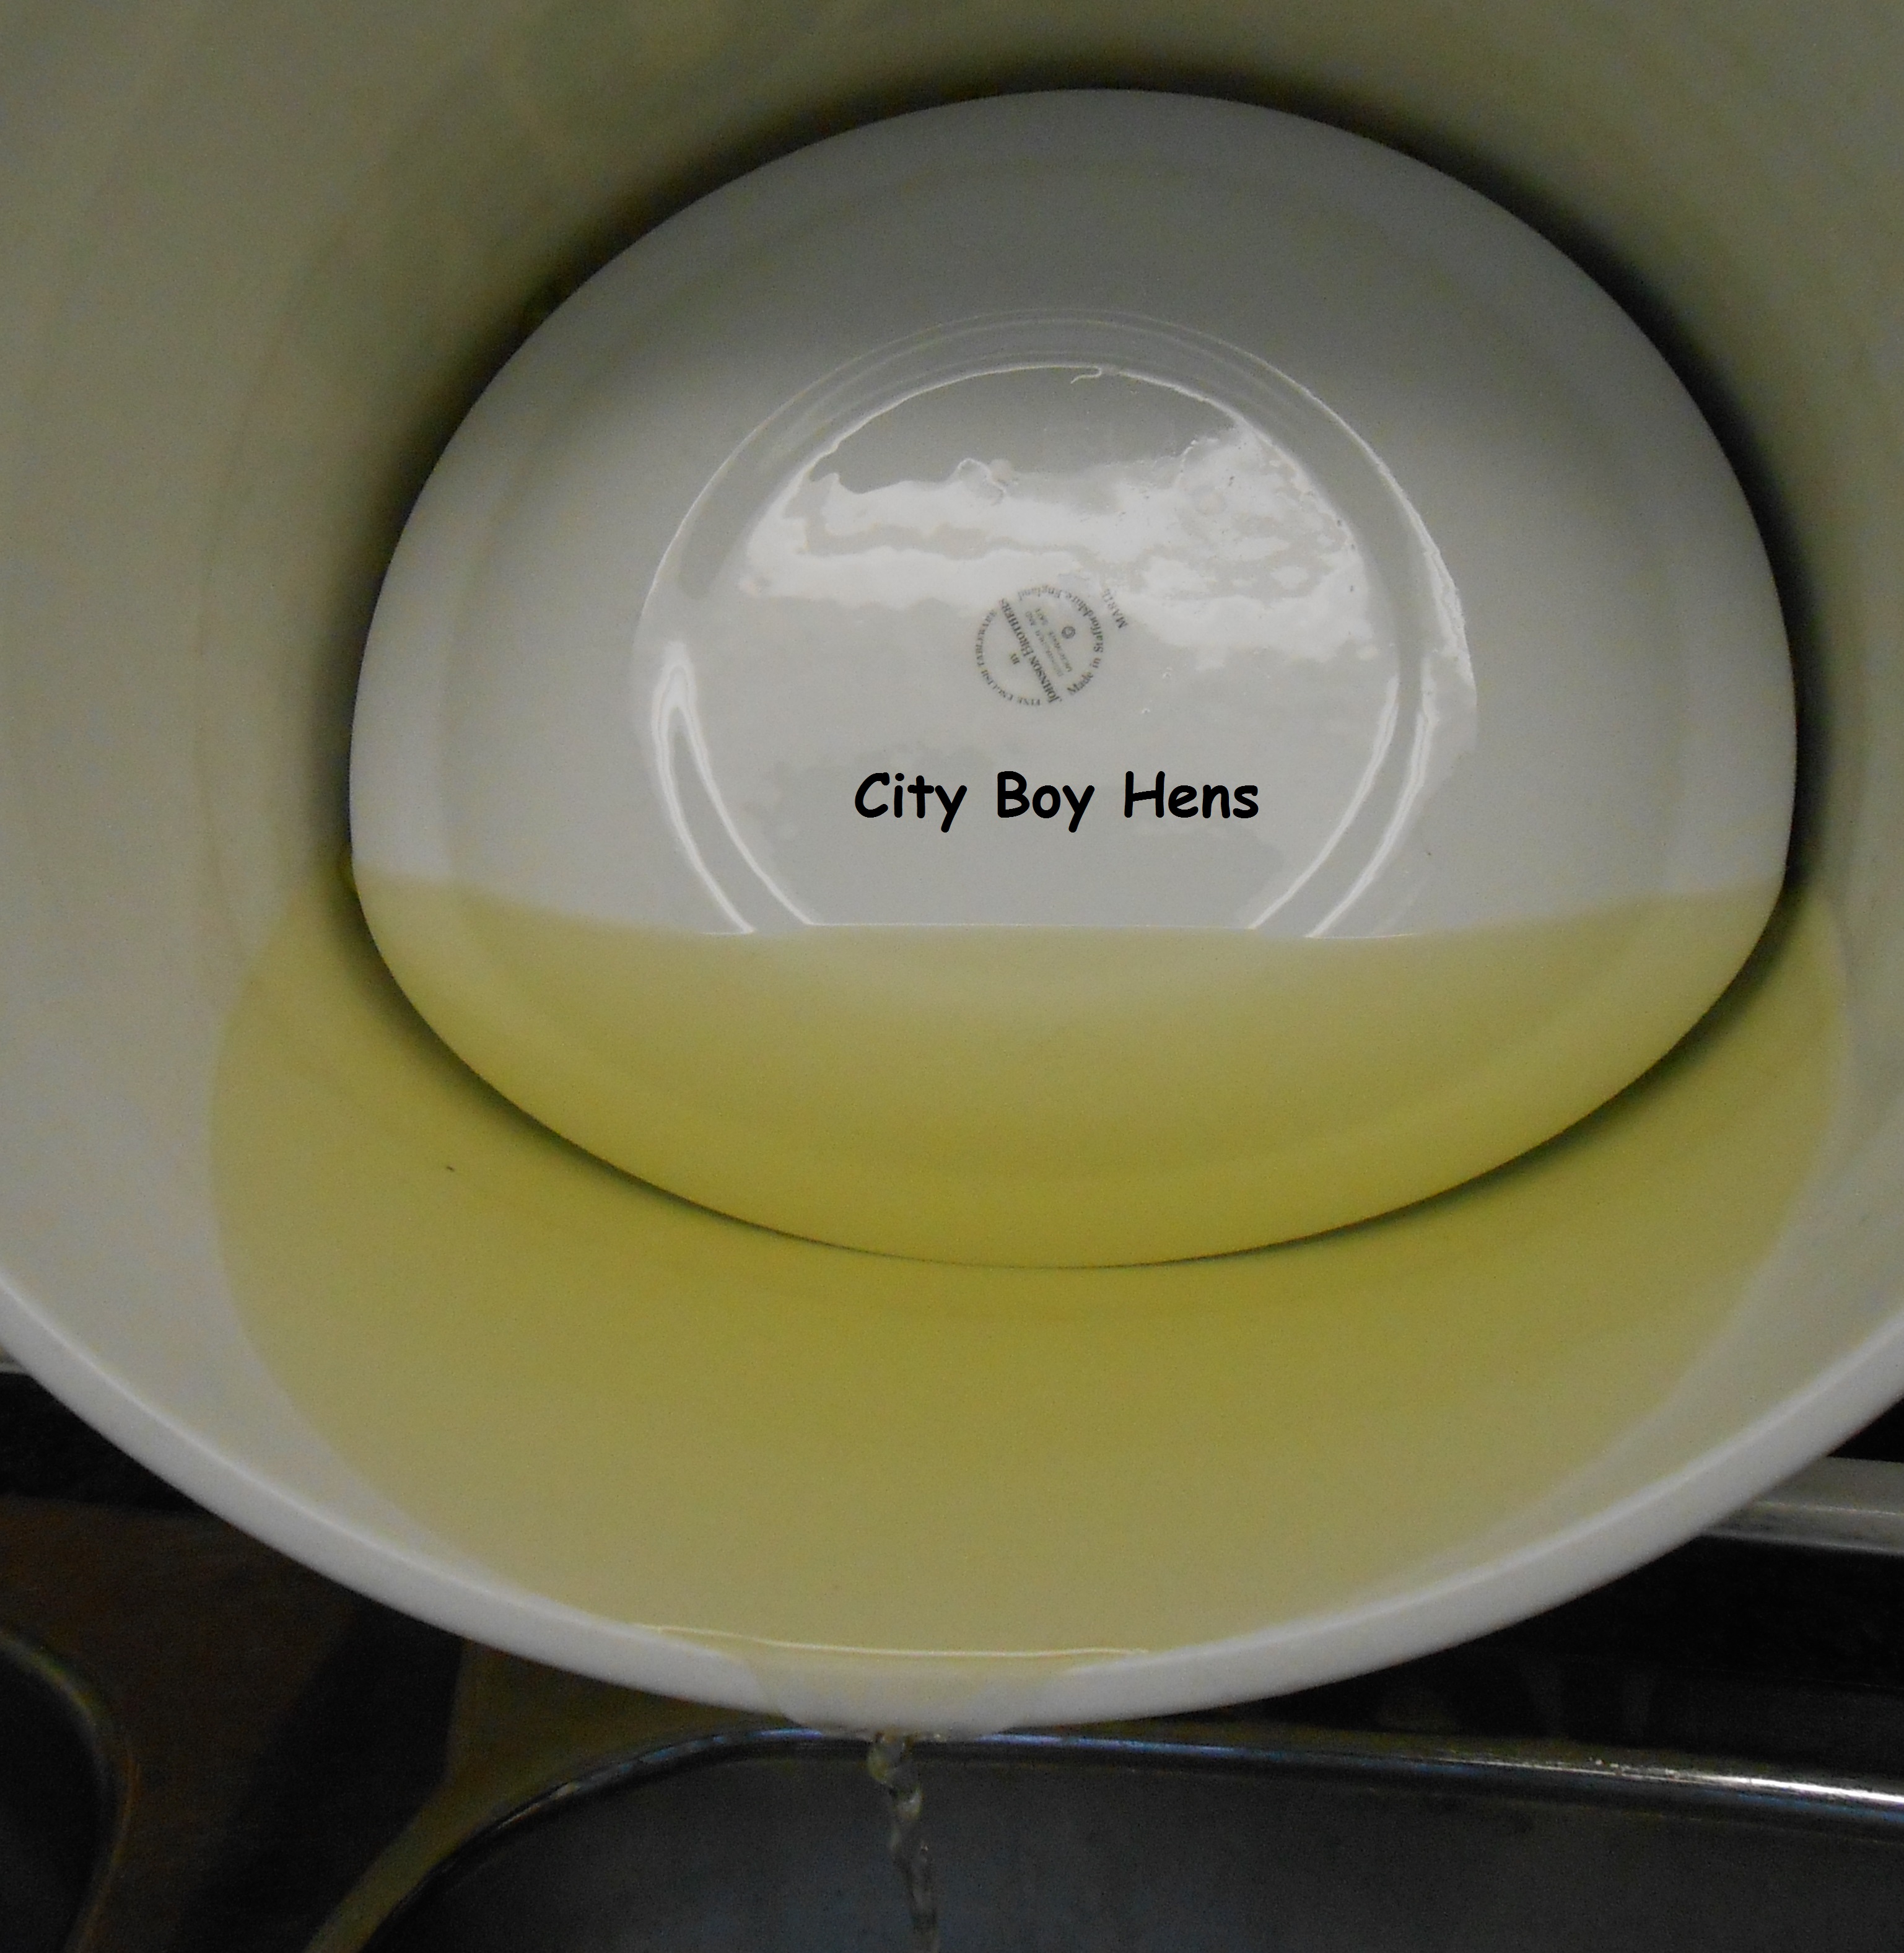
If you’re not familiar with making a sponge….DON’T PANIC.  It’s really EASY!   All you’re going to do is combine the warm water, sugar, salt, and yeast in a small bowl.  Stir it up and leave it for around 10 minutes in order to let the yeast dissolve.  Next, stir in the flour.  It will end up feeling pretty sticky and looking like the picture below.004

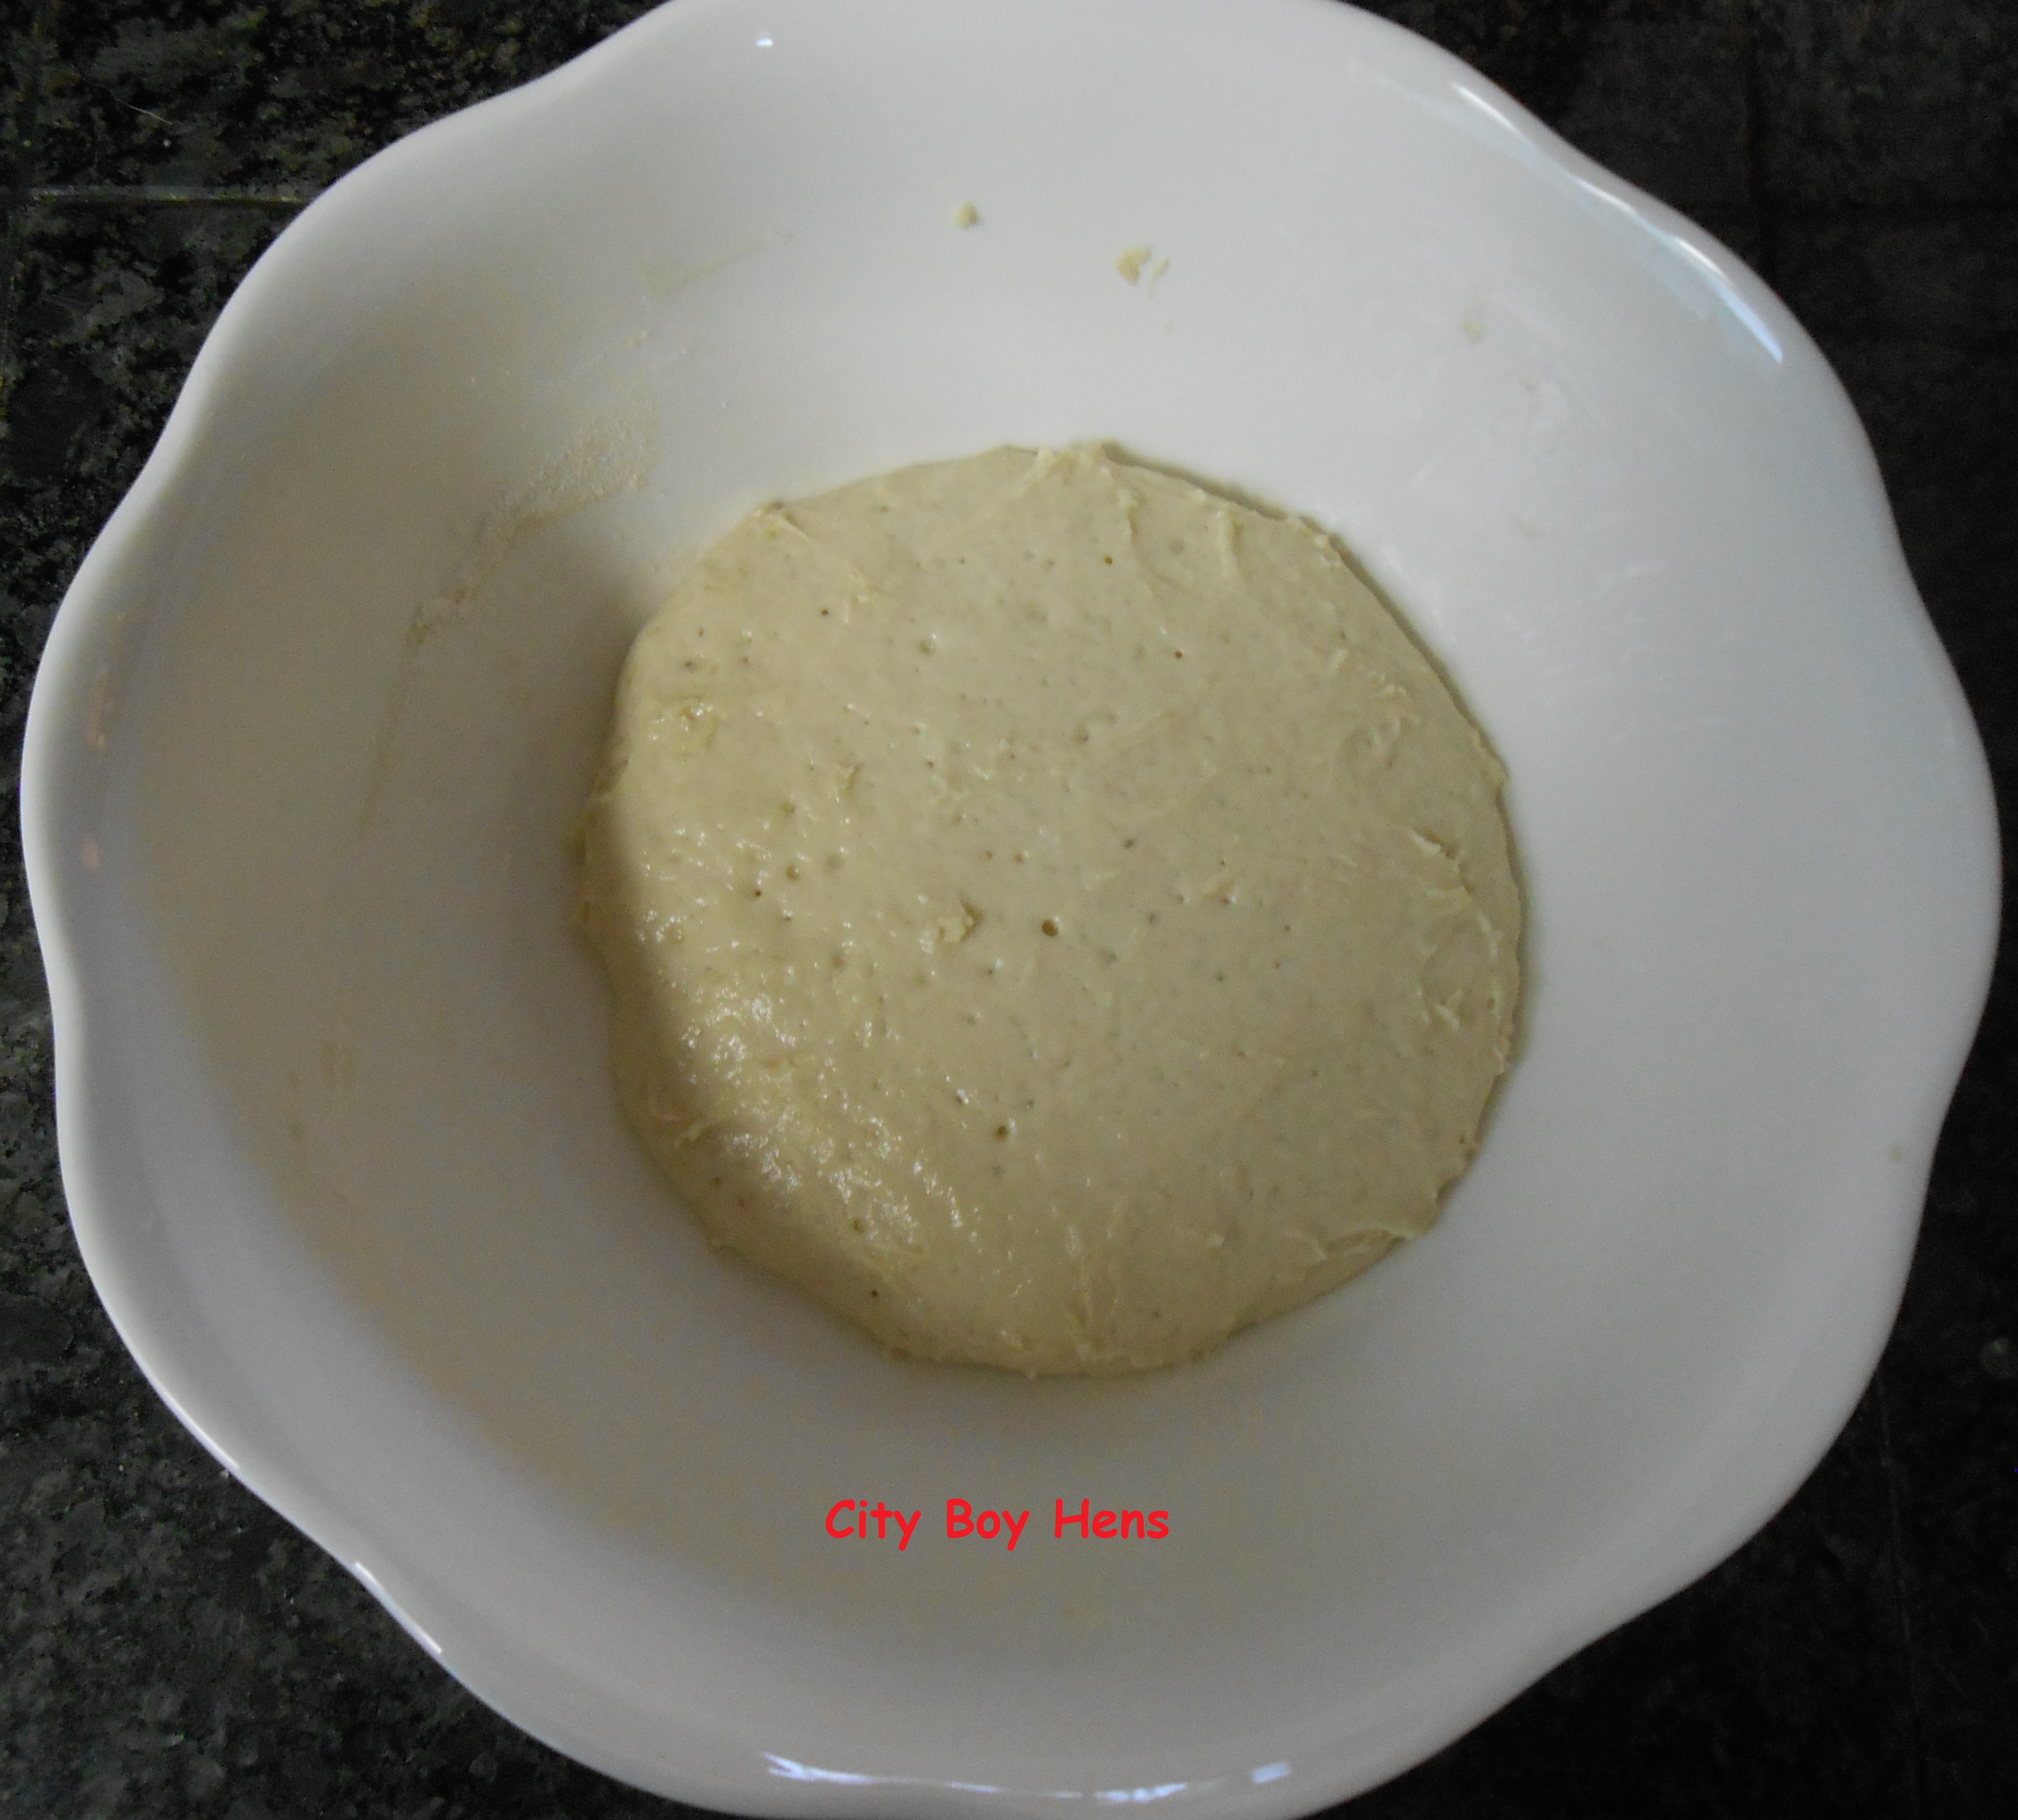
Now, cover the bowl with some plastic wrap and let it rise in a warm place until doubled in size (around 2 hours).  I use my oven for the warm place.  I find turning it on for a minute or two and continuing to keep the oven light on creates enough warmth for the rise.  Okay….now you have 2 hours to wait.  Go get that cup of tea/coffee and take a rest with a good book.  See ya’ in a few hours!

After 2 hours the sponge should look like this:
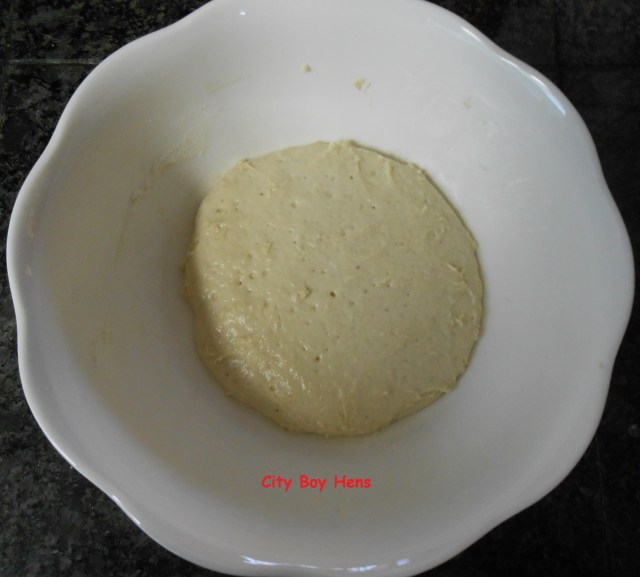
005

Dough:

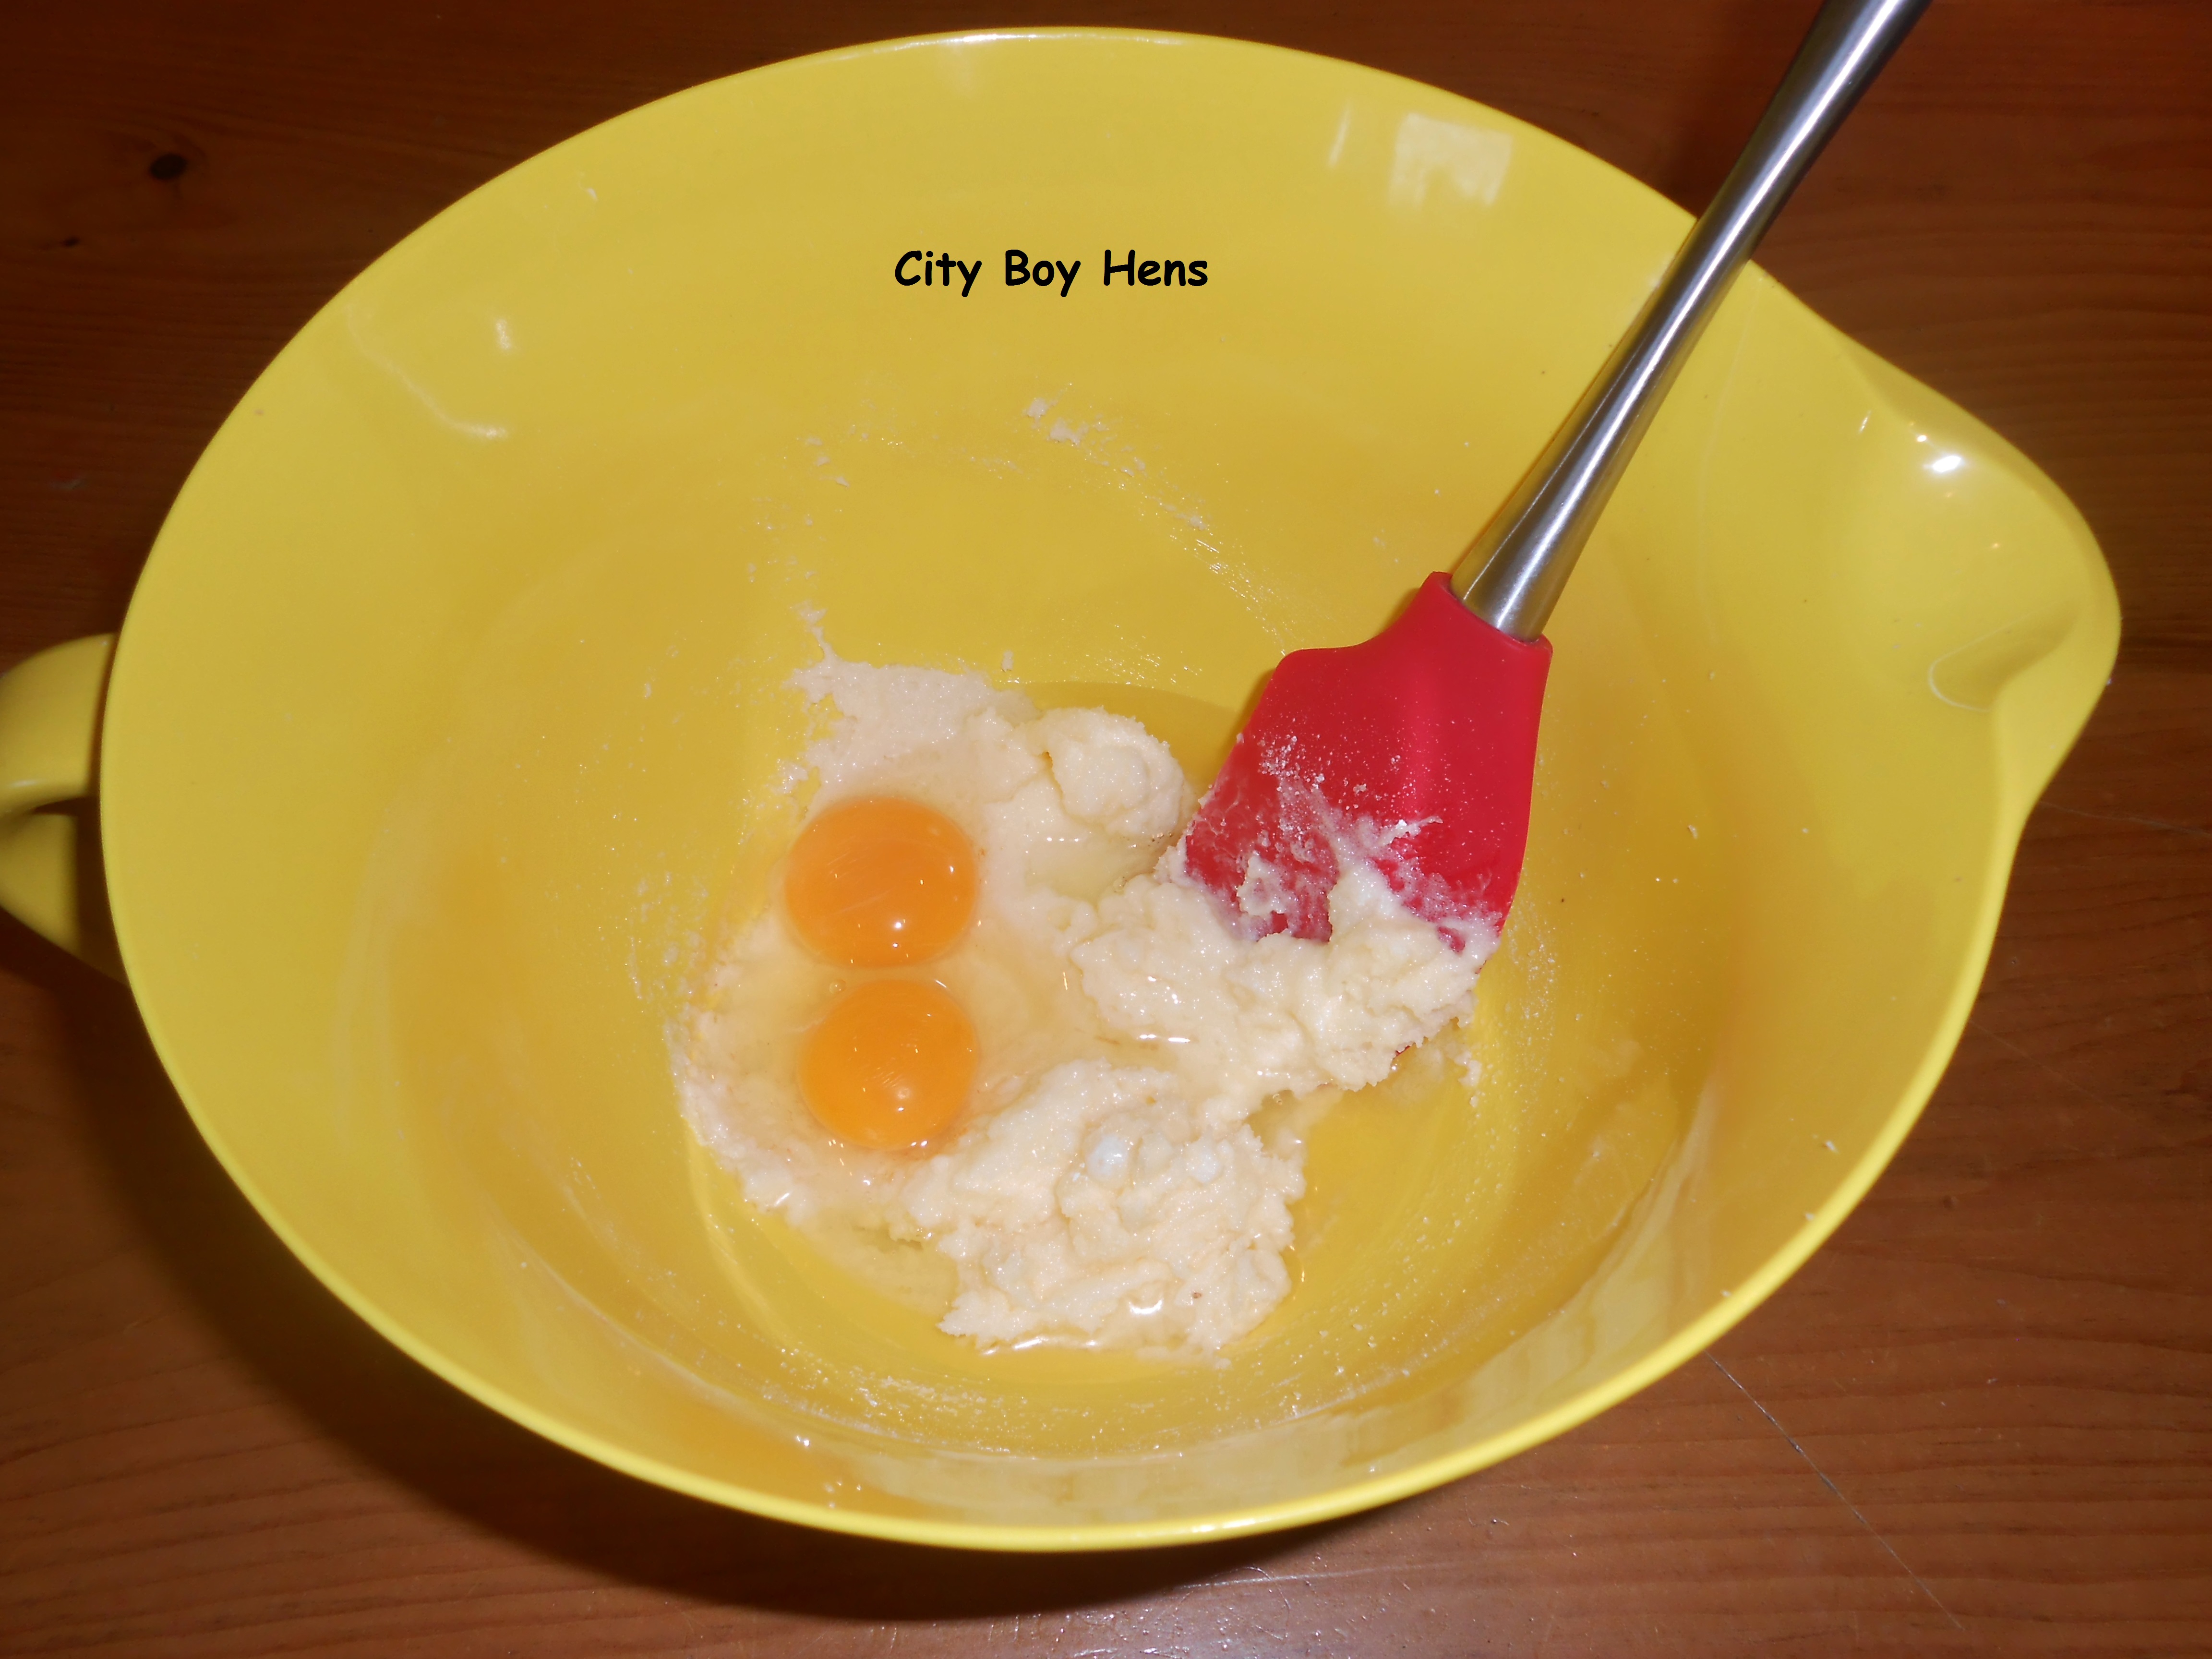
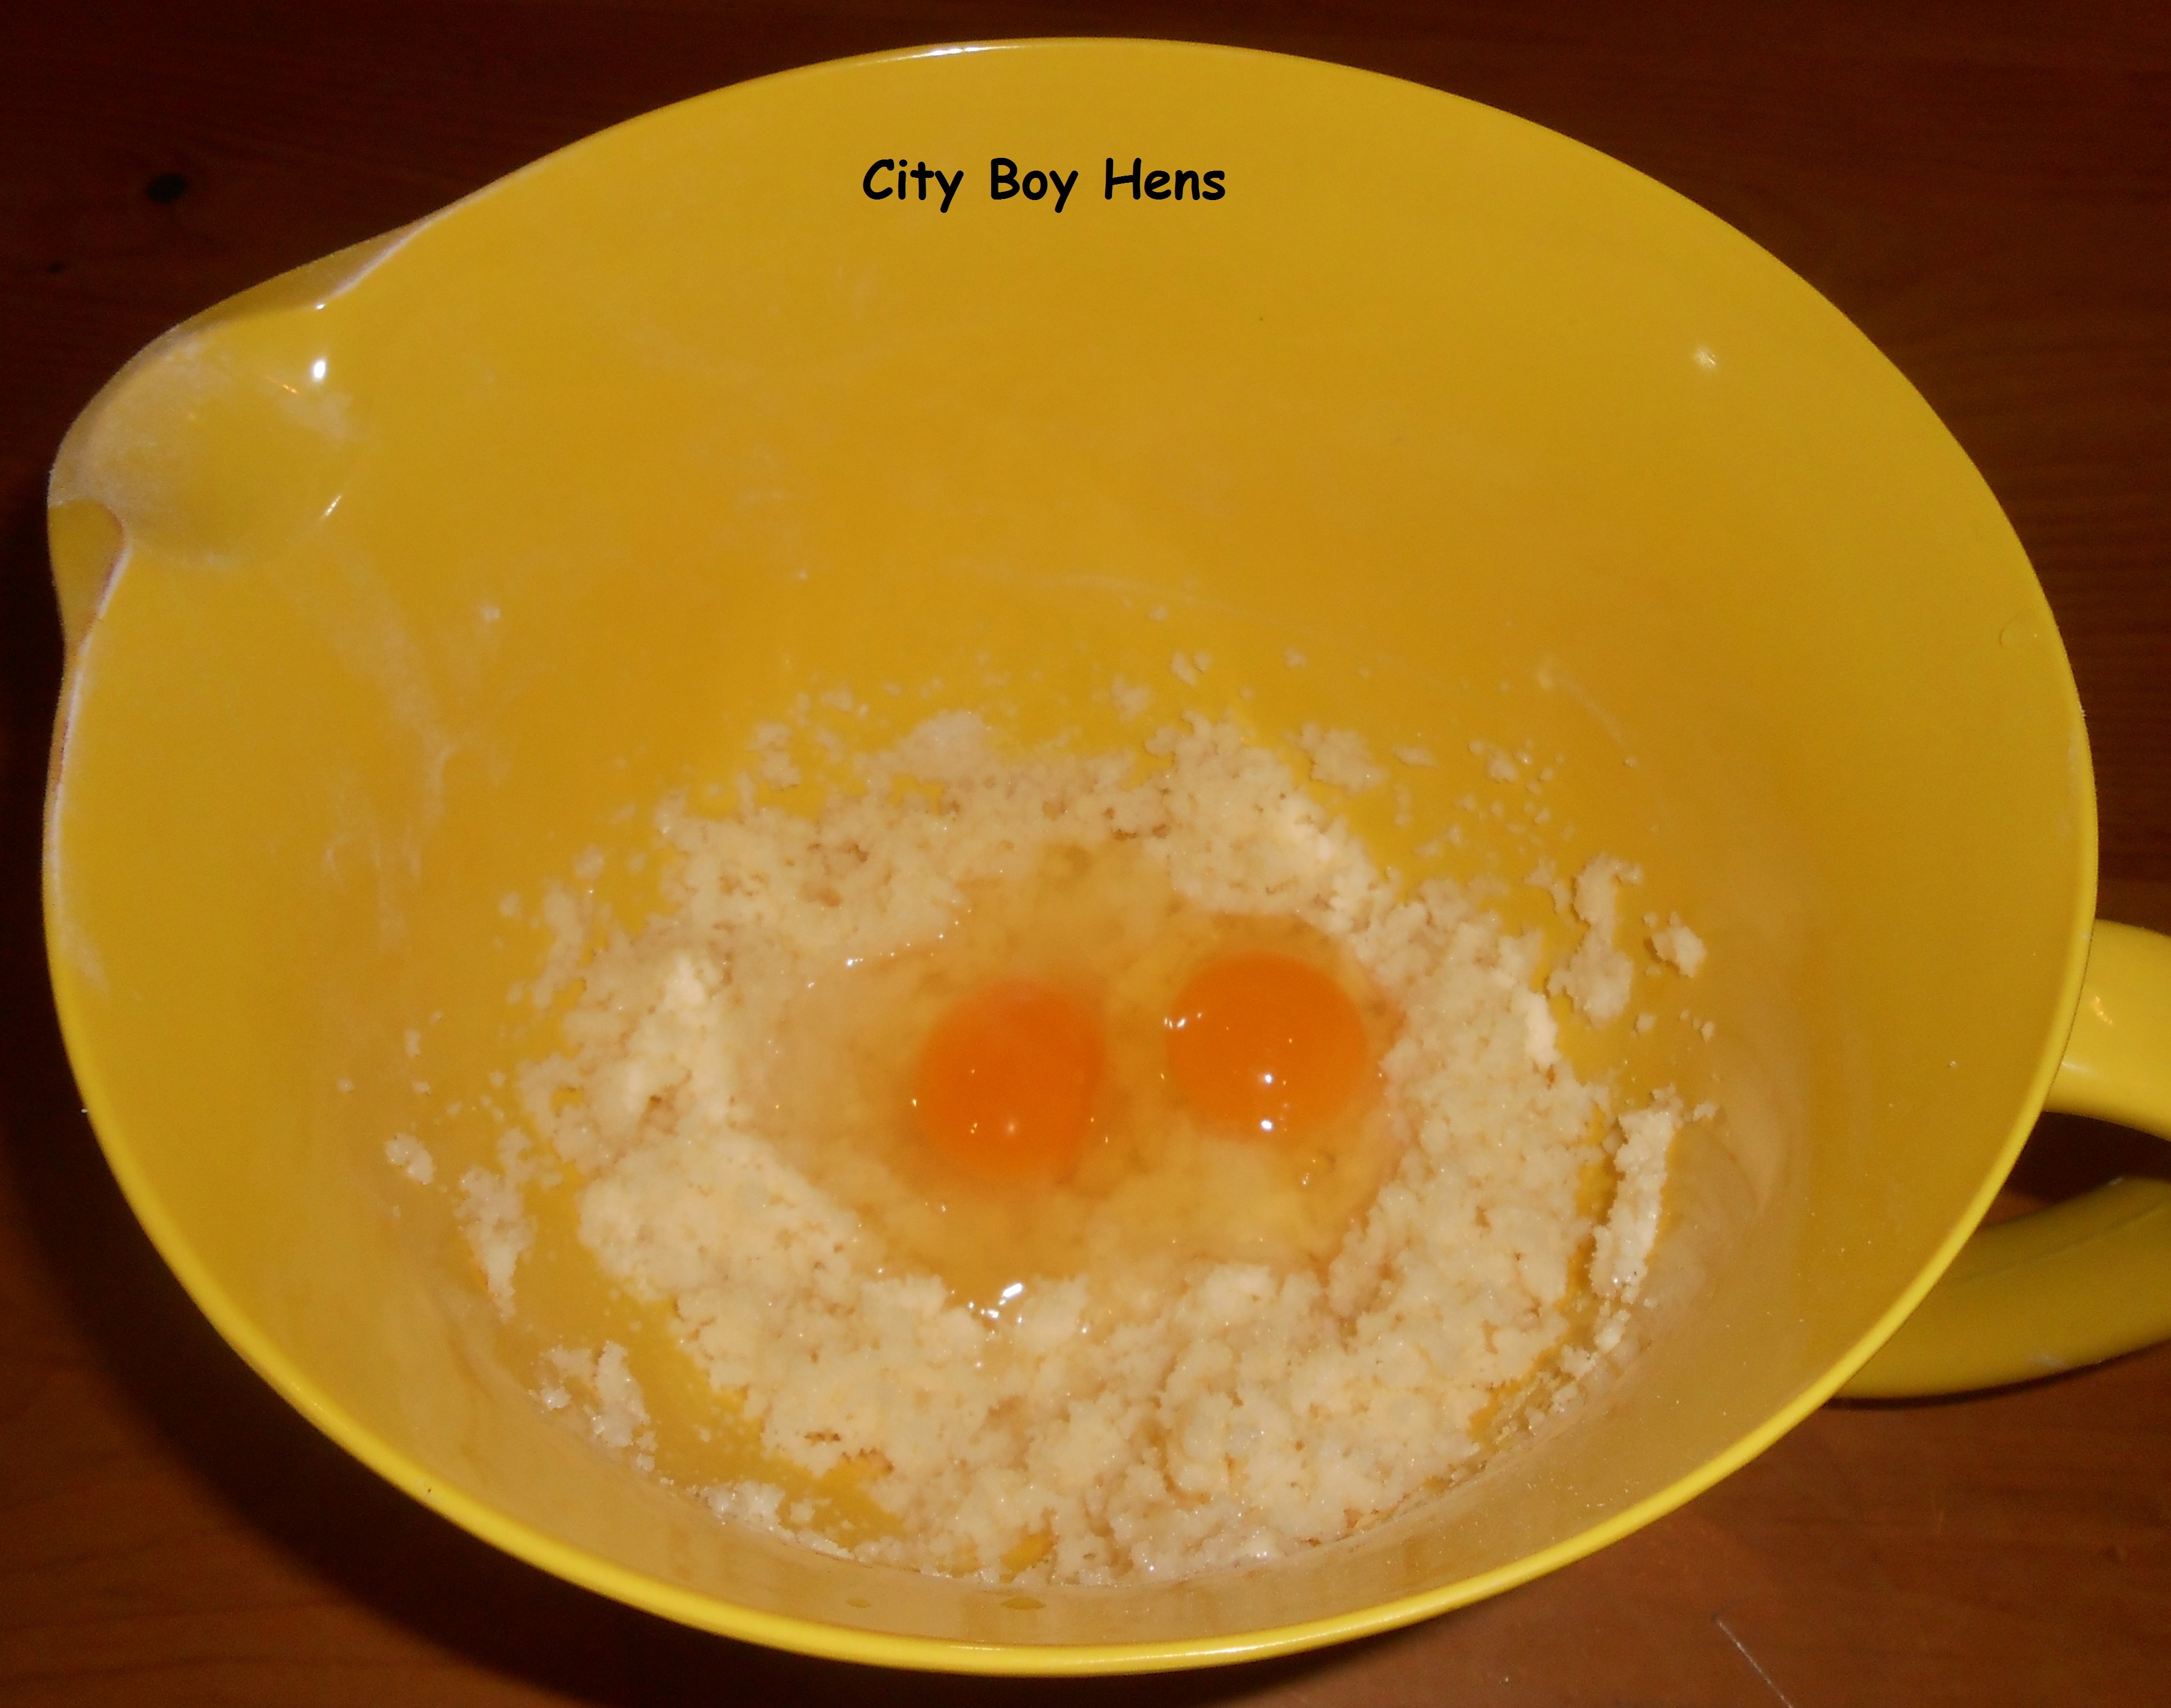
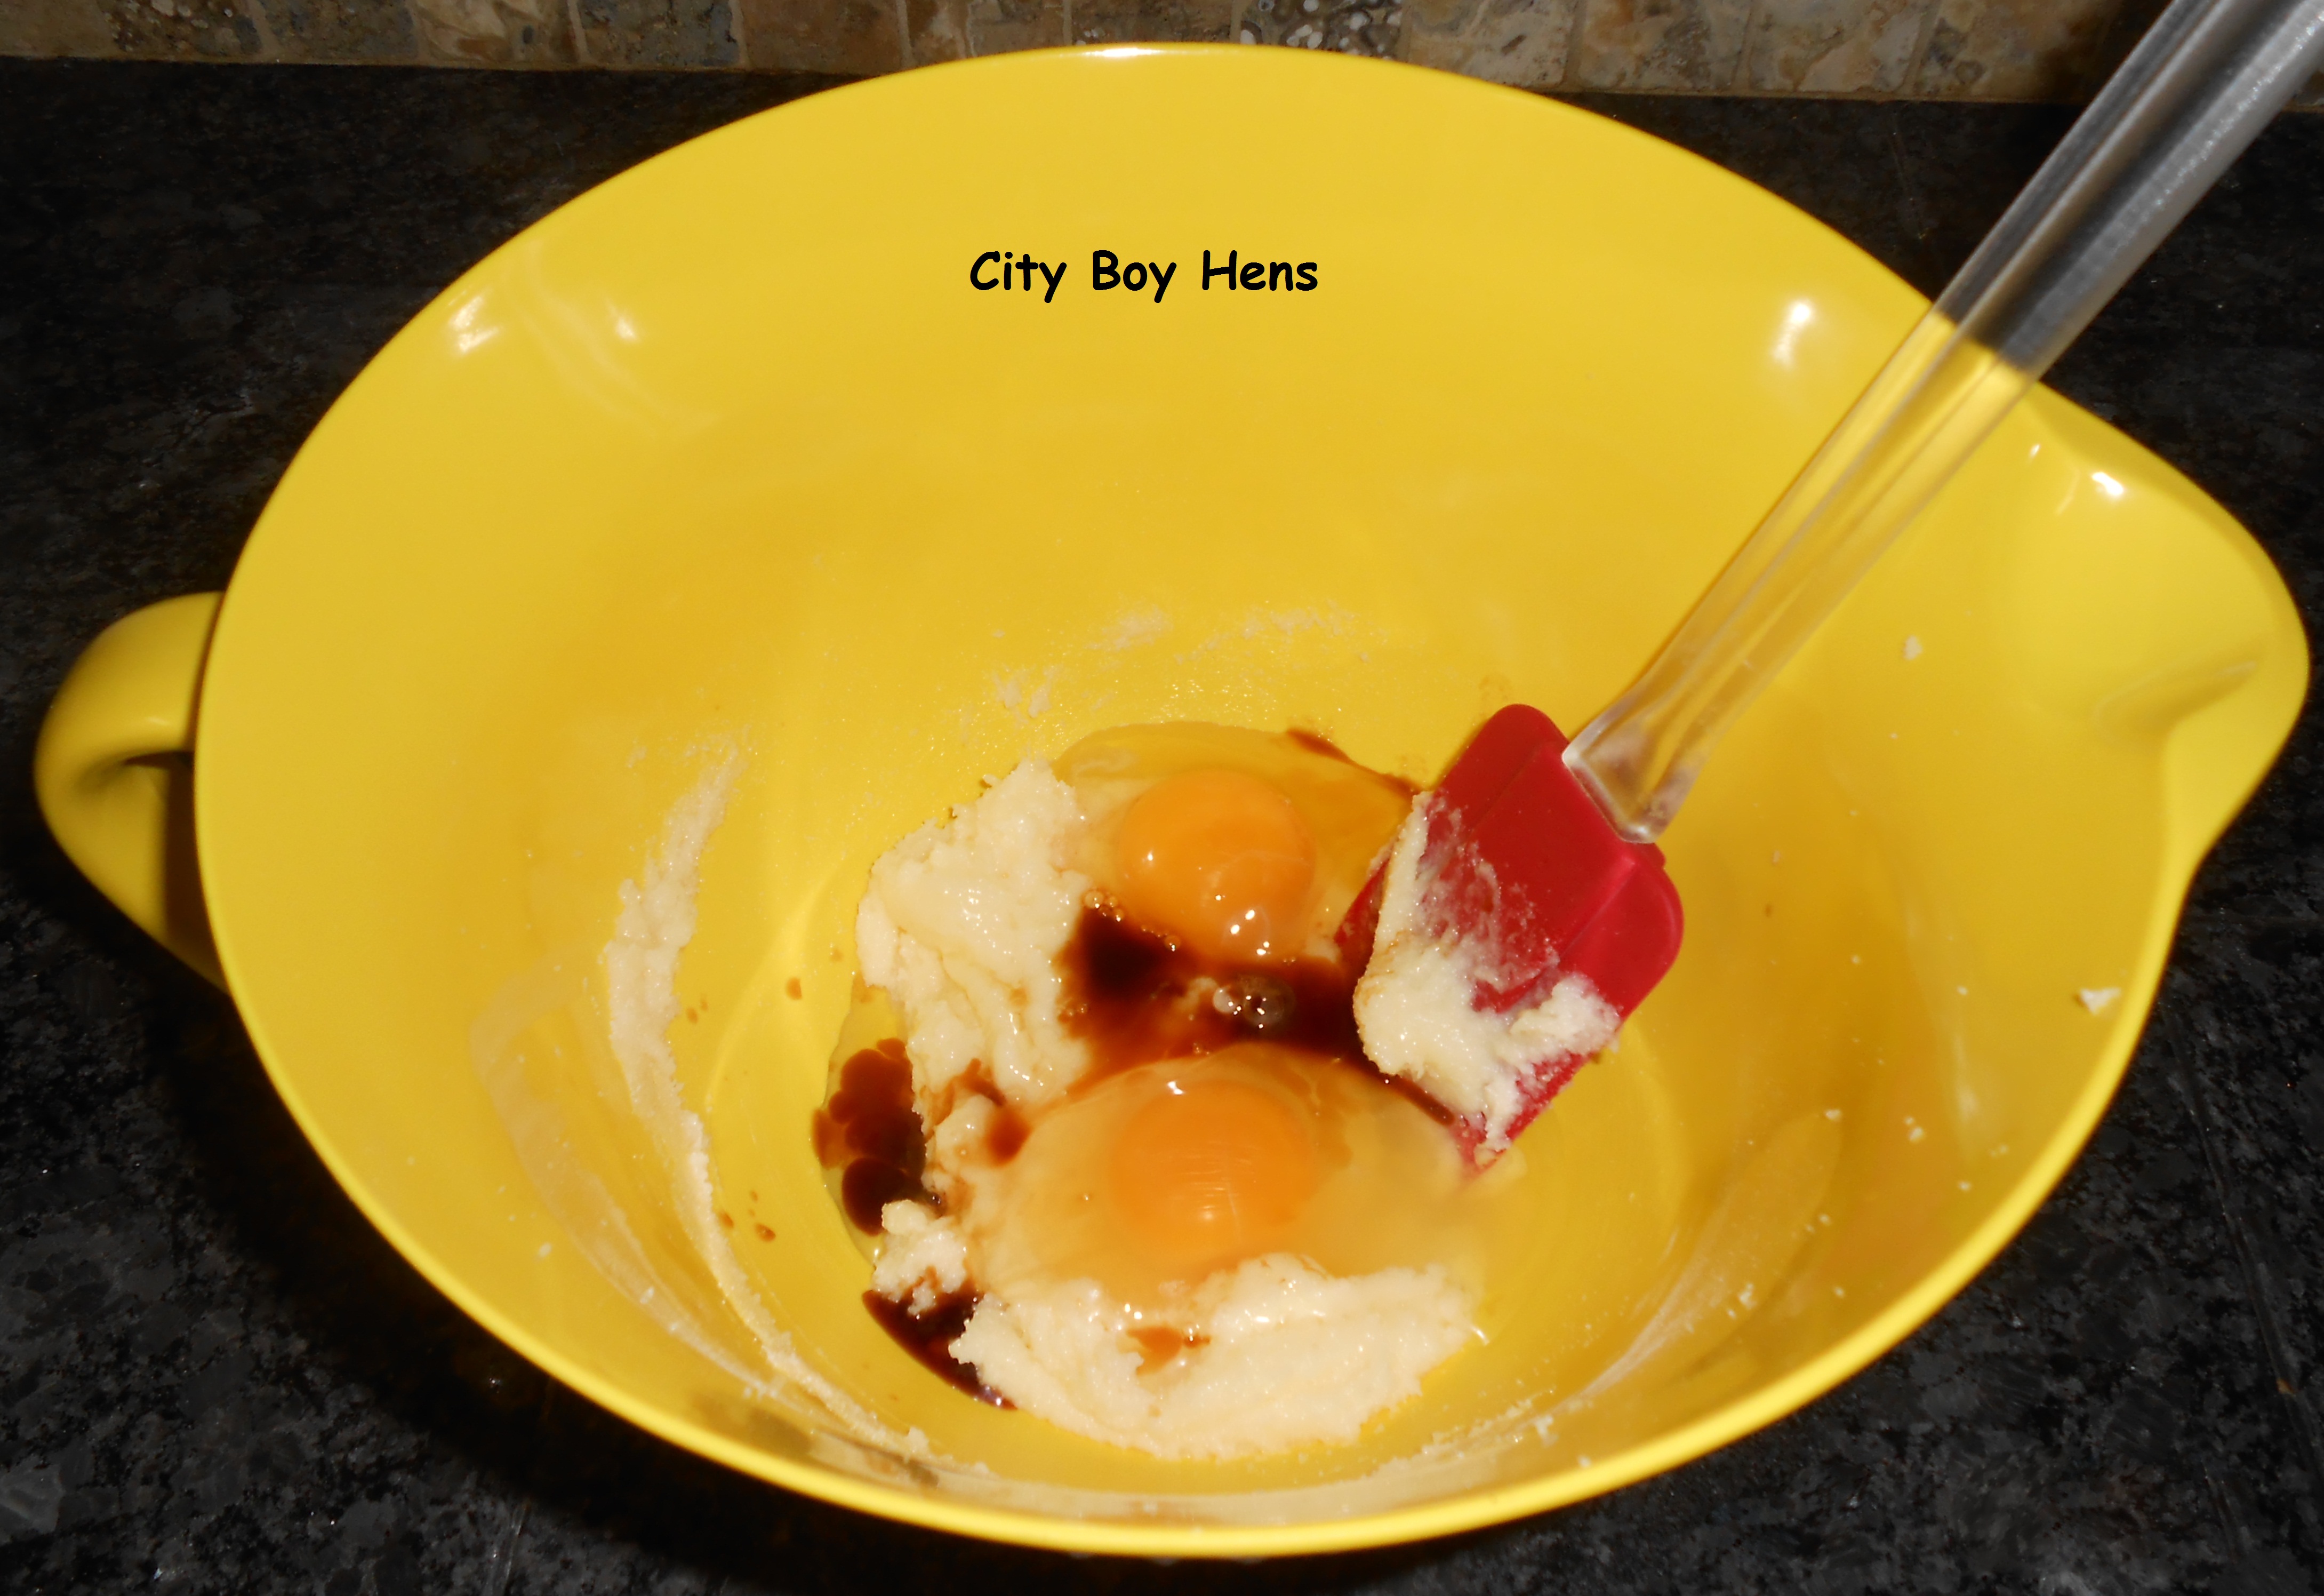
Mix together sugar and butter in a large bowl.  Now add your eggs and egg yolks.  Beat the dough until it is thoroughly mixed.  Add sponge, warm milk, and vanilla.  Stir until well mixed.  Add the flour (1 cup at a time) until well mixed and a soft dough is formed.

Now begin to knead your dough on a lightly floured surface or in your stand mixer.  If you are kneading by hand, it should be around 8 minutes.  Make sure to add a bit more flour if the dough is too sticky.  If you are using a stand mixer, make sure it is at the “kneading setting” and you are using a dough hook.  6 minutes  on this setting worked well for me.  Either way, you want to continue kneading until the dough is smooth and elastic.

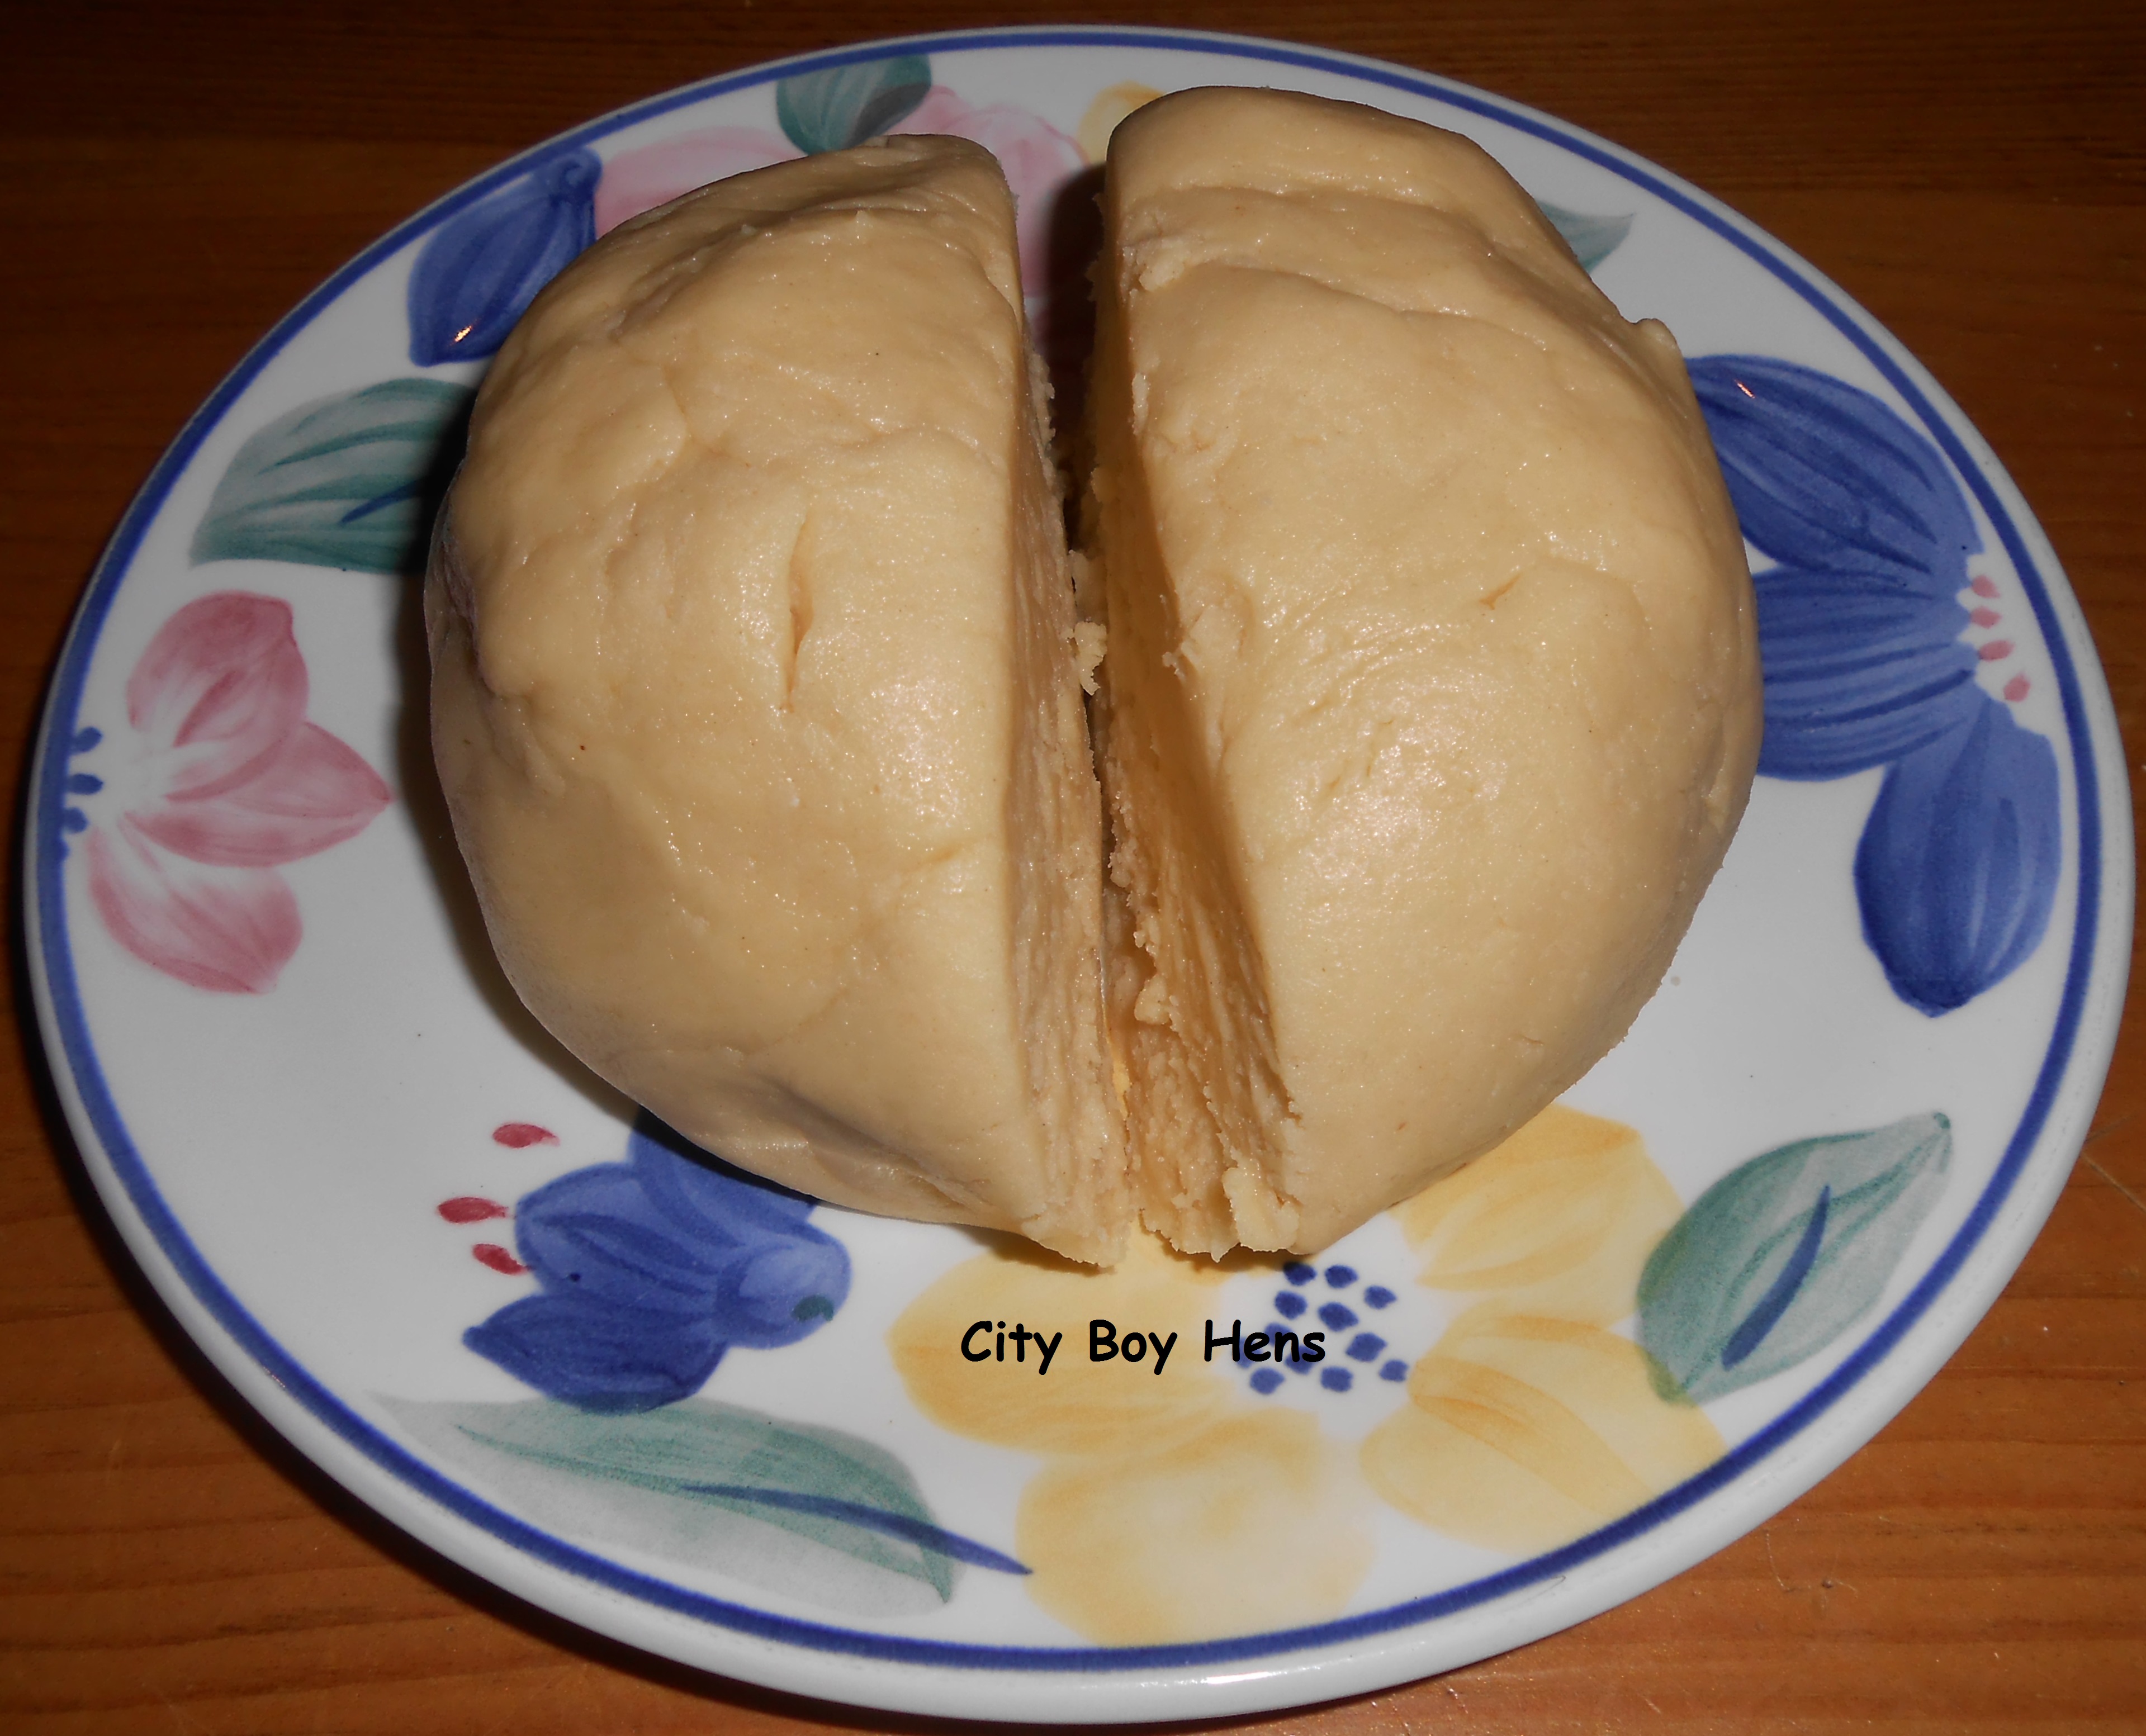
Place the dough in a greased bowl.  I used a bit of melted butter and used my hands to coat the bowl.  Flip the dough in the bowl in order to ensure that the other side also gets greased.  Cover with plastic wrap and let the dough rest in a warm place until it has doubled in size (around 2 hours).  *  Now it’s time for you to have another rest, warm beverage, good book, leisurely walk or…………..”Hey Beloved Wife……. Are the kids out? Do you still have that Santa’s helper costume that I got you last year???????”014

2 hours later, the dough should have doubled in size and look like the picture below.019

Fruit:

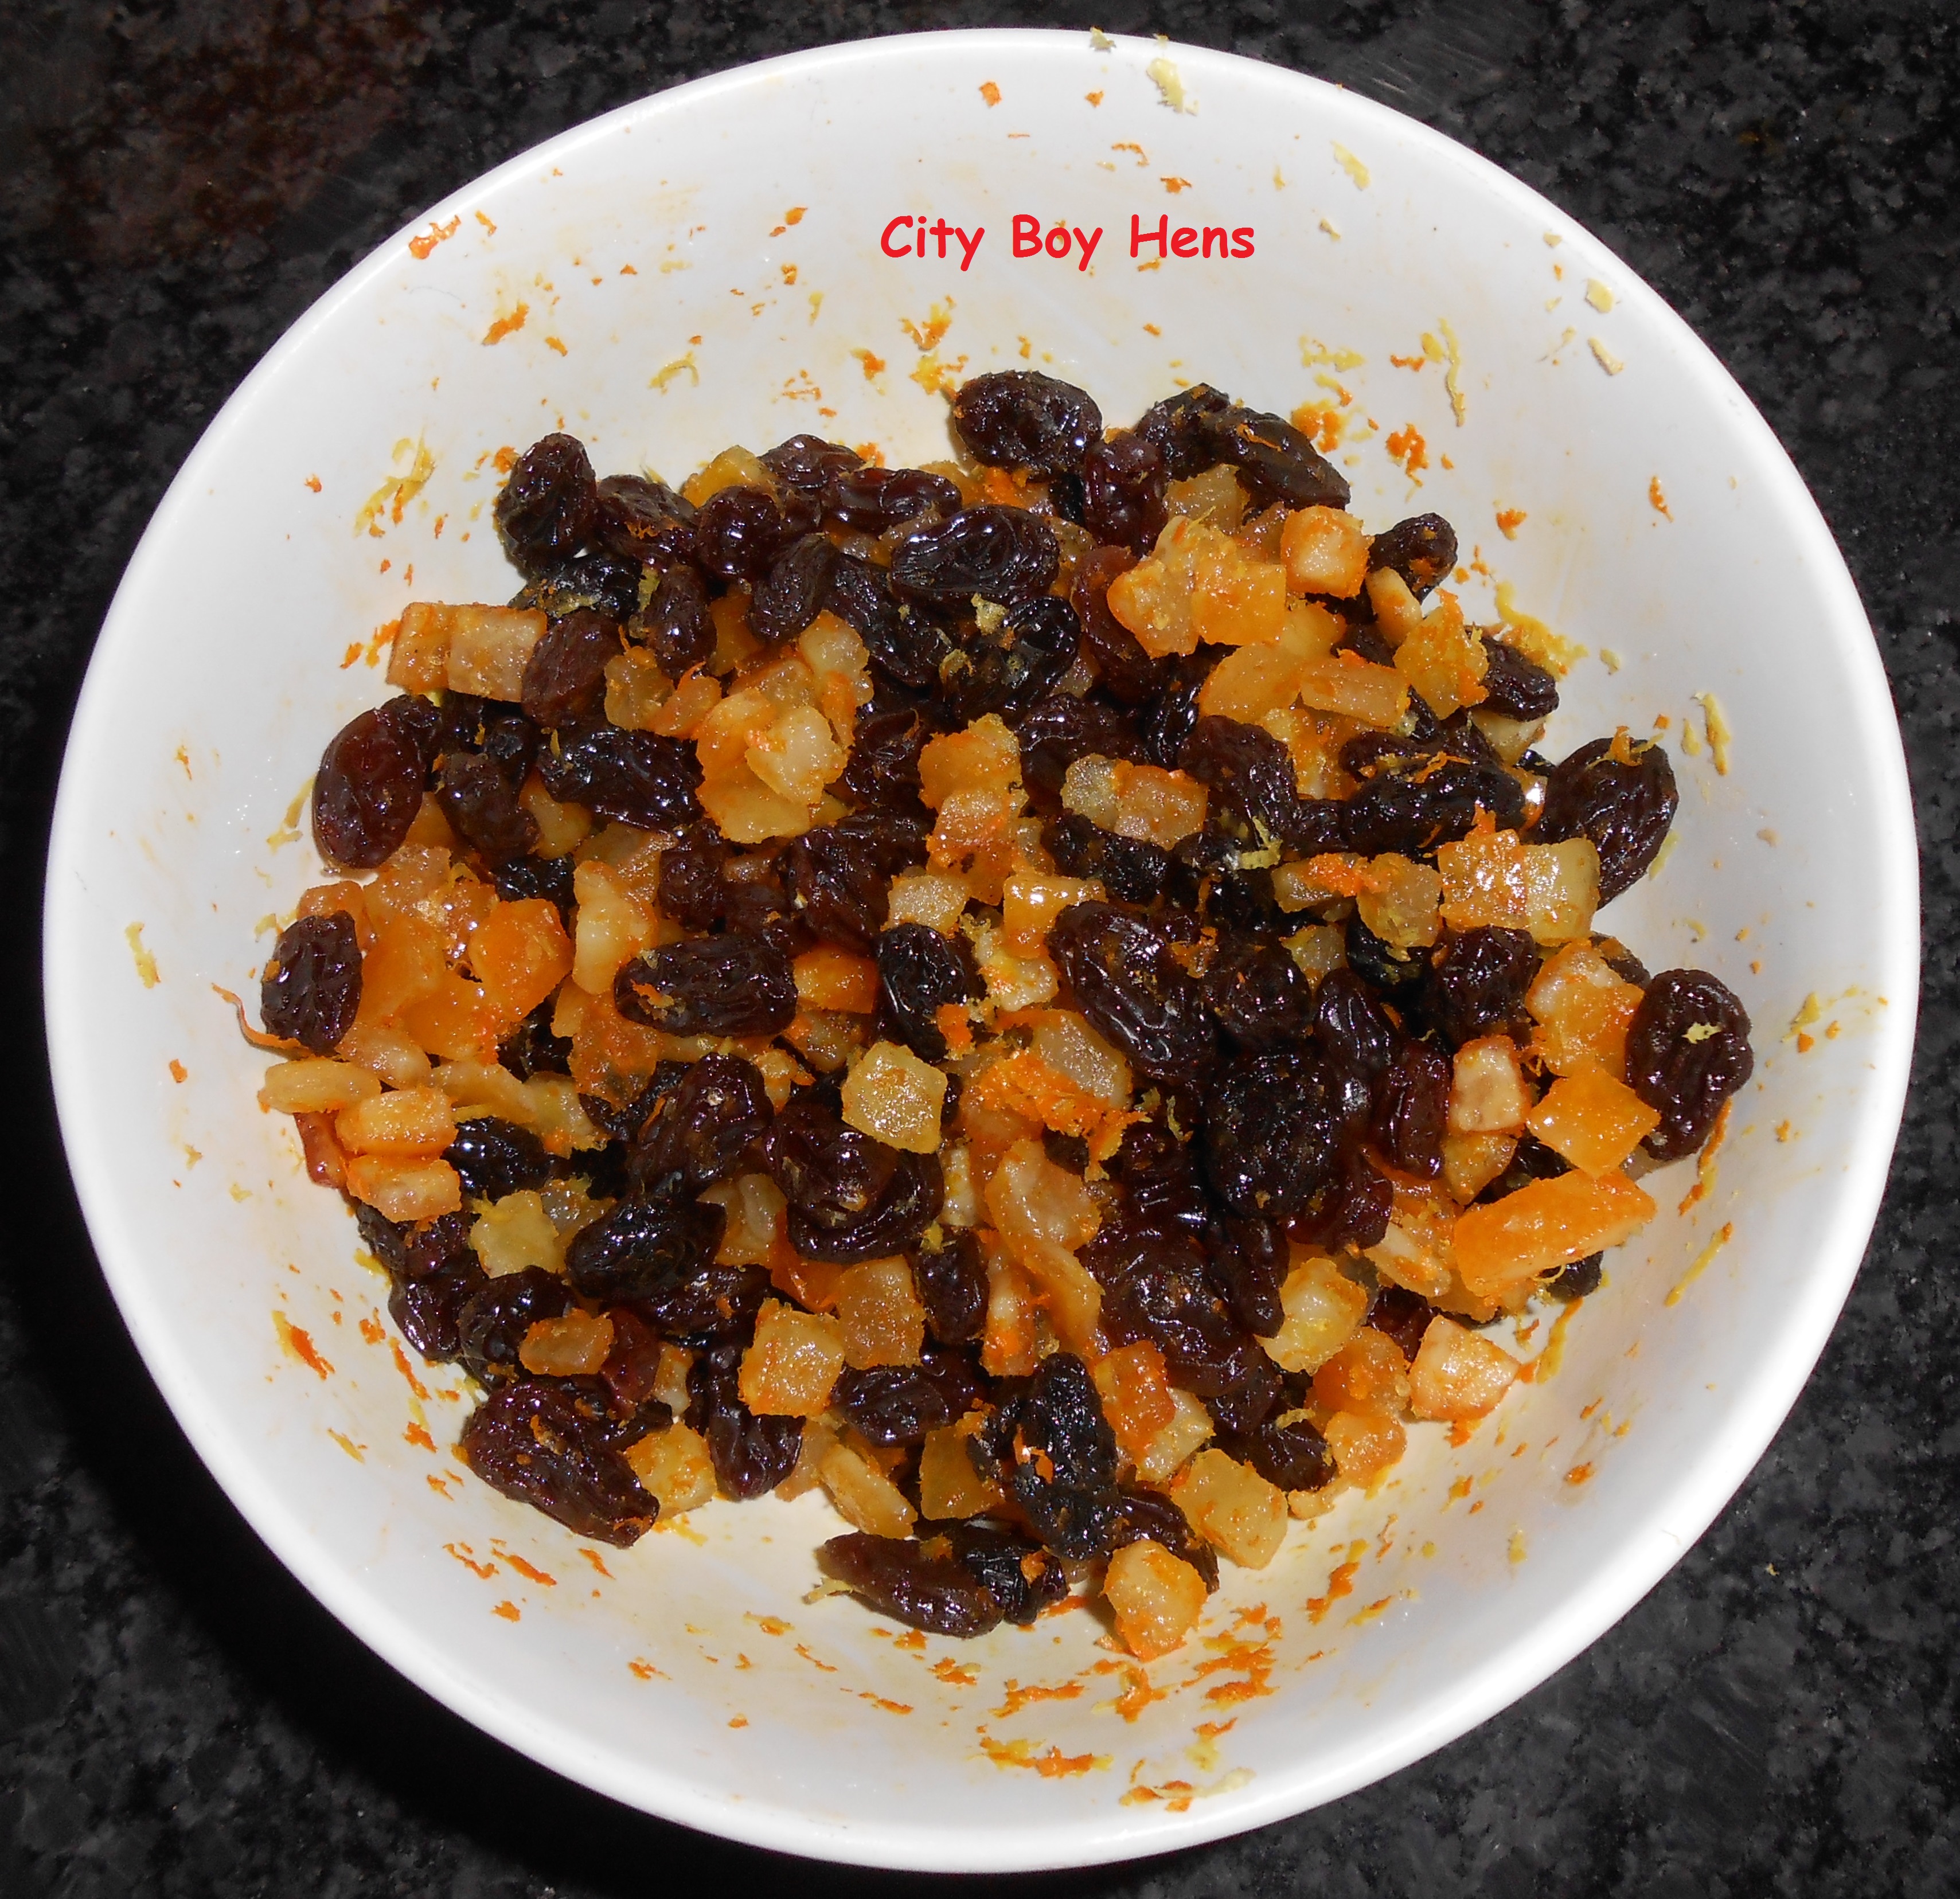
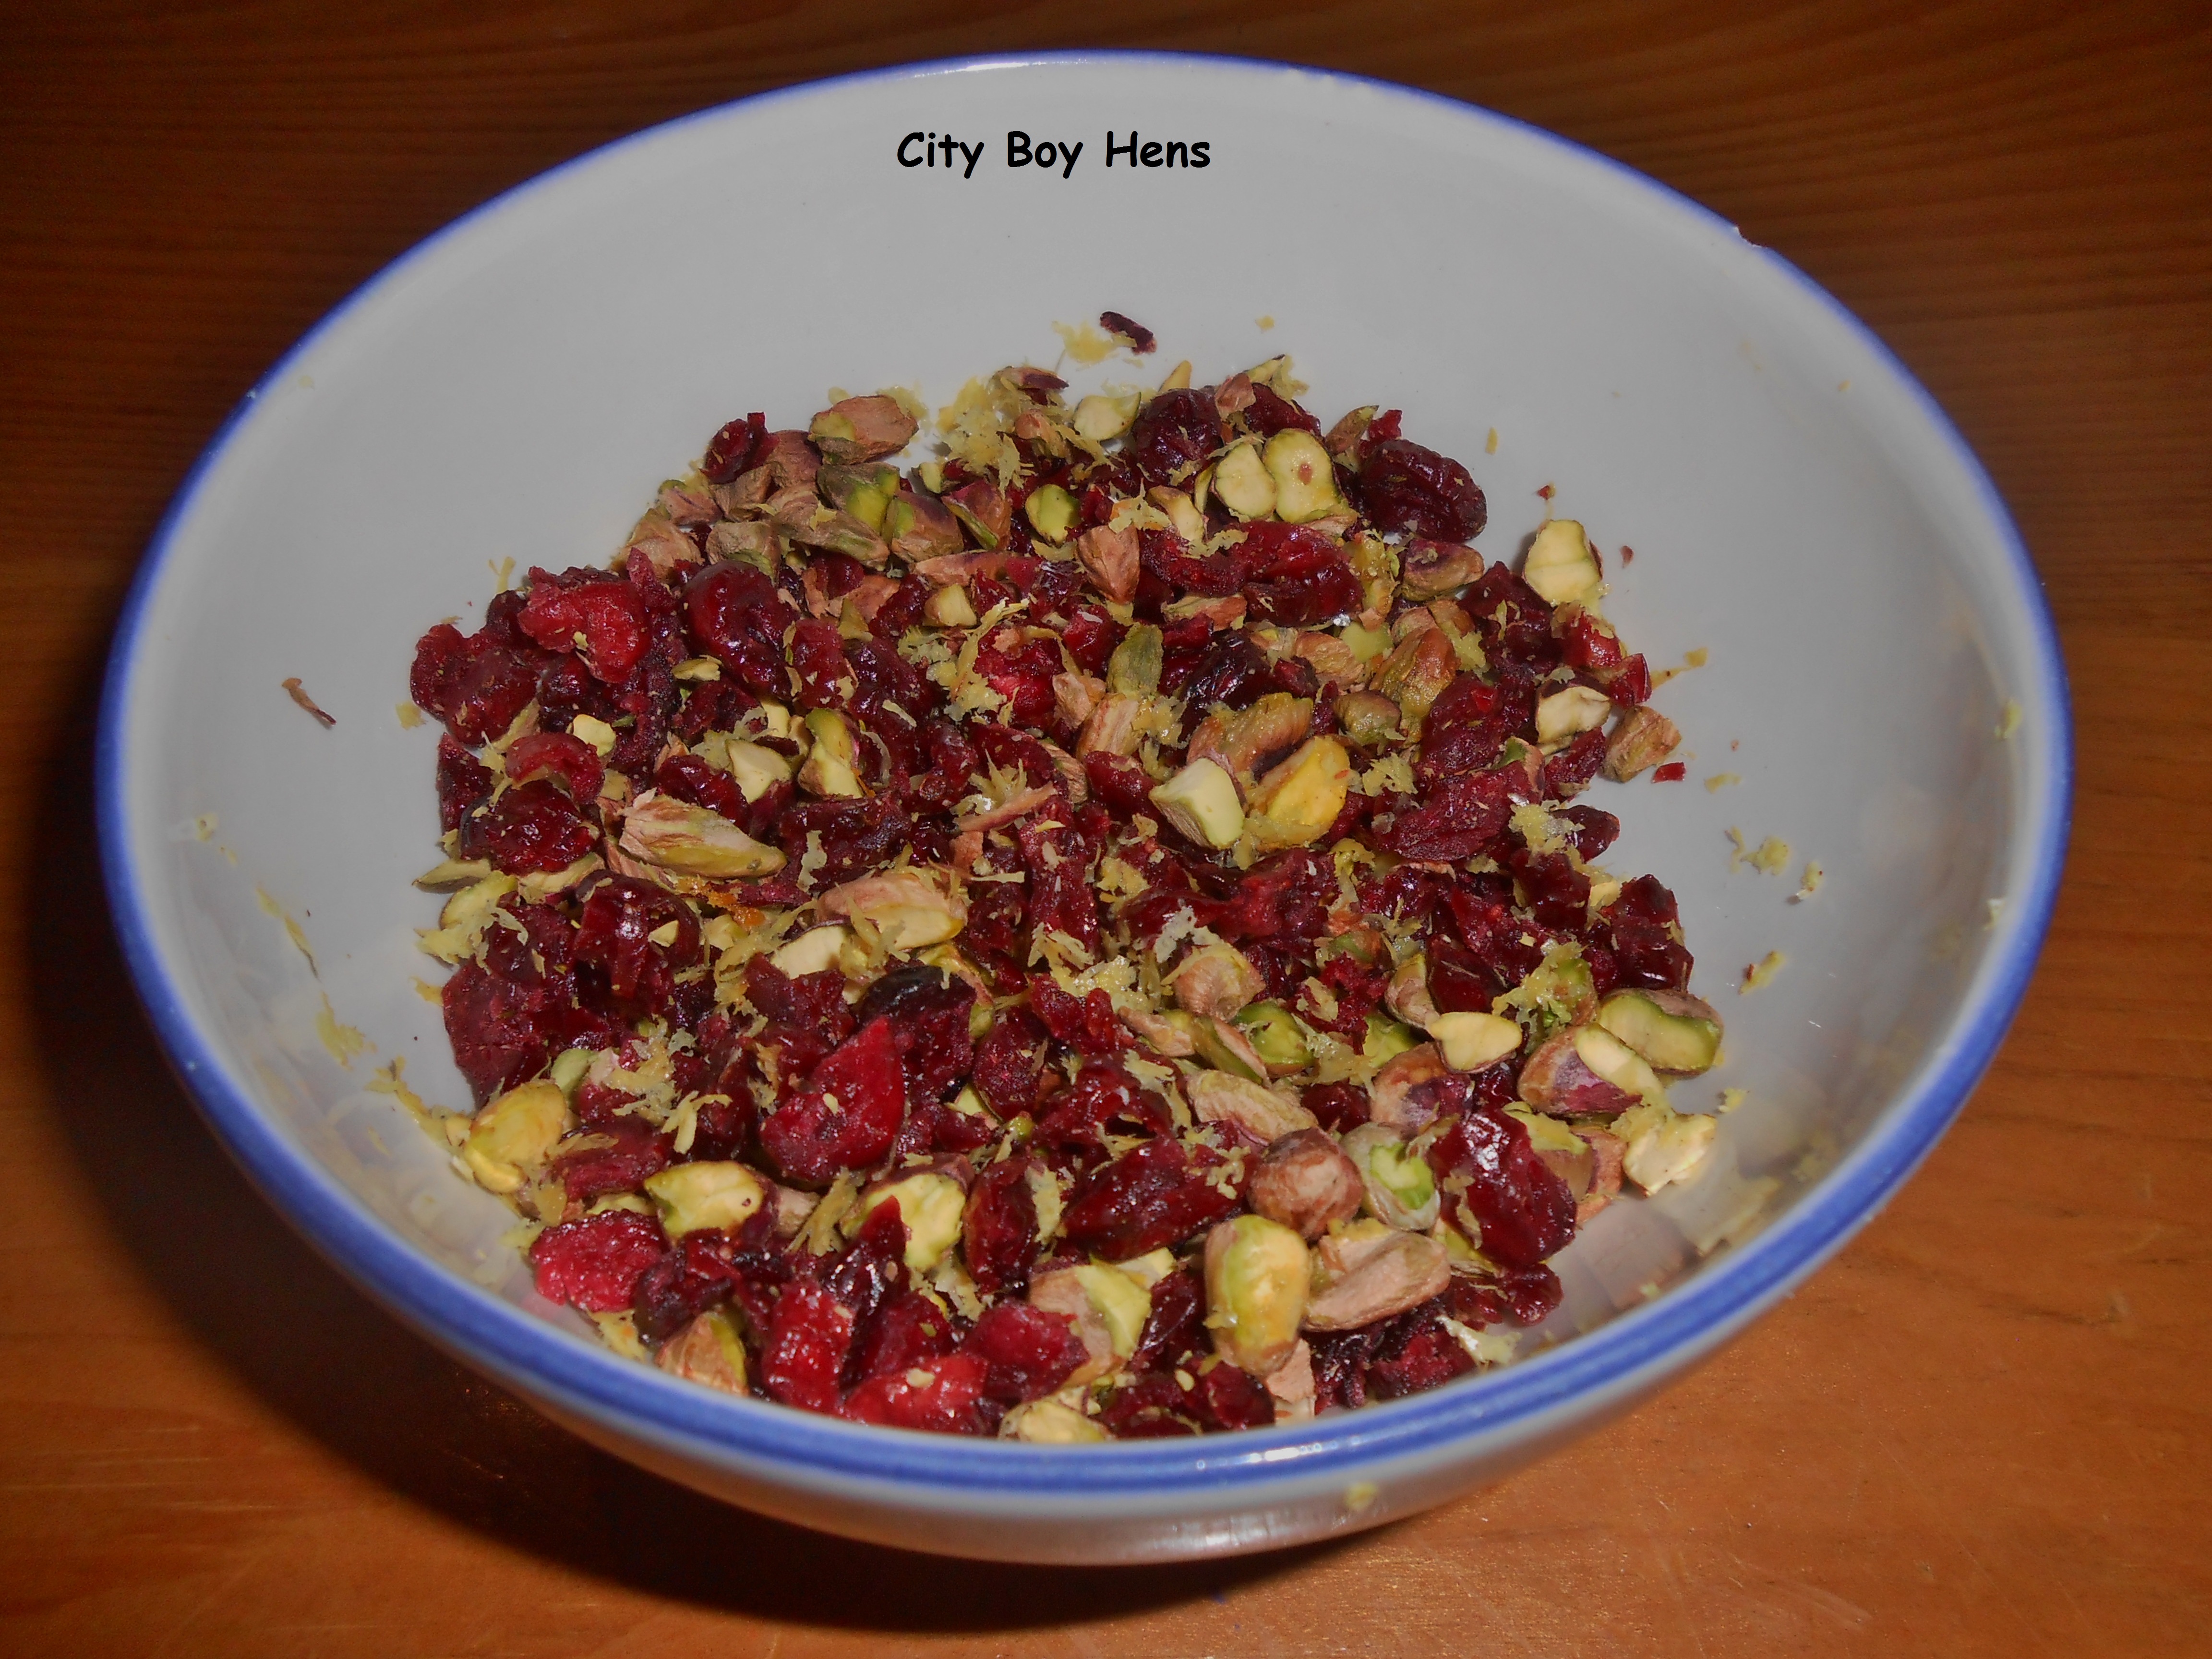
While the dough is rising, take a few minutes to get your raisins plumped up in the Amaretto.  I combined the raisins and the Amaretto in a small covered sauce pan on low heat for a few minutes and then set it aside.  Once cooled, combine the raisins, citrus peel and zest.017

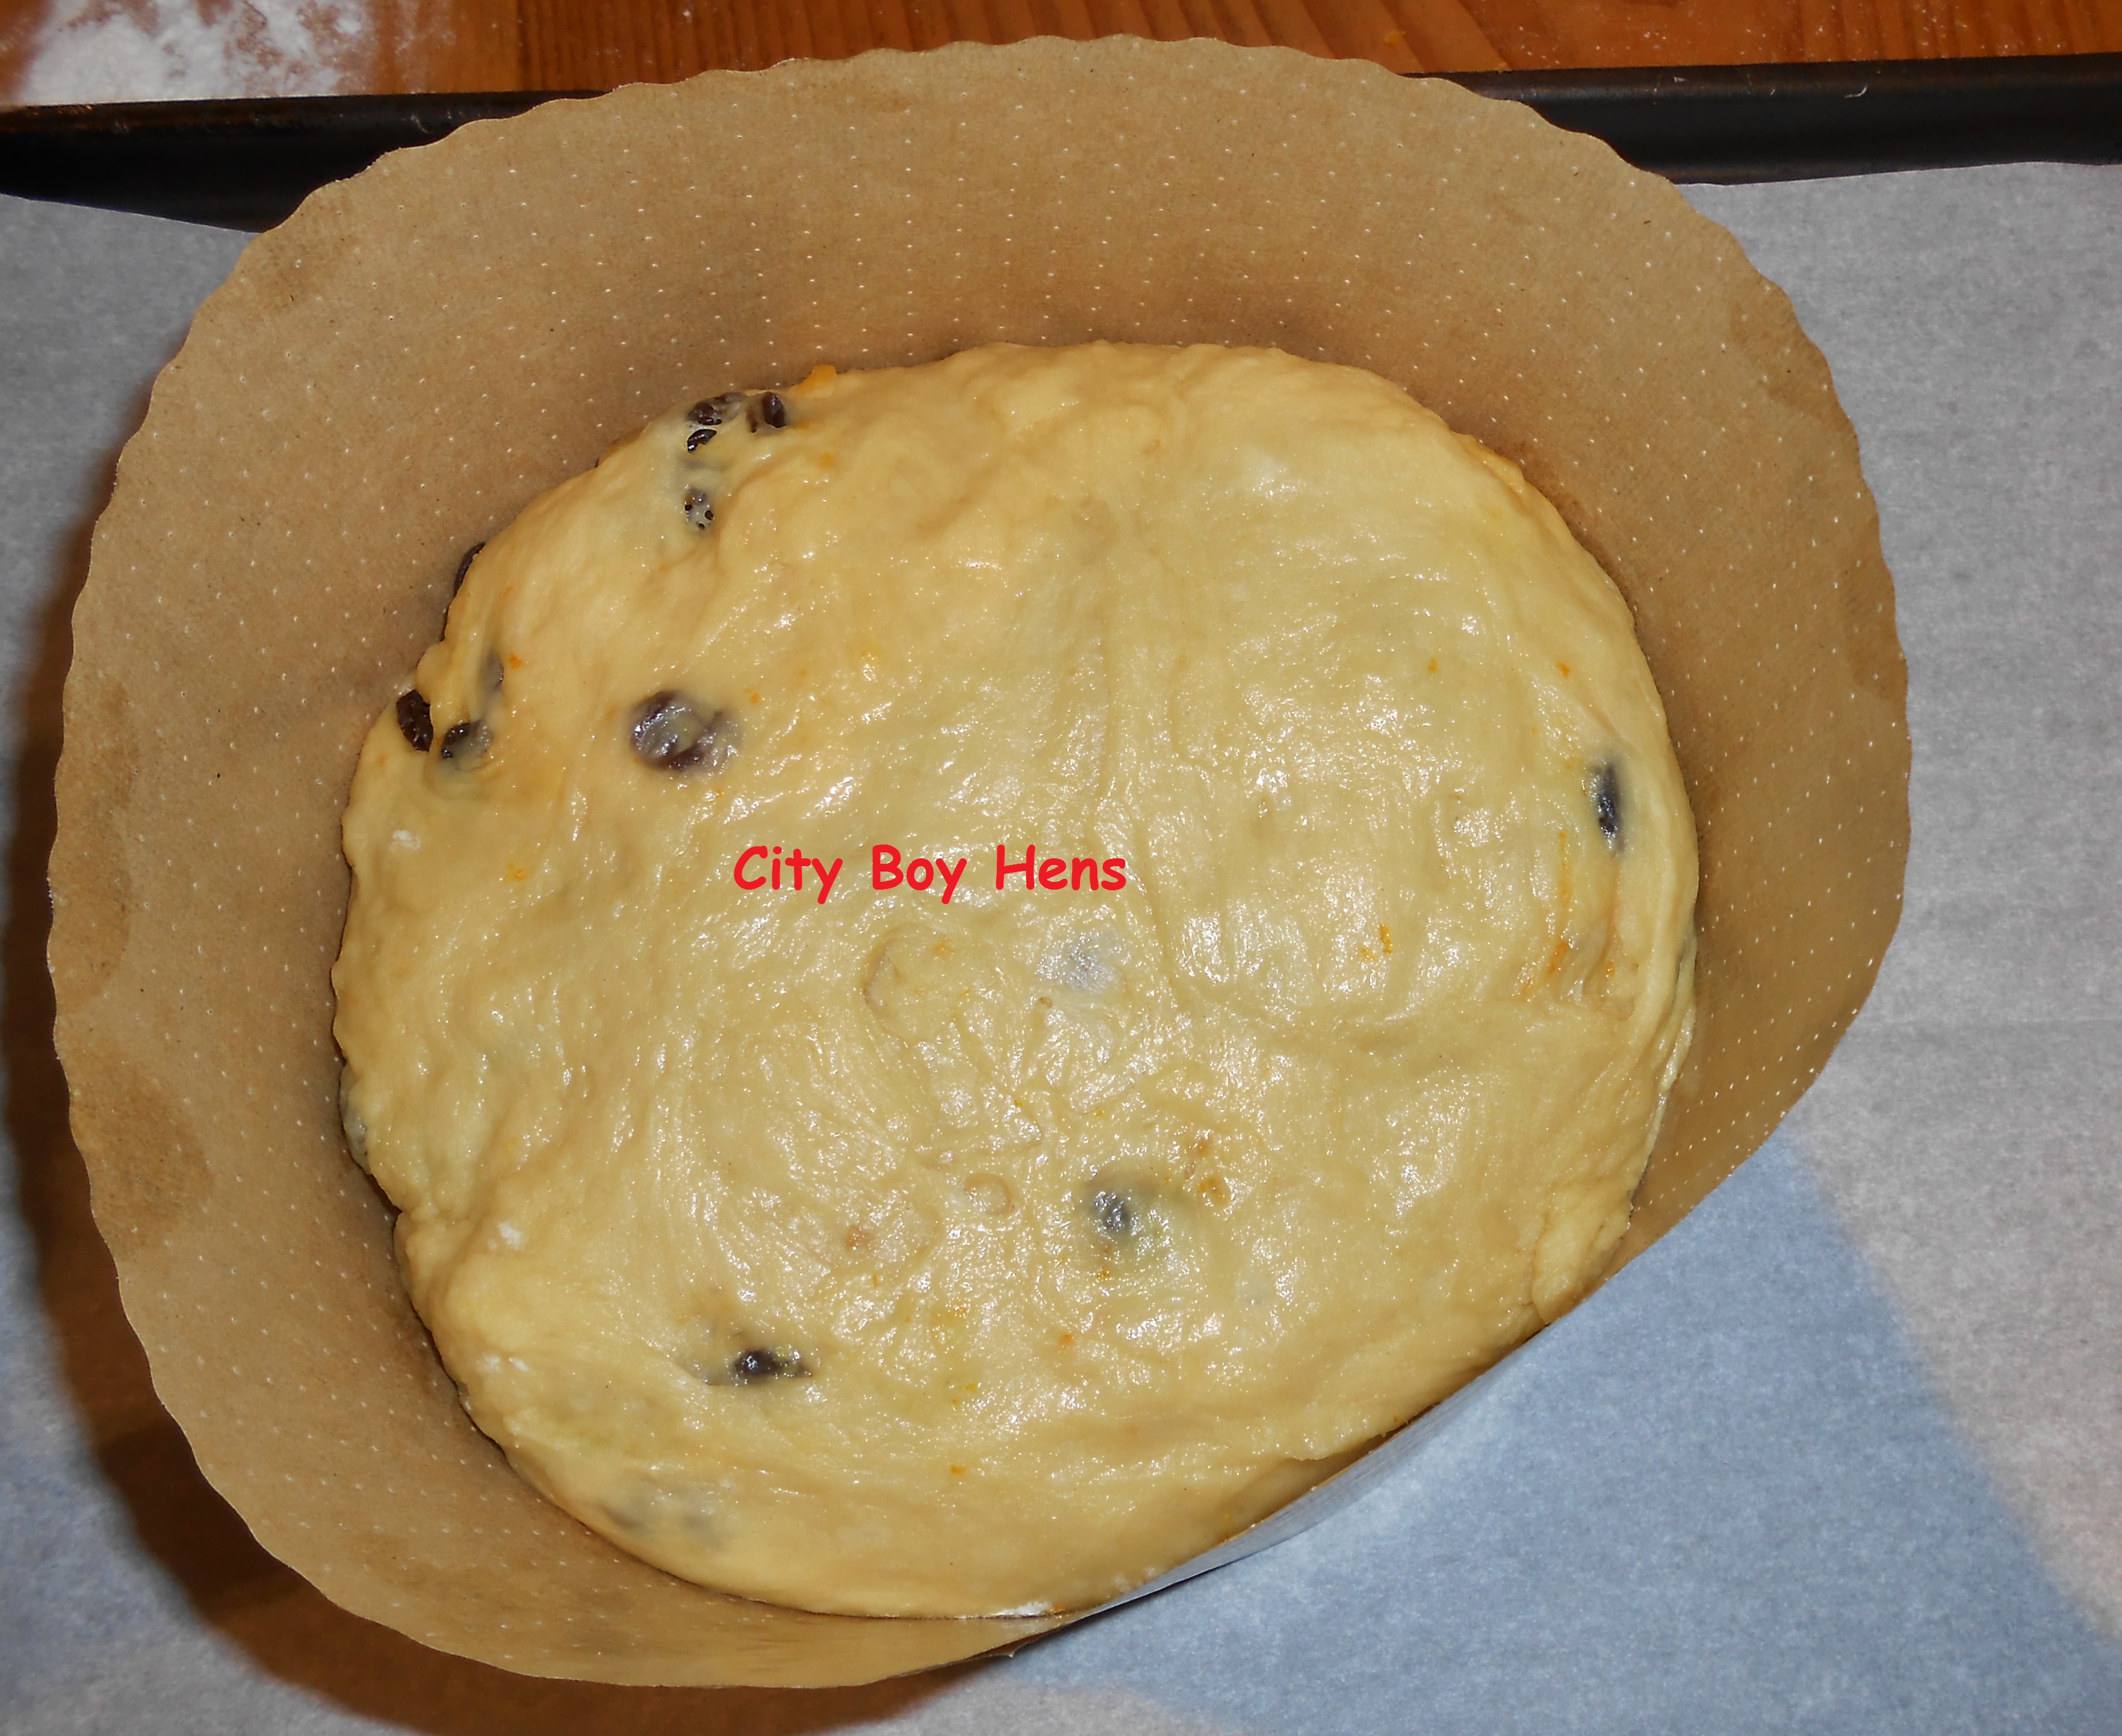
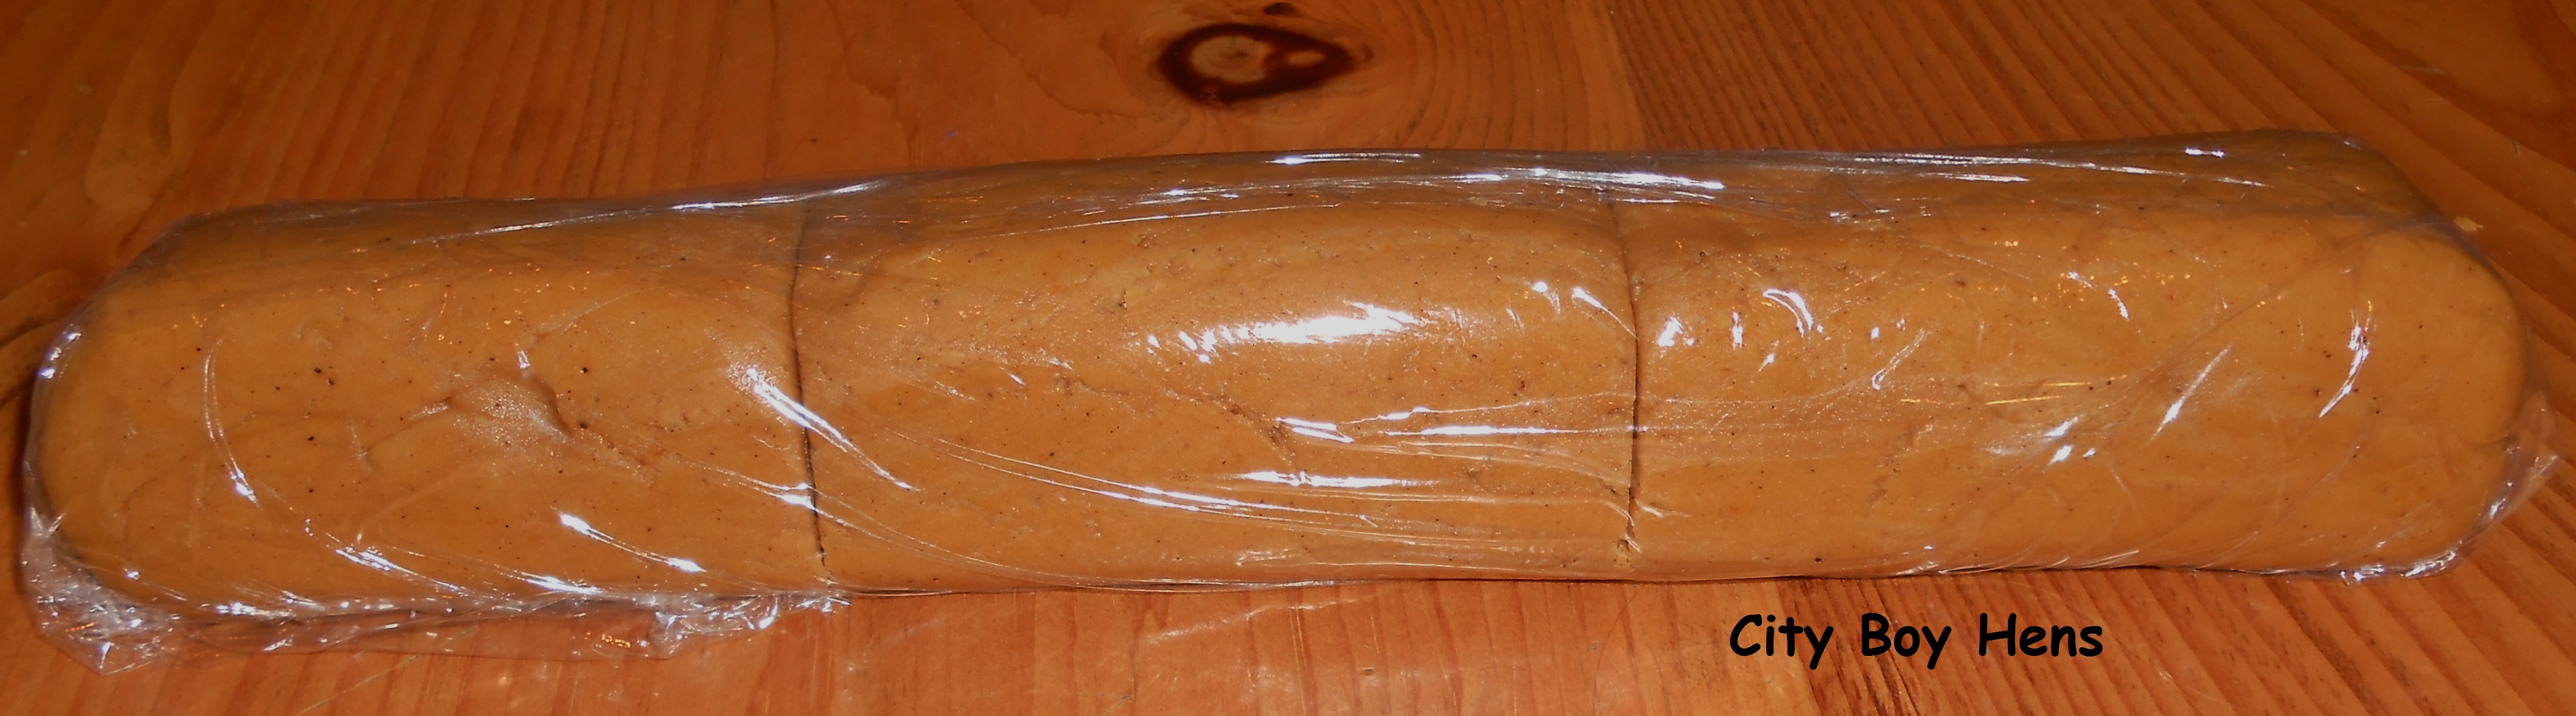
Once the dough has doubled in size, turn it out on to a lightly floured surface and “punch” it down.  You want to get the air out of the dough.  Next, pat the dough out and add the fruit to the middle.  Begin gently kneading until the fruit is evenly distributed throughout the dough ( a few minutes).  Form the dough into a ball and place it into a Panettone mold or greased pan. 021 Cover once again and let it rise in a warm spot until doubled in size (around 2 hours).  After 2 hours, it should look like the following picture.
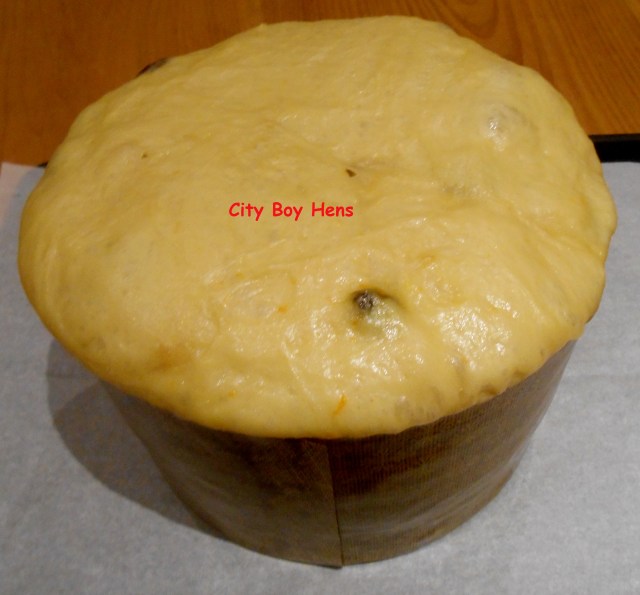
023

Bake:

Preheat oven to 400 degrees F.

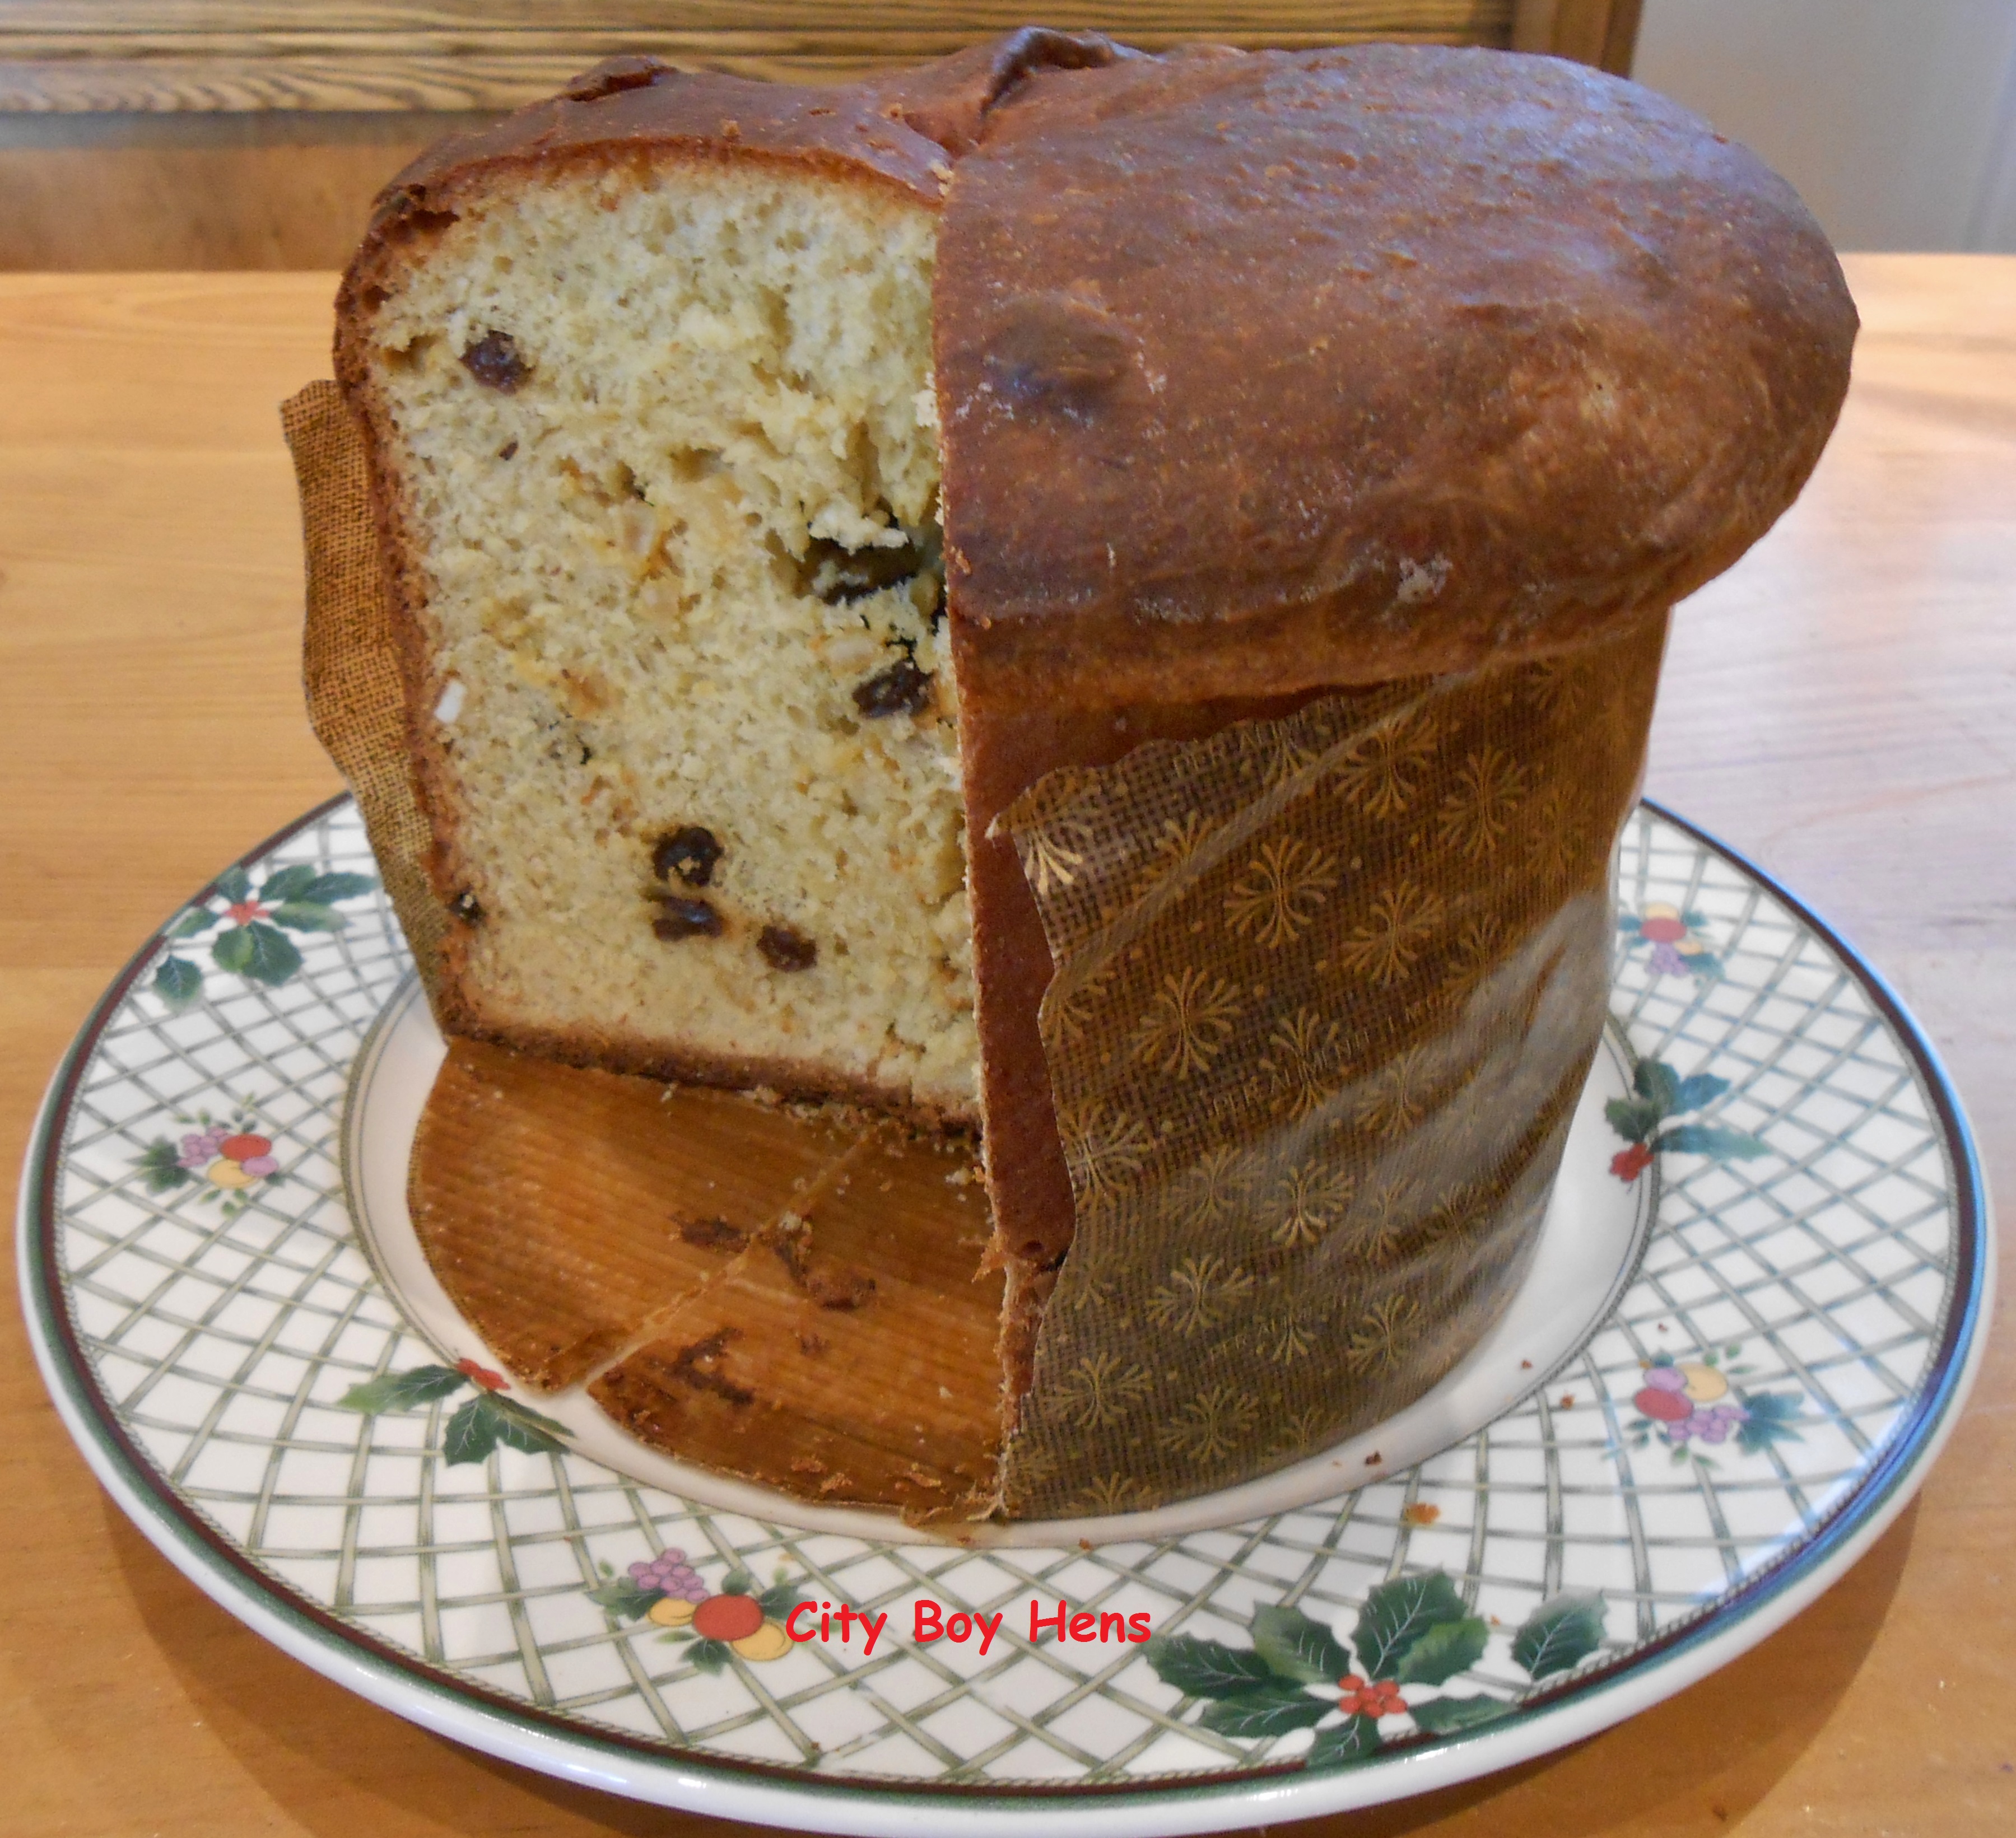
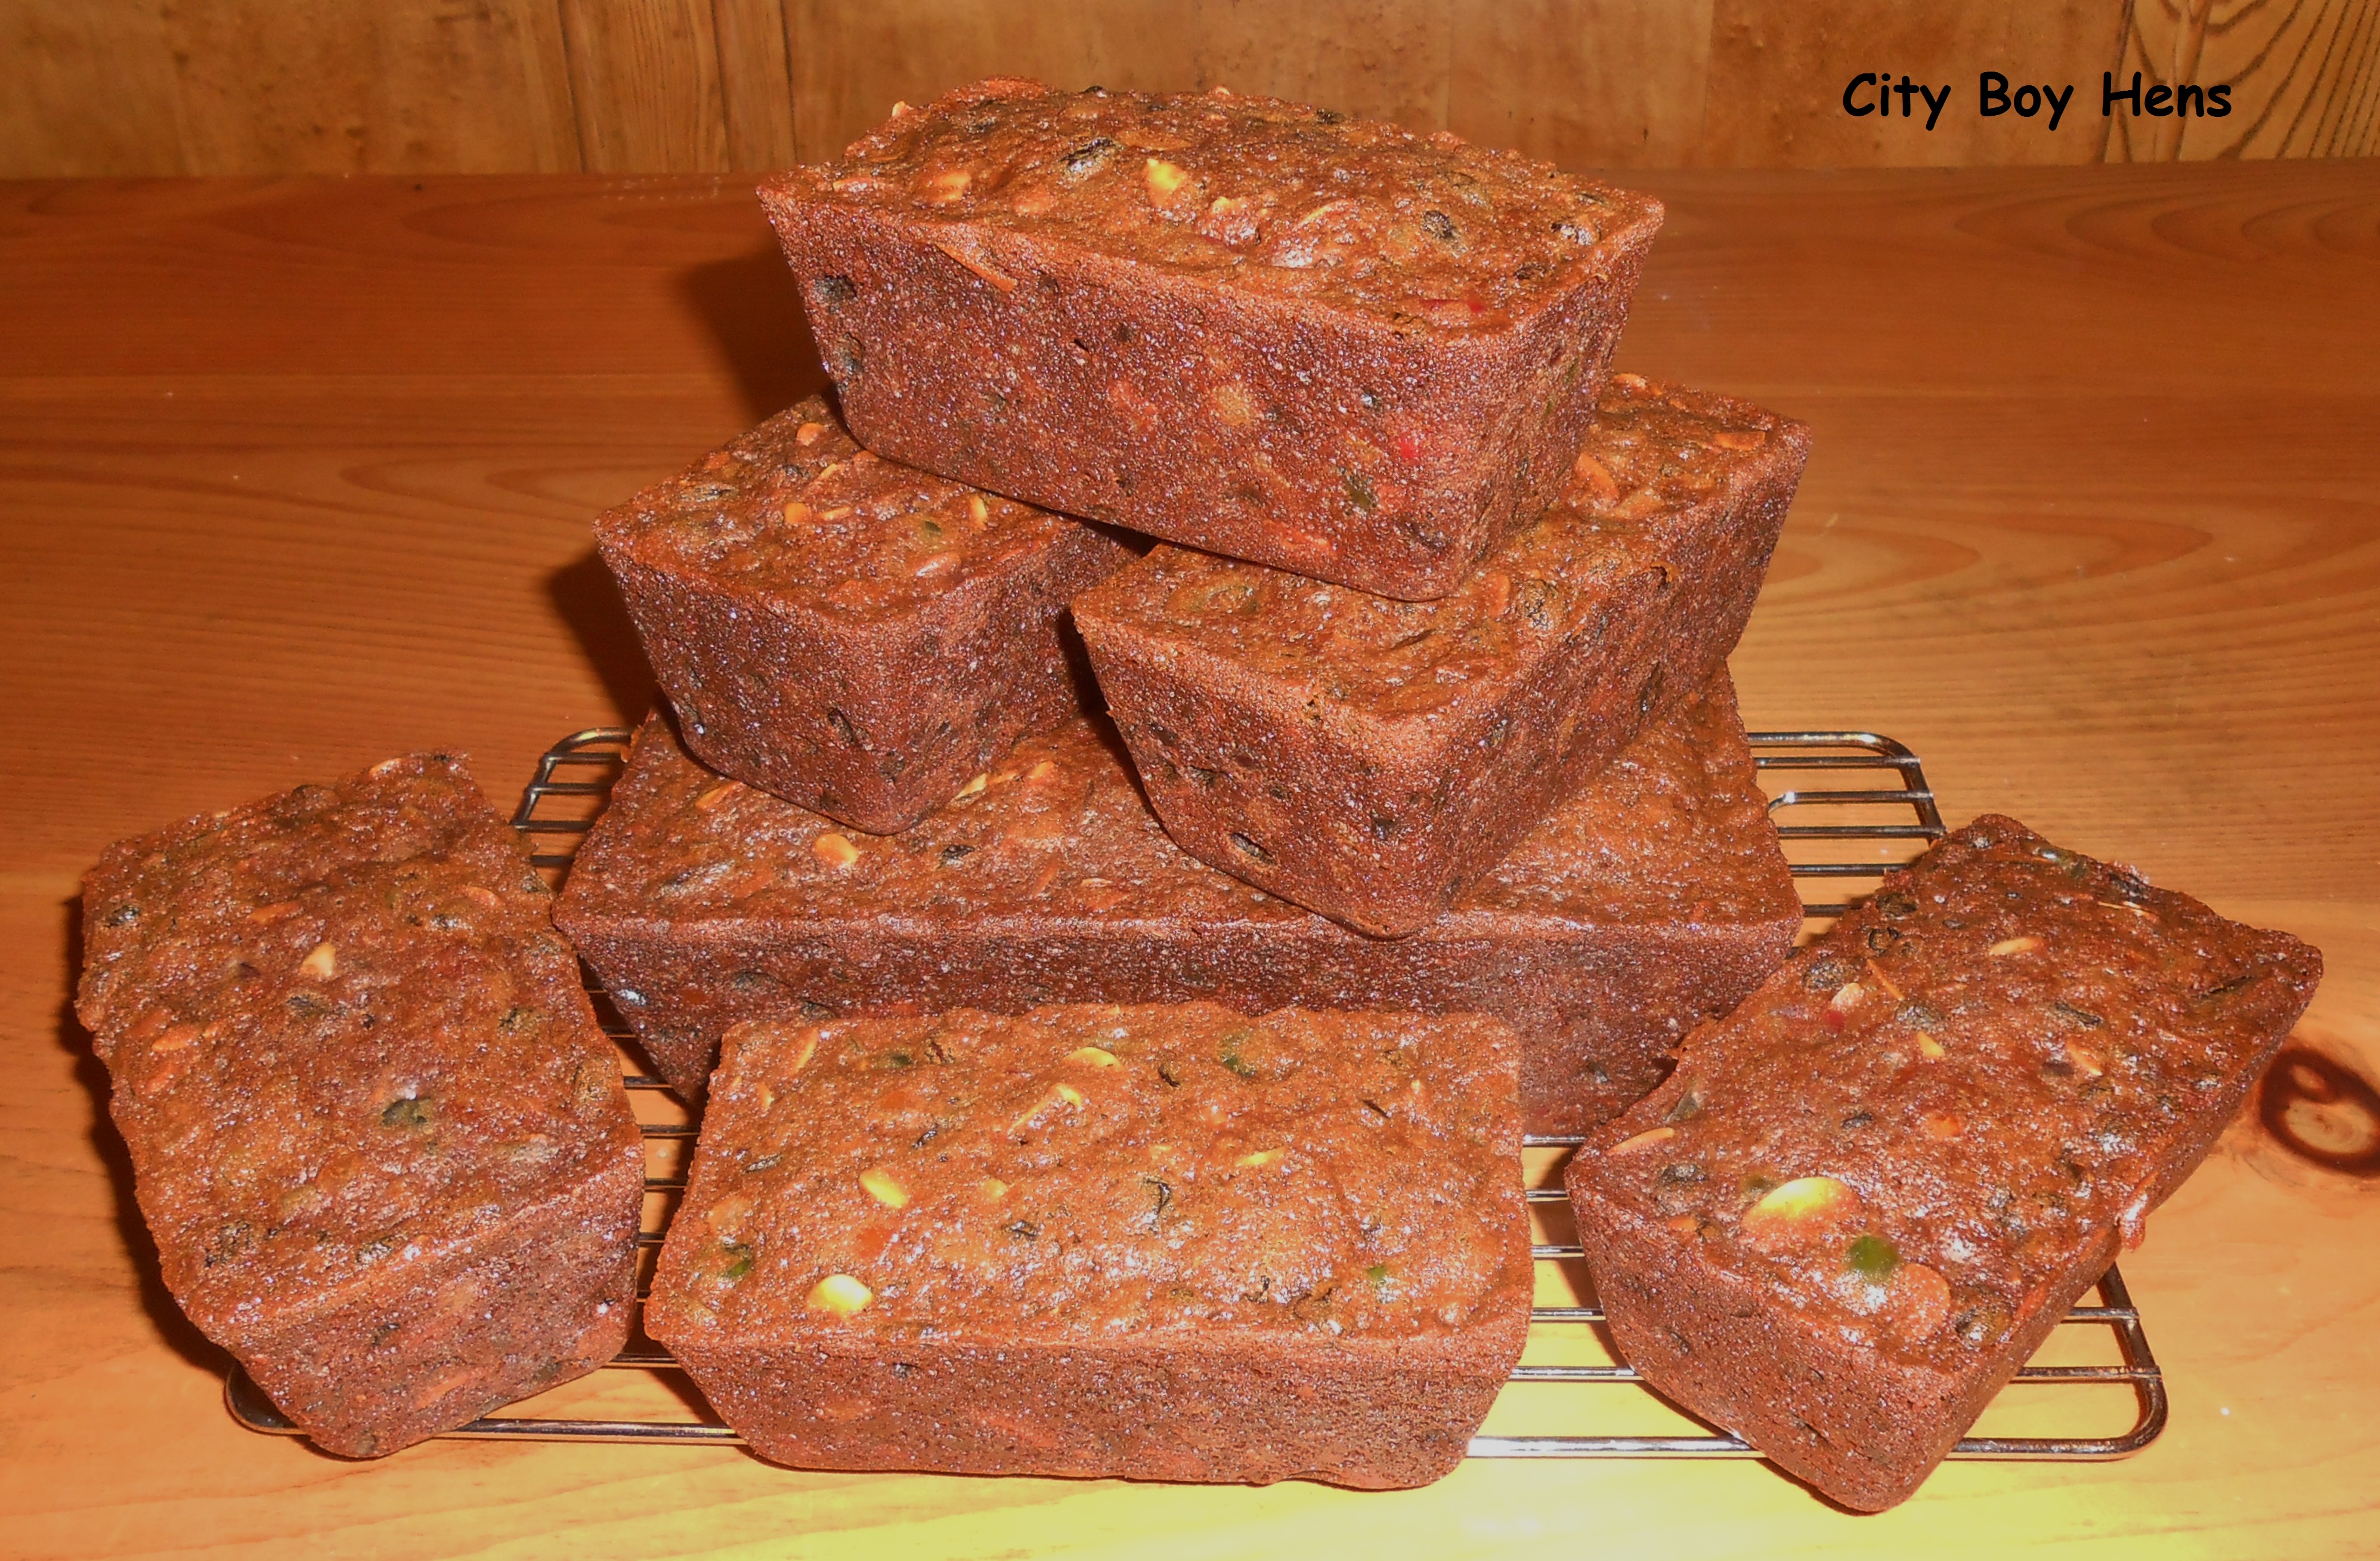
Brush the top of the Panettone with melted butter.  If you are using a Panettone mold, make sure to place it on a cookie sheet that is lined with parchment paper.  Place the Panettone in the oven and set the timer for 10 minutes.  After 10 minutes, reduce the heat to 350 degrees F. and continue to bake for 40 more minutes.  If the top begins to brown too quickly during the bake,  then place a piece of aluminum foil over the top of the bread for the duration of the bake.  At 50 minutes, remove the Panettone from the oven and “test” that it is done by inserting a long wooden skewer (the kind you’ll use for shish kabobs) into the center of the cake.  If it comes out clean, you are done.  If not, put it back in the oven for another few more minutes and “test” again.

Place Panettone on a wire cooling rack. If you are using a pan, let it rest on the rack for 10 minutes before removing the Panettone.033

I really hope you give this bread a try.  Don’t be intimidated by the time that it takes.  Remember, most of that time, the bread will be rising and you could be reading, resting, enjoying a warm beverage, taking a walk or……..  “What’s that Beloved Wife……..No I’m not puttin’ on the Bad Santa costume AGAIN!”
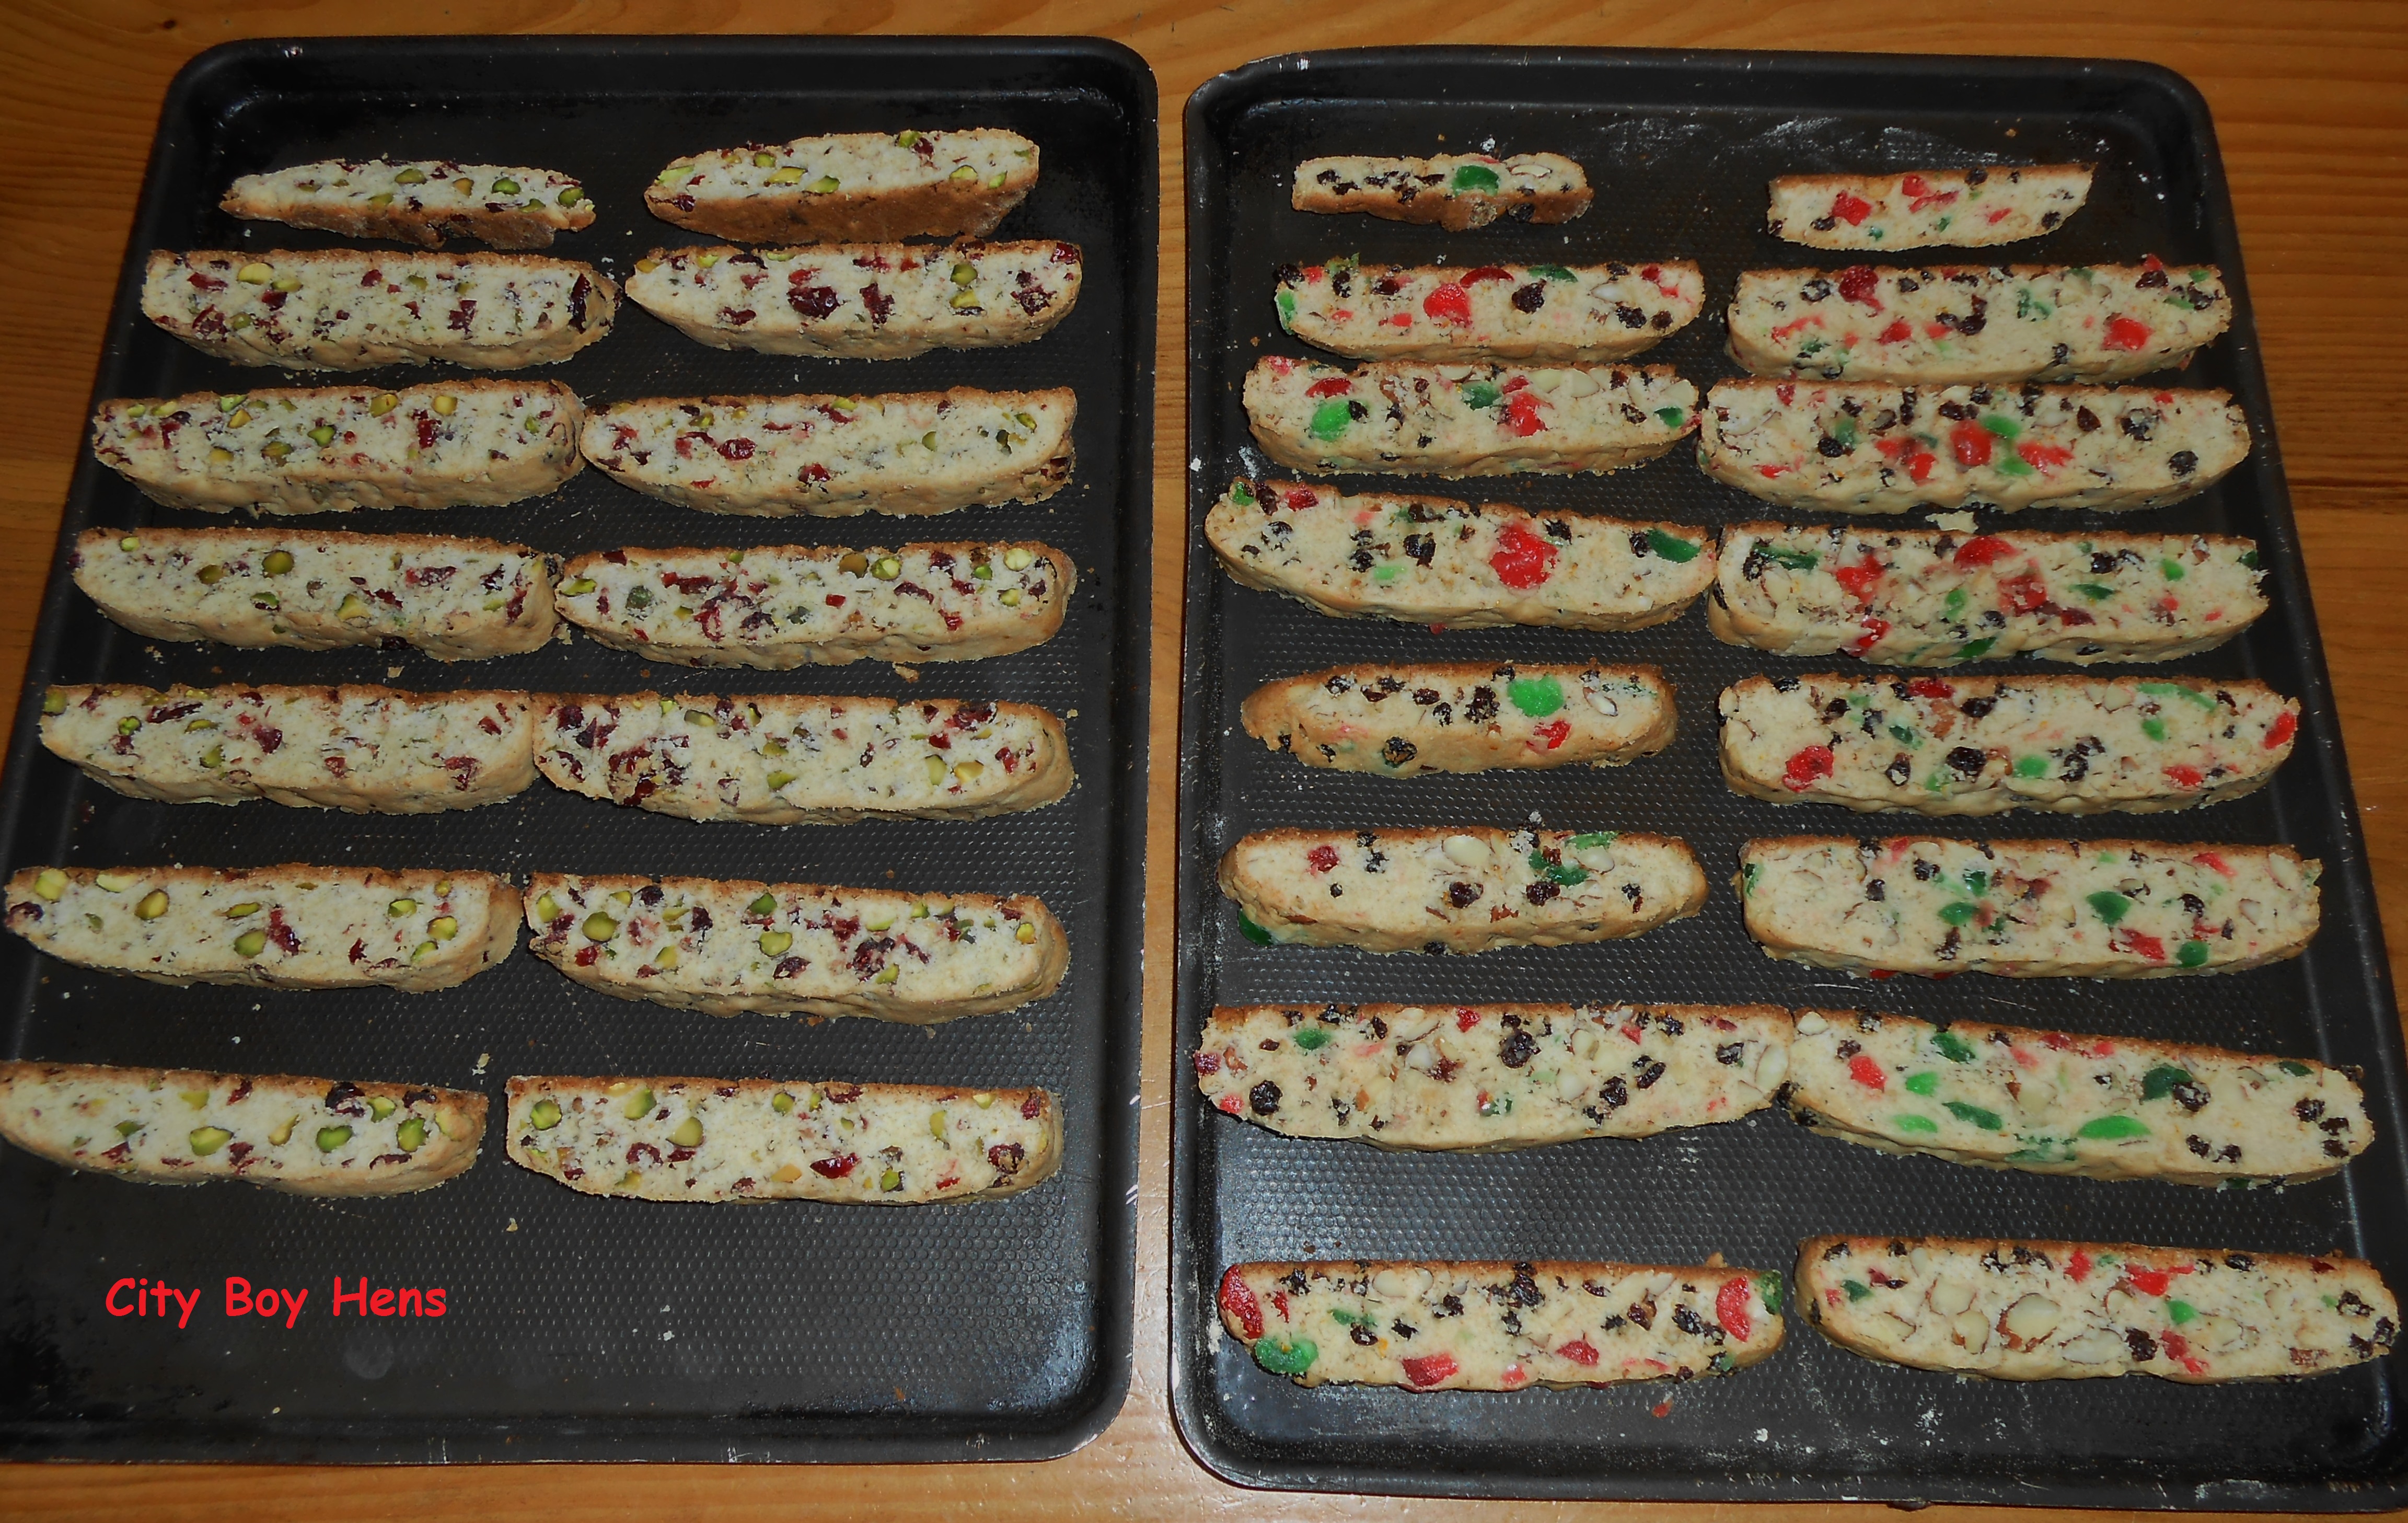
Gingerbread Chickens

013                        “Run, run as fast as you can. You can’t catch me…… I’m the Gingerbread Man!”……………  “Wanna’ bet” said the Gingerbread CHICKENS.010
Ok….it might be a bit of a stretch, but maybe it’s time to change things up a bit and Mr. Gingerbread Man could show some good cheer and share some of the festive spotlight with…..the CHICKEN. After all, what contributions has the Gingerbread Man made to our palates besides…a cookie and the odd cake or loaf? Last time I checked, it wasn’t bacon & gingerbread or gingerbread Benedict or…..well…you get the picture.

So last weekend, Non-Egg Eating Daughter and myself decided to make some Christmas gingerbread cookies. I’m quite aware that the “cookie making window” may be closing for us as I try to compete with One Direction, trips to the mall,  iPads and Tumblr. Maybe she’s just humoring her Old Man, but I’ll take what I can get. We’ve been Christmas baking together for a number of years and I’m glad that she’s doing it once again.

This is an easy cookie recipe and fun to make with kids. Non-Egg Eating Daughter helps with making the dough and then she takes complete control of the “cookie cutting” and decorating roles. I hope you give it a try and maybe make some less traditional gingerbread cookies besides the gingerbread man.

Makes approximately 30 cookies.

Ingredients:

3 1/2 cups all-purpose flour

1/2 tablespoon baking powder

1/2 tablespoon ground ginger

1/2 teaspoon ground nutmeg

1/2 teaspoon ground cloves

1/2 teaspoon ground cinnamon

1/2 teaspoon salt

1/2 cup butter melted & cooled

1/2 cup molasses

1/2 cup brown sugar packed

1/4 cup water

1 egg

1/2 teaspoon vanilla extract

Directions:

Sift together flour, baking powder, ginger, nutmeg, cloves, cinnamon and salt.  Set aside.027

In another bowl, mix together butter, molasses, brown sugar, water, egg and vanilla until smooth. 028             Stir in dry ingredients – one-third at a time until completely combined.  Roll dough into a tight ball, wrap in plastic wrap and refrigerate for 3 hours.  *If time is tight and outside temperature is conducive, divide your dough into thirds and place your bowl of dough outside for a faster chill.002

Preheat oven to 350 degrees Ferinheight.  On a lightly floured  surface, roll a portion of the dough out to 1/4 inch thickness.  Leave the rest in the fridge or outside.  Cut into desired shapes and space cookies 1 inch apart on an ungreased cookie sheet.005

Bake for 10-12 minutes and remove from baking sheet to cool on racks.

Decorate with icing  (1/4 cup confectioners’ sugar with a few drops of water).

“Well…..thanks again Non-Egg Eating Daughter.  It wouldn’t be Christmas for me if we didn’t get the chance to bake together!  Now…go clean up your room  before your Mom freaks out again!”

012

Christmas Biscotti

016 - Copy“OK……….there’s gingerbread men, sugar cookies, snickerdoodles and a host of other Christmas cookies, but where the heck are the biscotti??????????????????????  Well……I’m glad to report that Christmas Biscotti has made its introduction at City Boy Hens.  I came up with the recipe by adapting my original biscotti recipe Click Here and some inspiration from my Christmas Fruit Cake recipe Click Here.  These cookies are easy to make and look very festive.  But, best of all, they are not loaded with sugar and butter which seem to be a common thread in a lot of other Christmas cookies.

*For the purpose of this post, I have made two separate biscotti recipes.  This will allow you to sample 2 different loaves in one try.  If you are partial to one recipe, than double the ingredients in bowl #1 or #2 (see below).

Directions:

Beat 1/3 cup of room temperature butter for 30 seconds.

Combine 2/3 of a cup of sugar, 2 teaspoons of baking powder & 1/2 a teaspoon of salt with the butter.

Beat in 2 farm fresh eggs.007

Stir in 2 cups of all-purpose flour, 1/3 at a time until completely mixed.  Form into a ball and divide in half.009

In two separate bowls combine the “Christmas” ingredients:

Bowl #1

1/2 cup chopped candied cherries   001 - Copy

3/4 cup dried currants

1/2 cup chopped almonds

zest of 1 navel orange

1/2 teaspoon of almond extract

Bowl #2

1/2 cup of chopped dried cranberries003 - Copy

1/2 cup of chopped pistachios

zest of 1 lemon

1/2 teaspoon of lemon extract

Remove one half of the dough from your mixing bowl and set aside.  Add the “Christmas” ingredients from bowl #1 to your dough.  Need until all ingredients are completely combined and evenly distributed in the dough.  Remove the dough from the bowl and place on a lightly floured surface.  Using the palms of your hands, press and shape the dough until it is around 10 ” long and 5″ wide.  Gently lift  up the dough and place it on one side of a cookie sheet.

Repeat this process for bowl #2.011 - CopyBake at 375 Ferinheight for 20-25 minutes or until loaves are golden brown.  Remove from oven and cool on rack.012 Using a serrated knife, cut the biscotti into 3/4″ strips and transfer back on to a cookie sheet and bake at 325 F for another 8 minutes/ side.015 - CopySo….there you have it……..Christmas Biscotti.  Move over gingerbread men and sugar cookies.  There’s a new cookie moving into the festive spotlight.  I hope you give it a try! Buon Natale!016 - Copy

Making Christmas Fruit Cake With A Traditional Twist

004Christmas cake, fruit cake, holiday cake…..whatever you want to call it…….this cake has had a love/hate relationship with a lot of folks.  Quite simply, you are either a huge fan of this Christmas tradition or you look upon it with the same revulsion as The Plague! If you fall in to the second category than I’ll bid you a good day and hope you’ll drop by again.  But, if you enjoy the combined taste of almonds, currants, dates, raisins, candied cherries and citrus all baked up into a flavorful greatness, than I’ll bet that you love fruit cake and look forward to buying this cake at Christmas.  But this year, instead of buying Fruit Cake, why not try your hand at making this Holiday favorite?  I promise……it really isn’t hard!

My initial desire to make this cake came from two separate areas.  First, my Dad LOVES fruit cake.  I can still remember his “company gift” fruit cake coming into our house on Christmas Eve and being strategically placed on top of our fridge.  Every January evening after dinner, that fruit cake was taken down from its sacred spots and a small piece was sliced off and washed down with a cup of coffee. So for you Dad, I’m really making this cake, though I too am a fan of the fruit cake as well.  Secondly, my blog is focused on “stepping back to a simpler time” and I received a great opportunity this month to make a fruit cake in a wood fired brick oven just the way folks would have done so more than 150 years ago!  So…. without further adieu, here is a classic fruit cake recipe that I hope you will enjoy.  Oh….by the way, ……you don’t need the wood fired brick oven.  Your conventional oven will work just fine.

Makes 1 large cake or 3 small cakes

Ingredients:

1/2 cup slivered blanched almonds

1 cup candied cherries cut in half

1/2 cup chopped mixed peel

1 cup raisins

1/2 cup dried currants

1/2 cup chopped dates

1/4 cup brandy

* combine and allow to stand overnight014

Grease a loaf pan which will hold 5 1/2 cups of ingredients or 3 small pans which will each hold just under 2 cups of ingredients. 

Blend together:

1 1/2 cups all-purpose flour

1/4 teaspoon baking soda

1/2 teaspoon cloves

1/2 teaspoon allspice

1/2 teaspoon cinnamon

1/4 teaspoon salt042

Cream

1/2 cup butter

Gradually blend in

1 cup lightly packed brown sugar

3 eggs044

Mix together

3/8 cup molasses (1/4 cup + 2 tablespoons)

3/8 cup apple juice/ cider (1/4 cup + 2 tablespoons)

Add sifted dry ingredients alternately with liquid.  Make 4 dry and 3 liquid additions.  Fold in flavored fruit.  Turn into a prepared pan.046049

051

054 - Copy

Bake in 275 degree oven for 3 to 3 1/2 hours for a full size cake and 2 hours & 40 minutes for a mini cake.  Because every oven is different, make sure to test your cake by inserting a toothpick into the cake,  If the toothpick comes out “clean” you will be good.  Remove from pan and lift off parchment paper.  Drizzle generously with brandy (around 2 tablespoons).065 - Copy


021

Cool cake completely and then wrap loosely in wax paper and store in an air-tight container.060

Thanksgiving Harvest Apple Cake

024We like to eat a lot of apples at City Boy Hens.  So much so, that I buy them by the bushel.  On their own, apples make a great snack, but combined in a cake….they are excellent.  This cake is very easy to make and is a family favorite.  It originates from memories of my childhood when it was baked by my Mom on Sunday afternoons in Winter. I guess I’ve managed to “pass the torch” because my kids love this cake as well and it always makes its first appearance of the year on Thanksgiving weekend.  Up here in Canada, we already celebrated Thanksgiving back in early October and now I have the opportunity to share this recipe with my neighbors who are “south of the border”.  I hope you give it a try.

Ingredients

Filling

1/4 cup melted butter

3/4 cup brown sugar

2 apples – peeled and thinly sliced

Batter

1 3/4 cups all-purpose flour

3  tsp. baking powder

3/4 tsp. salt

1/2 tsp. cinnamon

1/3 cup butter at room temperature

1 cup sugar

2 eggs

1 cup milk

1 tsp. vanilla extract

Directions

Filling

Preheat oven to 350 F.

Pour melted butter into a 10-inch cake pan.  Make sure to cover the edges of the pan.

Sprinkle sugar on top.

Add sliced apples and set aside.011 - Copy

Batter

Sift together flour, baking powder, salt and cinnamon.016

Cream together butter and sugar in a separate bowl.  Beat in both eggs.012

Combine milk and vanilla extract in a measuring cup.

Alternate adding 1/3 of the dry ingredients and 1/3 of the milk to the creamed butter.  Beat in between additions.

Once the final “thirds” have been added, beat the batter for 1 more minute.

013Spread batter over apples in cake pan.017

Bake for 45-50 minutes until golden brown.

Cake is done when a toothpick is inserted into the center of the cake and comes out clean.

Leave cake in pan and cool on rack for 30 minutes. 019

Now, decorate your cake with some leaves from your favorite tree.  I used 4 Japanese Maple leaves that I managed to keep before they all blew off the tree.  Contrary to dutiful son’s misunderstanding, they are not marijuana leaves.021Sprinkle generously with icing sugar and remove the leaves.024To all of my American family and friends, I wish you a great Thanksgiving weekend!

Curing Olives May Be EASIER Than You Think!

Oh……the olive. You either love them or  look upon them like the plague.  If you are in the second group, I suspect that I’ve lost you already.  But, if you are a lover of the olive, I’d like to show you had to easily pickle this tasty treat.  It’s going to take around 3 weeks to cure these babies with about 15 minutes worth of work to do every other day.  After that, you’ll be enjoying some great tasting olives for the next 12 months.

First, go out and purchase a case of green olives.  These olives generally come from California and are available from late September until mid November.  The olives are green in color because they are not ripe (a black olive is a ripened olive).  As a result, they are extremely bitter.  Taste one if you do not believe me.  I’ll bet you a dozen City Boy eggs that you won’t eat 2!002

Next, wash the olives in cold water and discard any that are damaged or spoiled012In order to make the olives palatable, the bitter element ( oleuropin), must be removed.  This is done by fermenting the olives in a brine for around 18 days.  This may not seem like a long time, considering that the olive is so bitter, but you are going to speed up this process by piercing the olive several times with a fork.  I do this by holding the olive between my thumb and index finger and piercing it with each turn (3 times will do).  Some folks like to cut slits in the olive with a knife, but I find that this takes too long.  Others like to hit the olive with a hammer, but I do not like the final presentation of smashed olives in a jar.  Either way, it’s entirely up to you.  Just make sure to create “openings” in the olive in order to let the bitterness out. This is the only labor intensive step to making olives and it will take you about 1.5 hours to prick, slit or smash every one.006

007

After pricking each olive, make sure to immediately drop them into a 5 gallon “food-grade”pail that has a brine solution of 1 cup pickling salt and 20 cups of water.  Make sure that all of the olives are immersed in the brine solution.  I have found that the best way to keep the olives immersed is to invert a 10″ dinner plate on top of the olives and weigh it down with a 1 quart mason jar that is filled with water.019

010

By day 2, the brine solution will begin to discolor.  Dump out the brine by tipping the bucket while firmly pushing down on the dinner plate.  Remove the plate and rinse the olives in the bucket.  Make up your brine solution and continue to repeat this process.

By around day 5, you will begin to hear large air bubbles occasionally escaping from under the plate.  This is a great sign that the olives are beginning to ferment.

Continue changing the brine ever other day until day 18.  Now taste an olive.  It should be firm and have a subtle salty olive rich taste.  If it still taste a bit bitter, give it another few days.

This is what the color of my brine solution looked like by day 16.  It is light green/yellow in color and had a rich aromatic scent.017

This is what my olives looked like by day 18.  Notice how the color is no longer bright green, but more of a…..well….olive drab color.  This is a good sign that you are almost ready to be preserve them in some mason jars.019

By day 18-21, the olives should be ready to be jarred.  Once again, it is not an exact science so you will have to rely on your taste buds.  If they no longer taste bitter or are only slightly bitter, than it is time to pack them in mason jars.  In order to extend their shelf life and ensure a safe edible product, it is necessary to increase the salt content in the brine to 1 cup of pickling salt for every 10 cups of water. I used 1 1/2 cups of pickling salt and 15 cups of water in order to make my brine.   I remember hearing about a traditional “old school” method that used an egg in order to achieve the proper salinity in a brine.  When the egg floated in the brine, the proper salinity was achieved!

Now sterilize your jars in the oven at 225 degrees Fahrenheit  for 10 minutes. Place the canning rings and seals in a small pot of water and bring this to a simmer for 10 minutes as well.  Once the jars are sterilized, put 1/2 teaspoon of chill peppers and 1-2 cloves of sliced garlic in each quart jar.  Now pack the olives into the jars and pour the brine over the fruit until they are completely submerged.  *Note:  Some folks have recommended that the brine be heated and the sealed jars be boiled in a canner for 15 minutes.  I recommend that you follow the canning practices that make you feel secure.

012  Top up the jars with 1/4″ of olive oil.  This will create a barrier which will prevent the air at the top of the jar from possibly contaminating the olives.017  Now seal up the jars and store them in your cantina or cupboard for the next 12 months.019

Oh……..I almost forgot…..Keep your opened jar stored in the fridge and continue to top up with olive oil.  A spoonful of this flavored oil tastes amazing on your pasta dishes!  I hope you’ll give it a try.

My Cottage Garden BELLY FLOP!

As the Canadian Thanksgiving ends and the American Thanksgiving approaches, I thought it would be a “humbling” experience to chronicle the “results” of my cottage garden.  It all started back in the winter when I had the hair-brained idea to make a vegetable garden at the cottage.  The rational for making the cottage garden was two-fold.  First, we spend a lot of time at the cottage in the warmer months.  Secondly, I have nowhere at home to build a suitably sized garden.

So back in early May, a few of my high school buddies helped me build a raised bed garden at the cottage during one of our bi-annual weekends together. I went to great lengths & cost in order to make my garden predator proof and  I had a local guy deliver 4 yards of triple-mix.  Everything was going along well, even though Mr. Local Guy was quite concerned that I would be growing my pot too close to the road.  I assured him that it would be vegetables that I would “attempt” to grow.  He gave me the same look that most rural folks give when they hear that I take our chickens to the cottage.032I then proceeded to plant the garden in early June.

Tomatoes, Hot Peppers, Basil, Leeks and Bush Beans

Tomatoes, Hot Peppers, Basil, Leeks and Bush Beans

Throughout July I lovingly tended my gardens.  I watered, weeded and sent silent thoughts of encouragement for a bountiful harvest to begin in August.  Maybe my thoughts weren’t encouraging enough because my garden didn’t respond with a yield that could feed one, let alone a family of 4.  By late August,  I knew we were in trouble with a harvest of only 7 beans, 3 cherry tomatoes and a miniscule feed of Swiss chard that wouldn’t even provide a snack for the chickens, let alone a side dish for this City Boy.  By Labor Day, I knew we were doomed.  It pained me to watch many of you write posts on your successful gardens and all of the produce that you would consume and share.  Don’t get me wrong….I was happy for each of you.  I just wanted a bit of tasty success for my own family.024As it turns out, Jack Frost dealt his deadly blow before the Canadian Thanksgiving.  So much for the dream of plump red Roma tomatoes that were destined to be bruschetta, salad accompaniments, and sandwich fillers.   As for the Leeks…..they were suppose to be the main ingredient in our Leek & Potato soupChili peppers…….they were to be dried, crushed and used in our hot Italian sausage and salami making recipes I could go on and on, but it hurts too damn much!

In hind-sight, I now see that my fatal mistake came way back in May long before I even planted my garden.  I still remember that fateful Saturday when my two buddies and I thoroughly discussed the location of the garden while quenching our thirst on a few beers from a local micro-brewery.  Maybe there was some mind altering ingredient in that micro-brewery beer?   Maybe it was the heat of the sun that beat down on our Vitamin E deprived brows?      But…….maybe………….. it was the fact that the  FREAKIN’ LEAVES ON THE ENORMOUSLY LARGE FREAKIN’ TREES THAT GREW FAR ENOUGH AWAY FROM THE GARDEN WERE STILL IN THEIR TINY  FREAKIN’ BUDS……..BUDS THAT WERE WAITING TO OPEN AND BLOCK ANY POSSIBILITY OF SUNLIGHT AFTER 3PM!  Damn!  How could I have been so stupid?  Nonno, If you are looking down on me….please stop shaking your head.  I know I came from a family that had its roots in farming, but I’m just a City Boy trying to reconnect with his Family’s past.

Well….I might as well get it over with….swim out to the raft….proceed to jump off and make the biggest belly flop that I am capable of making……………….019But wait………..Why should I be the only one punished for this oversight???????   Ah Hello??????  Mr. 5 Maples……..don’t you guys hold any responsibility for taking away my mid-afternoon sun which created that 2 inch cucumber, those emaciated leeks and the green tomatoes that refuse to turn red??????   025DAMN STRAIGHT YOU DO!  Well………at least it’s gonna’ be warm in the cottage next WINTER!     “Hey Beloved Wife……did you happen to get any leeks at the grocery store today?  I’m thinking about making some soup for dinner tonight!031